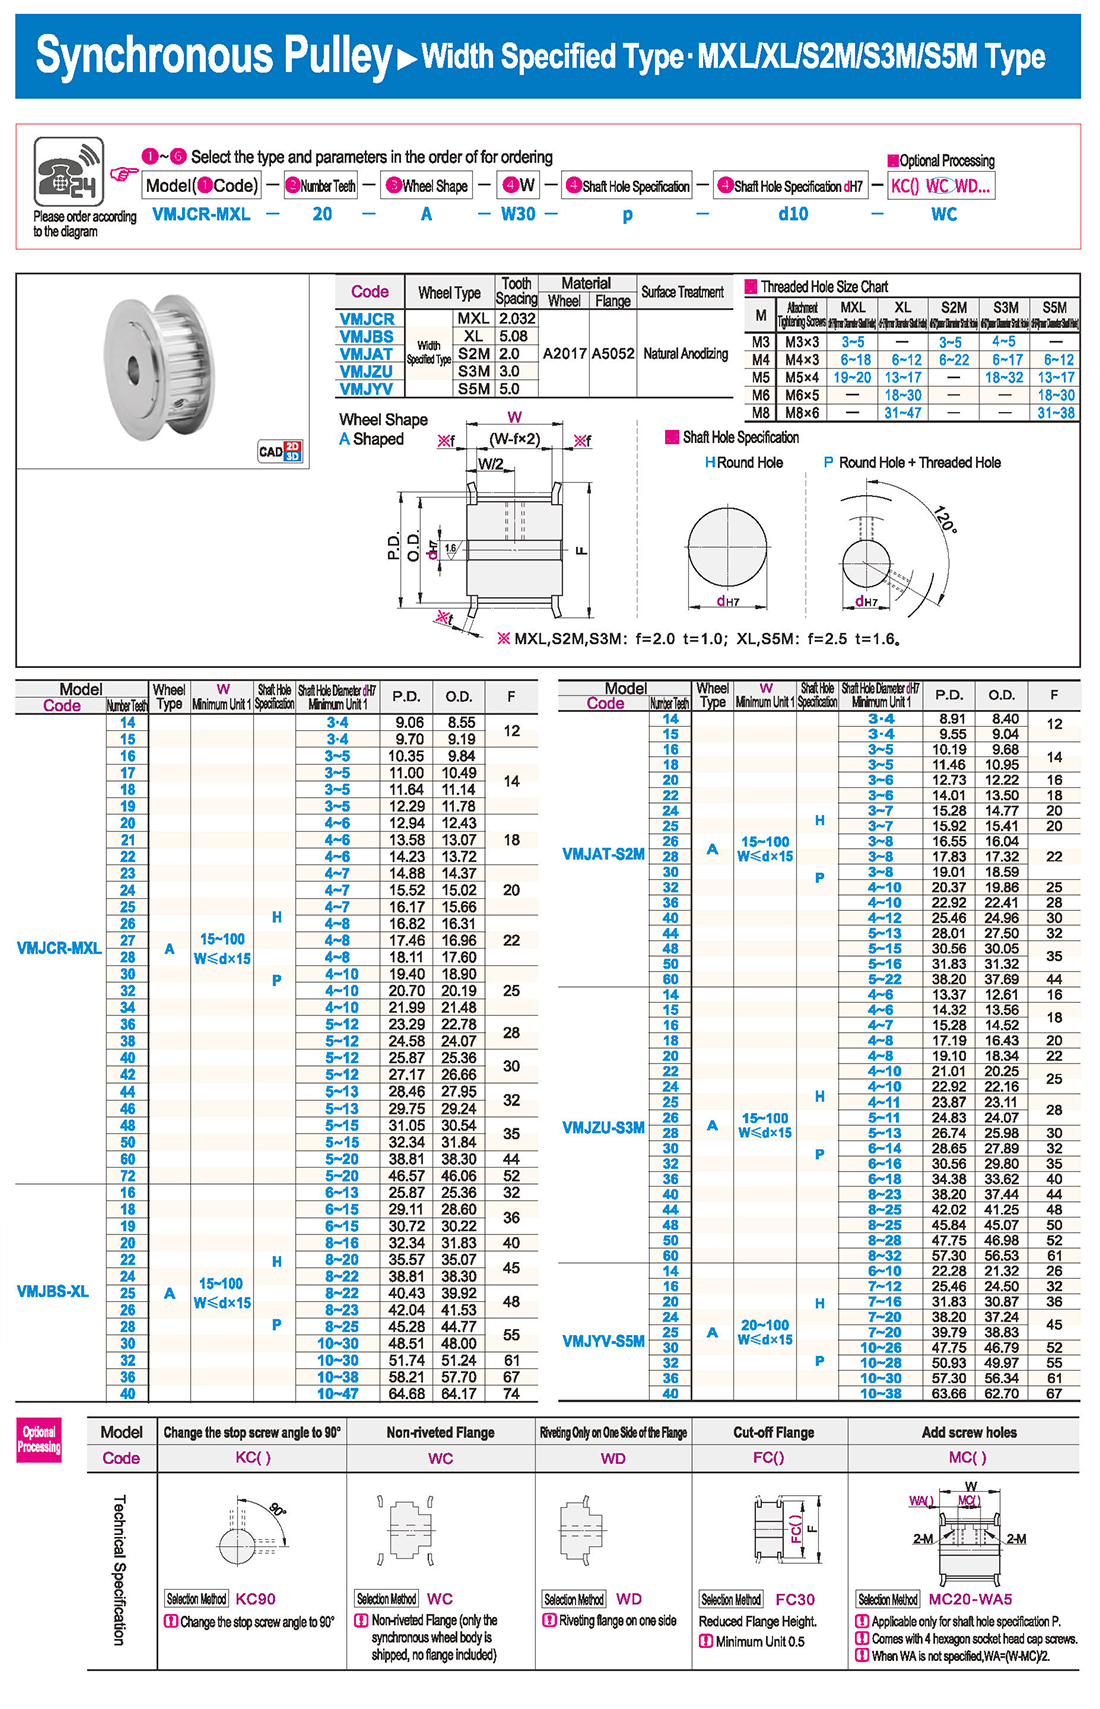
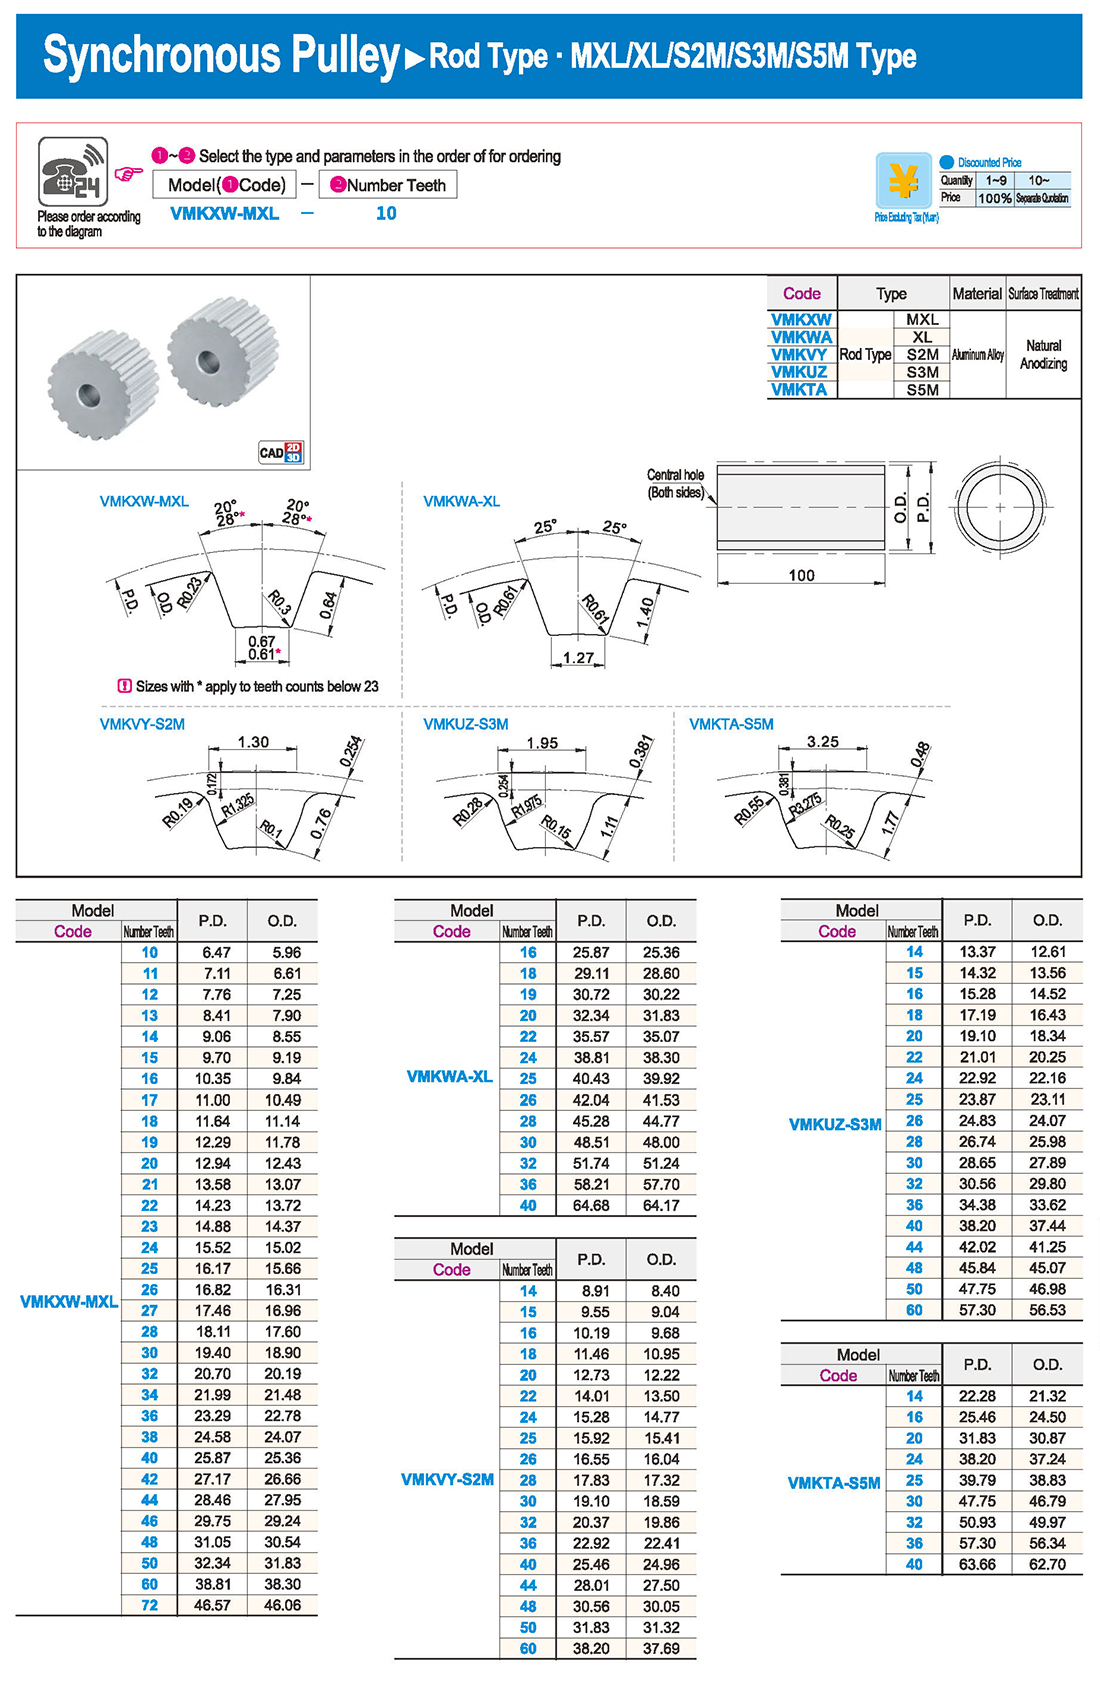
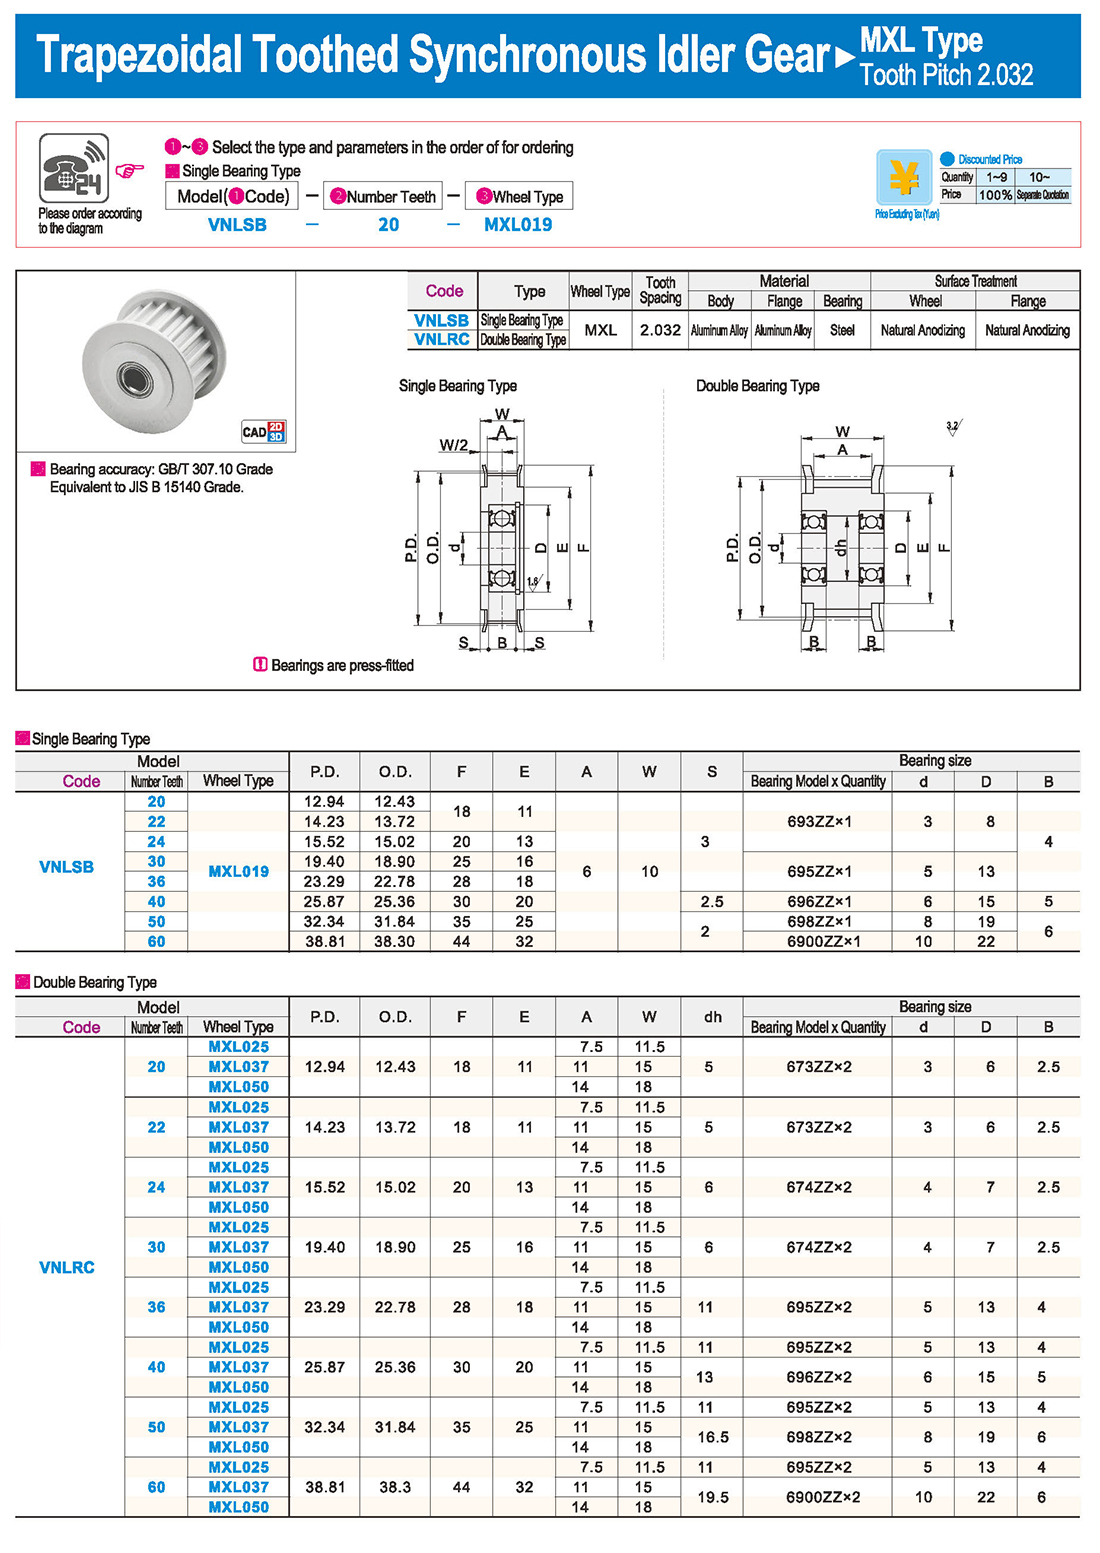
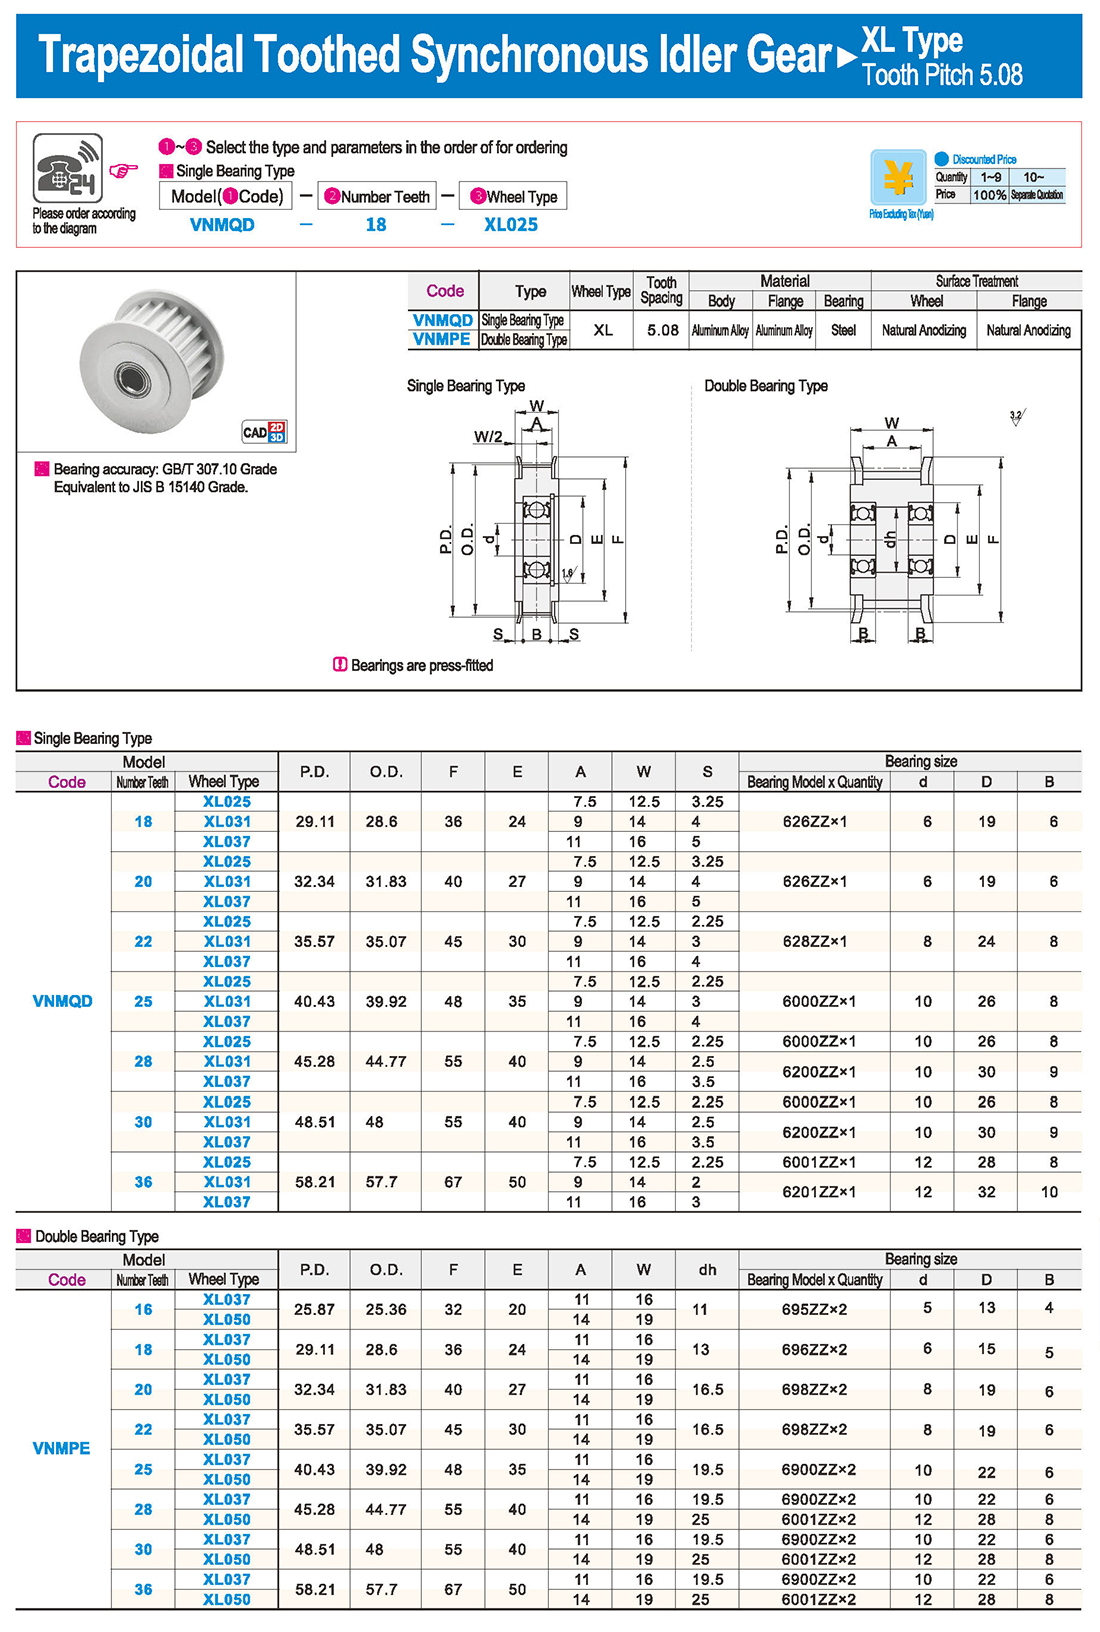
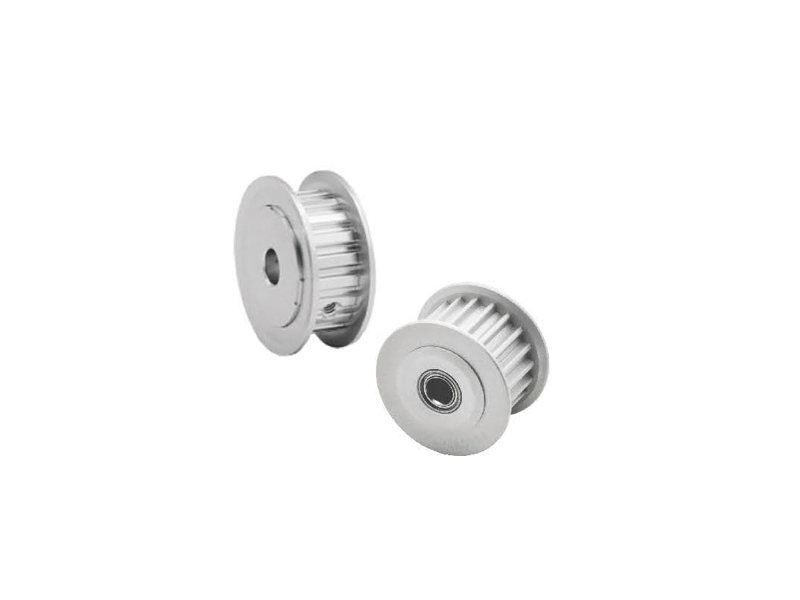
Знакомство с синхронными продуктами Pulley
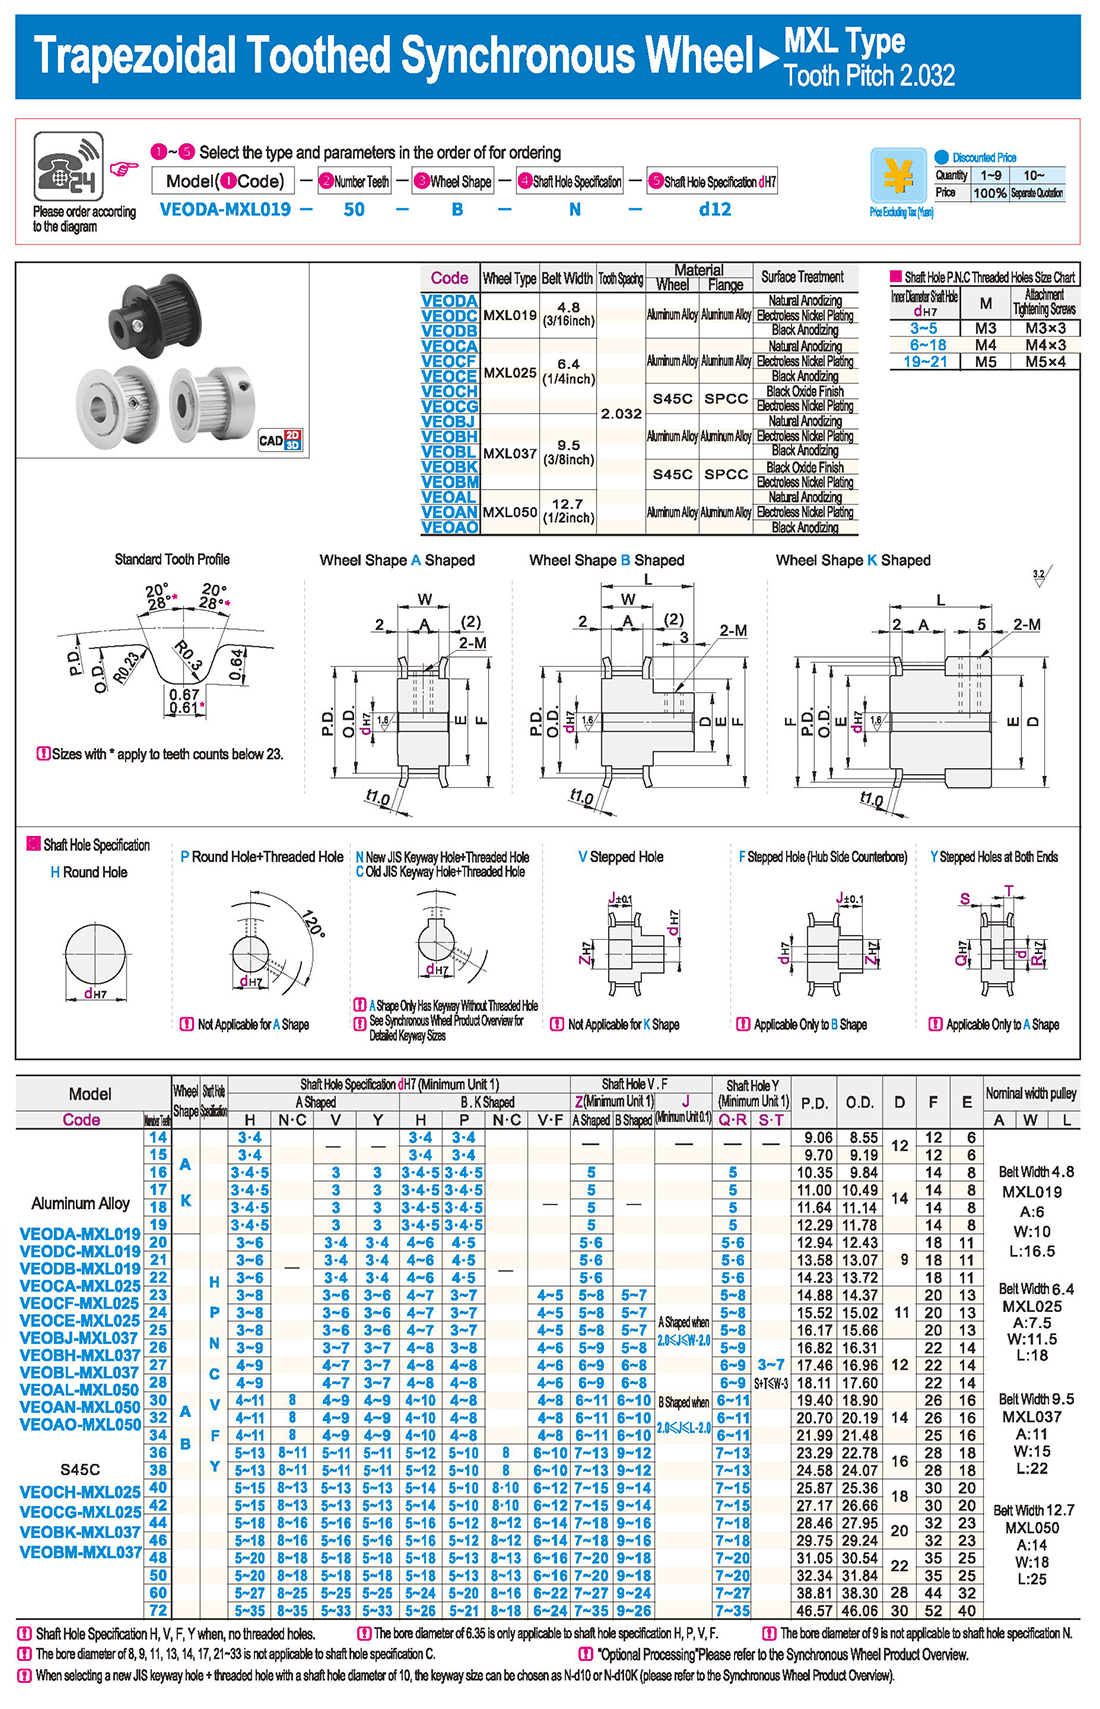
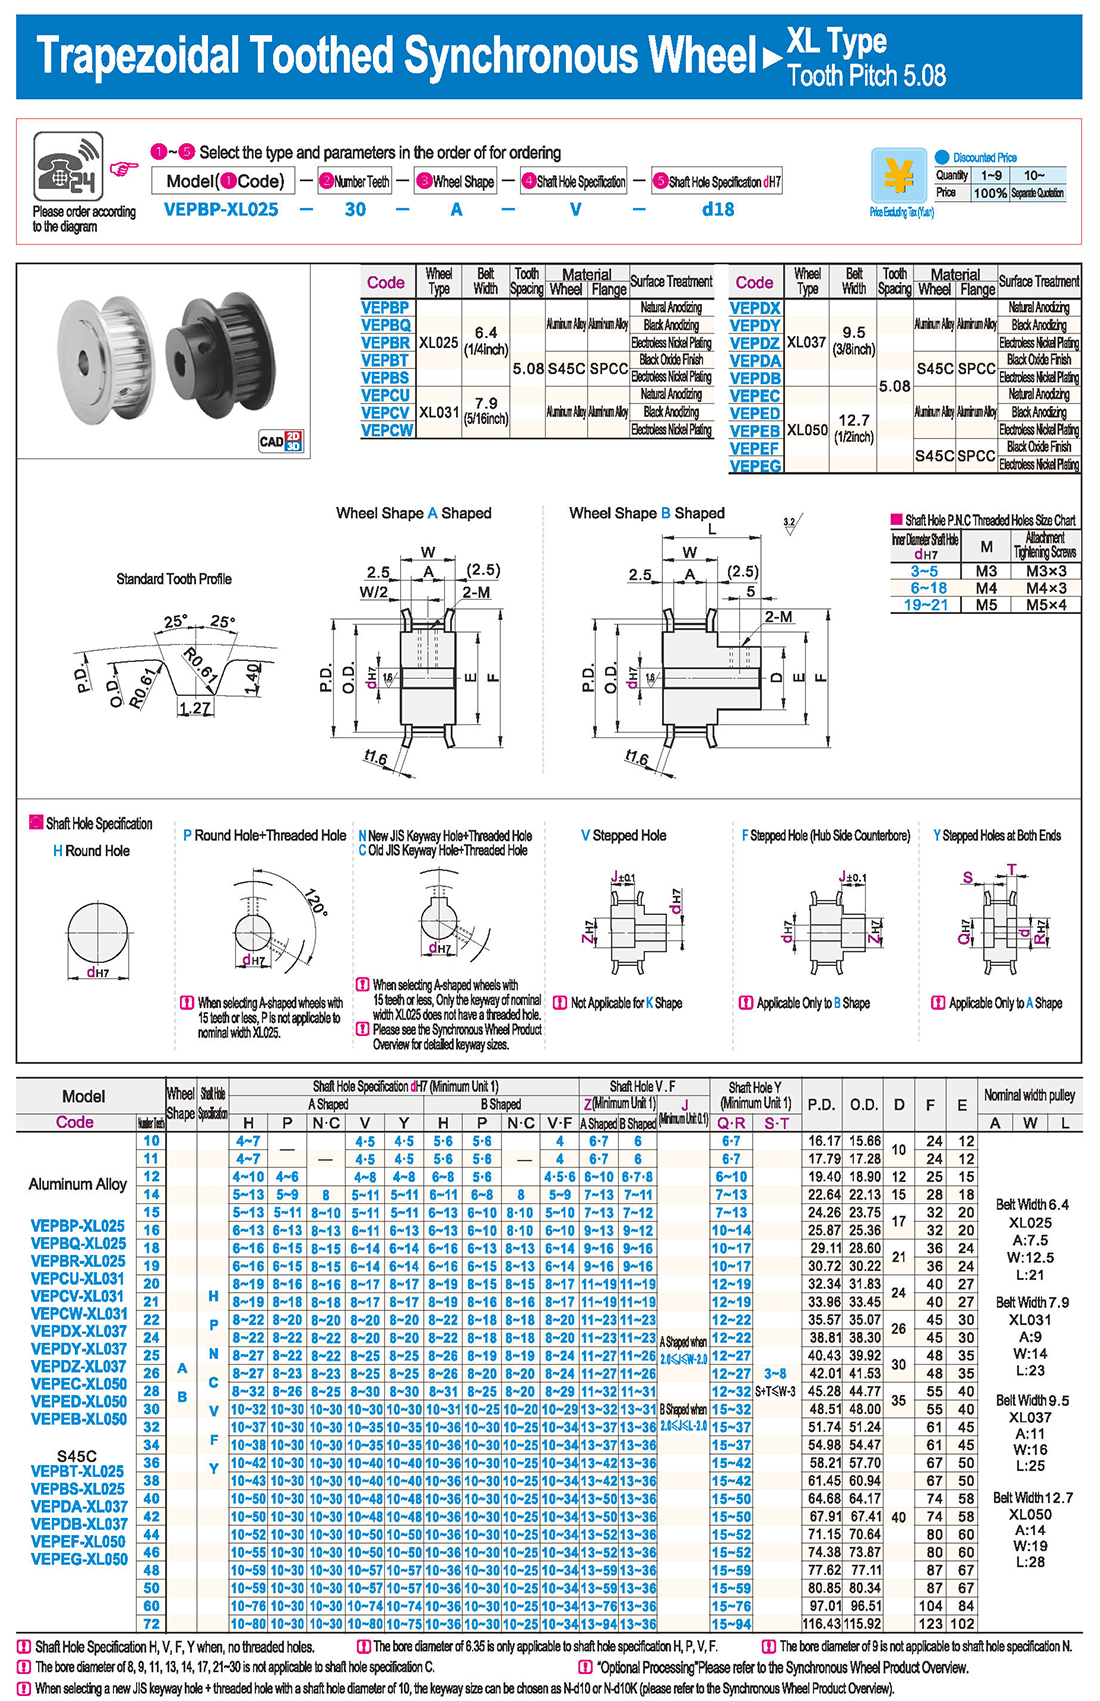
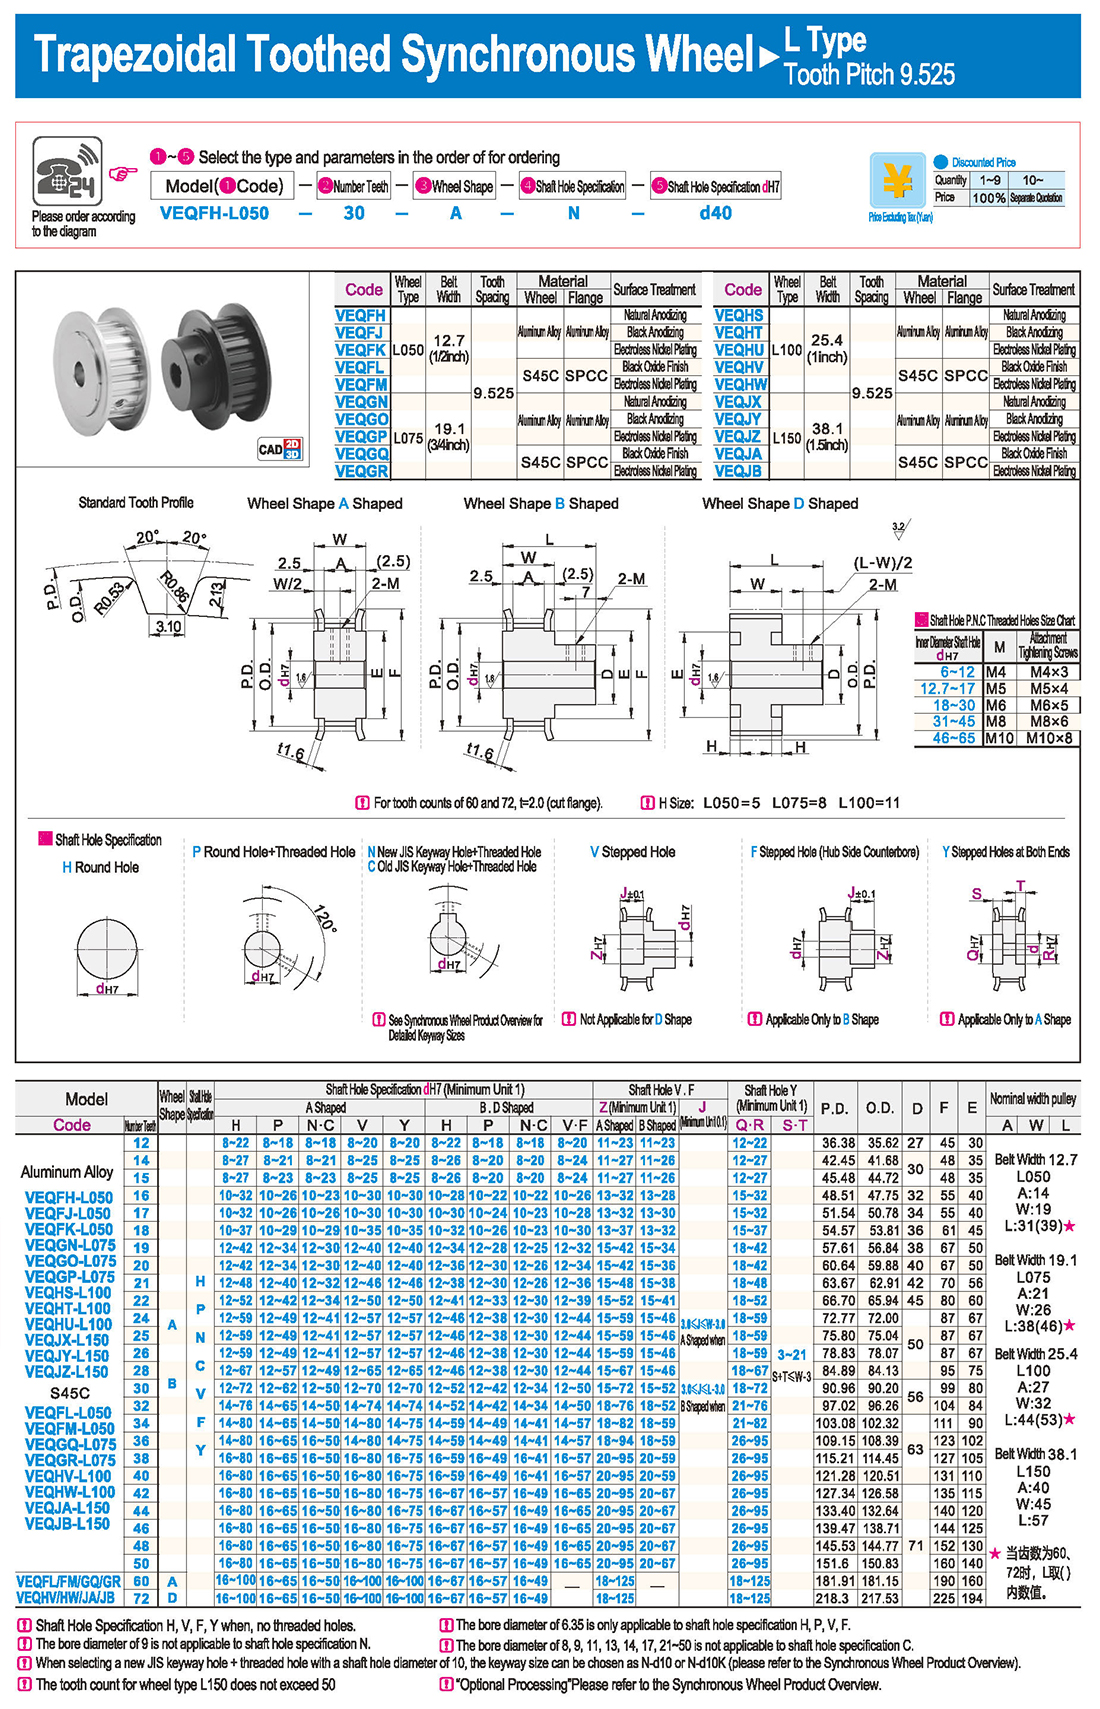
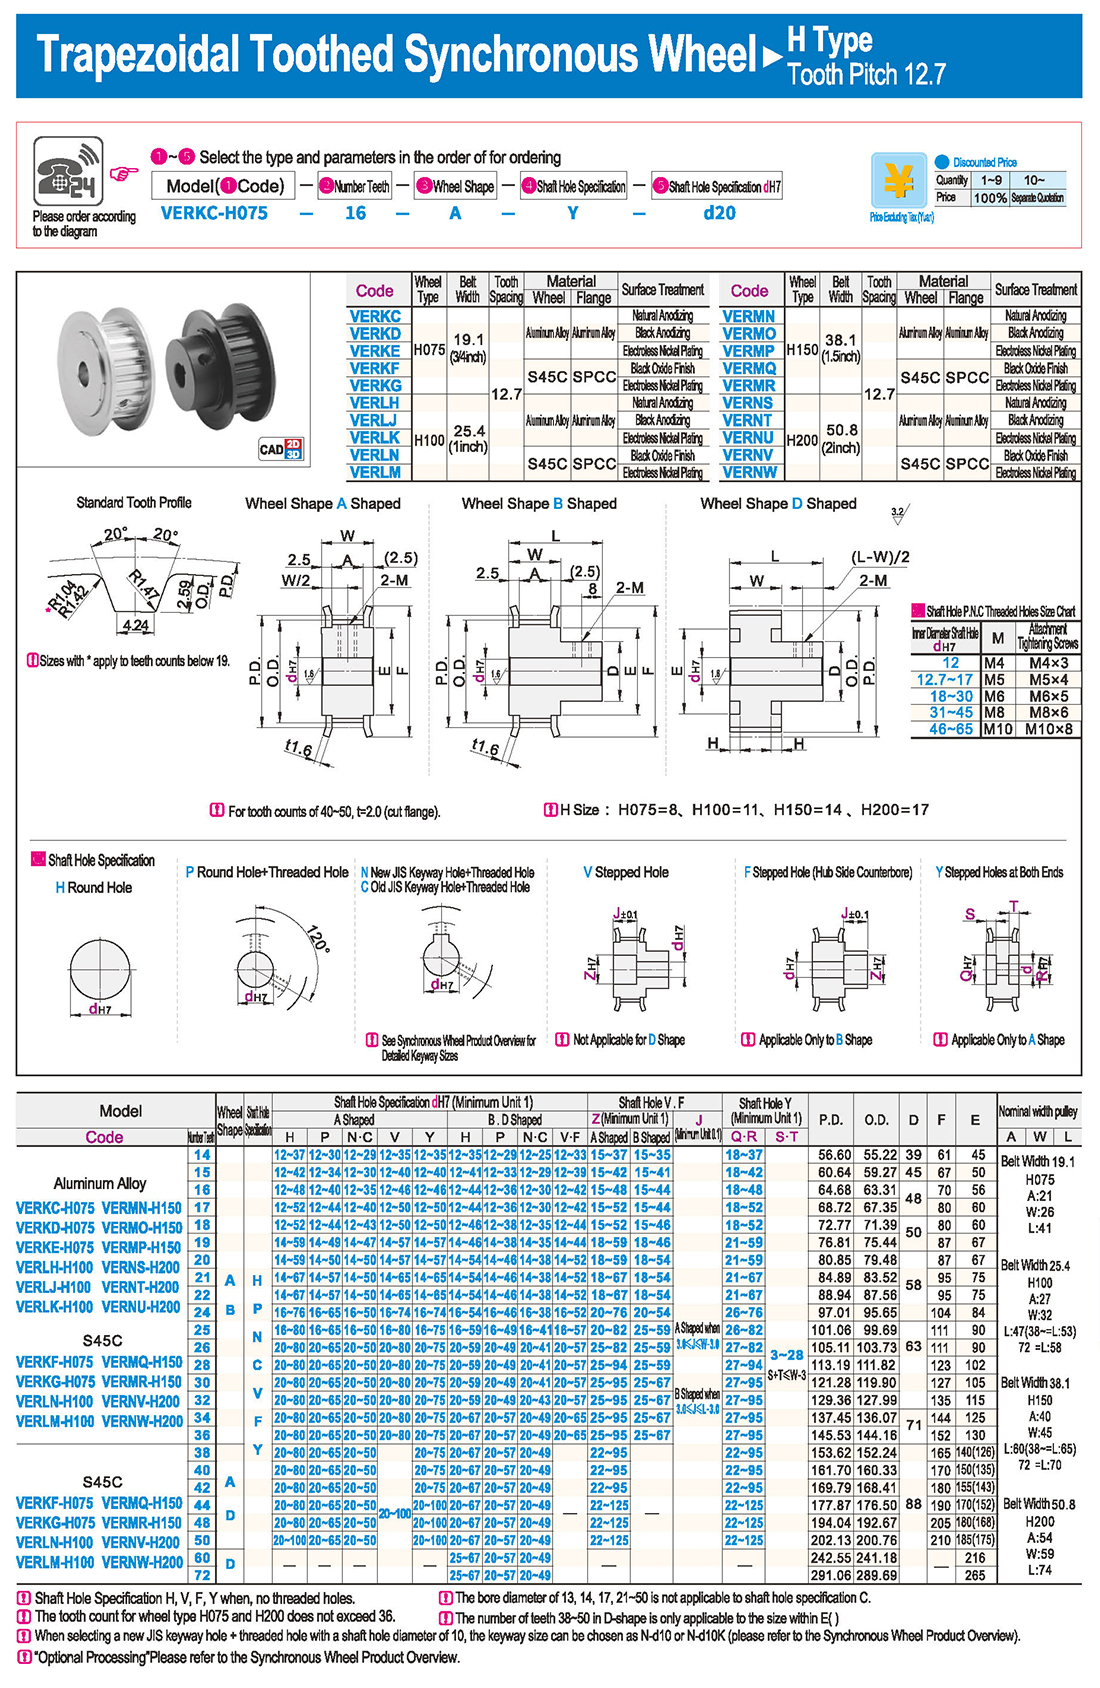
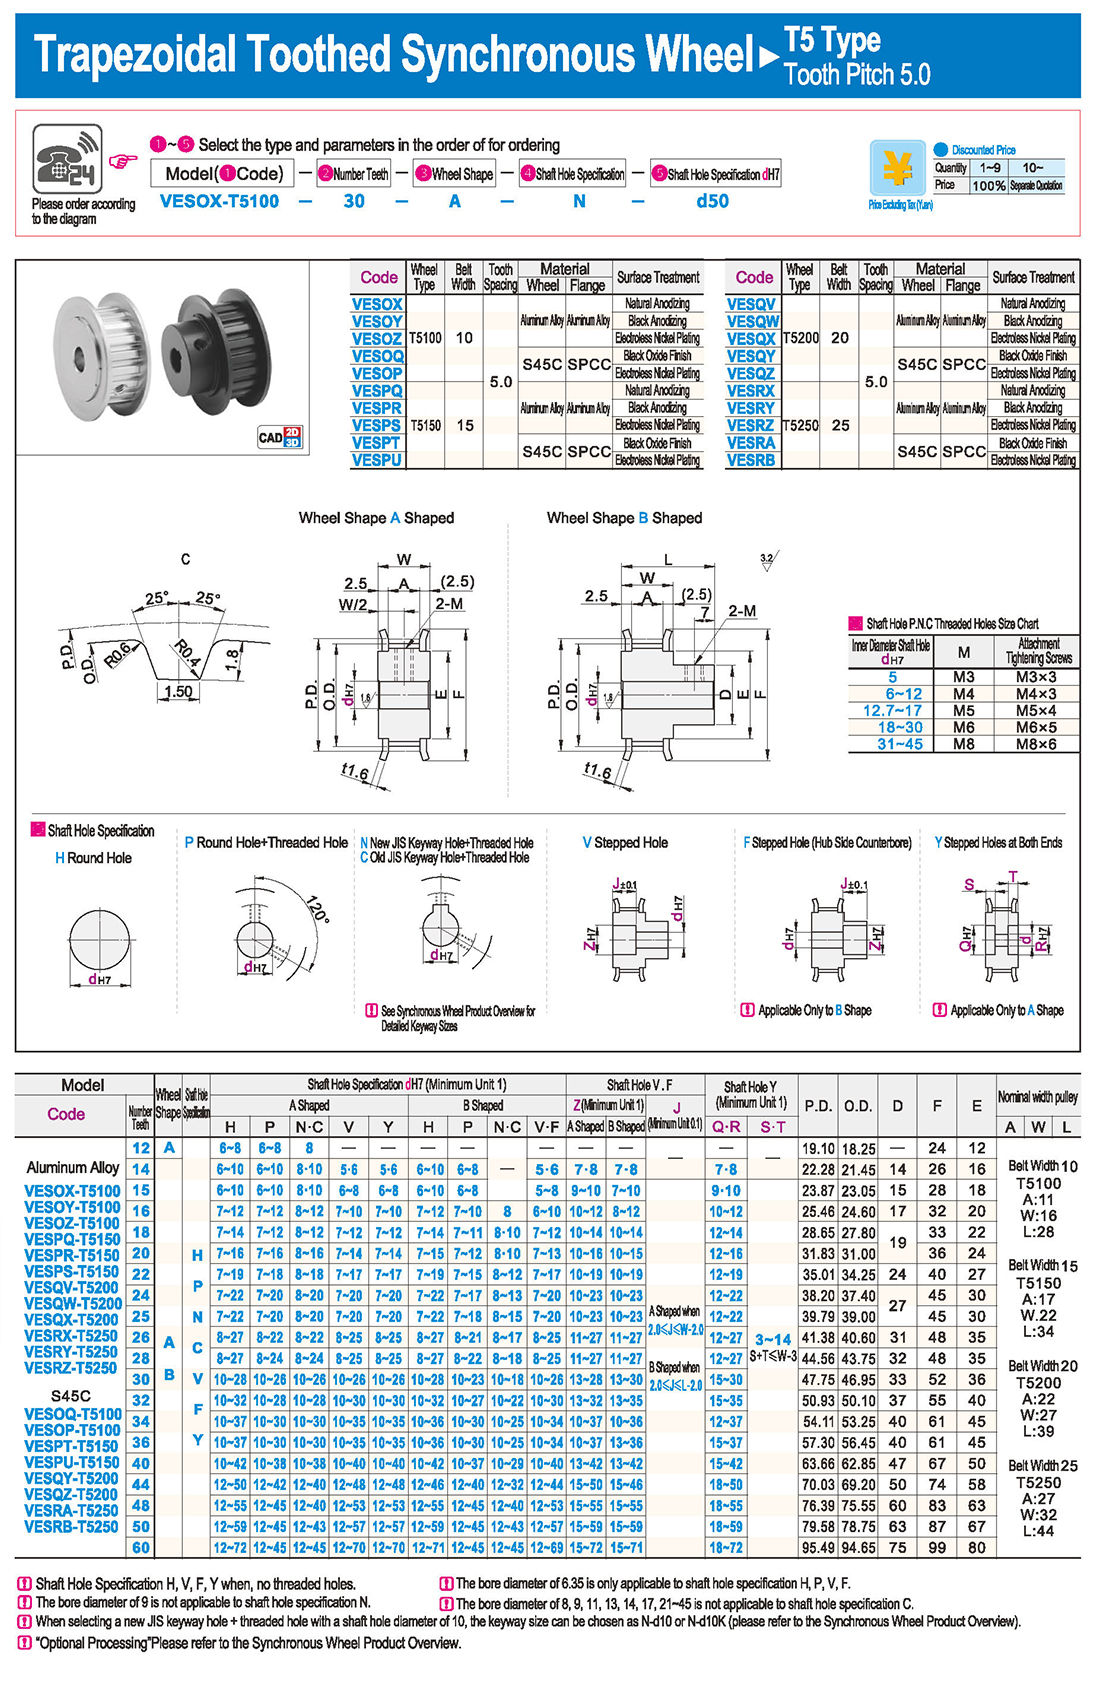
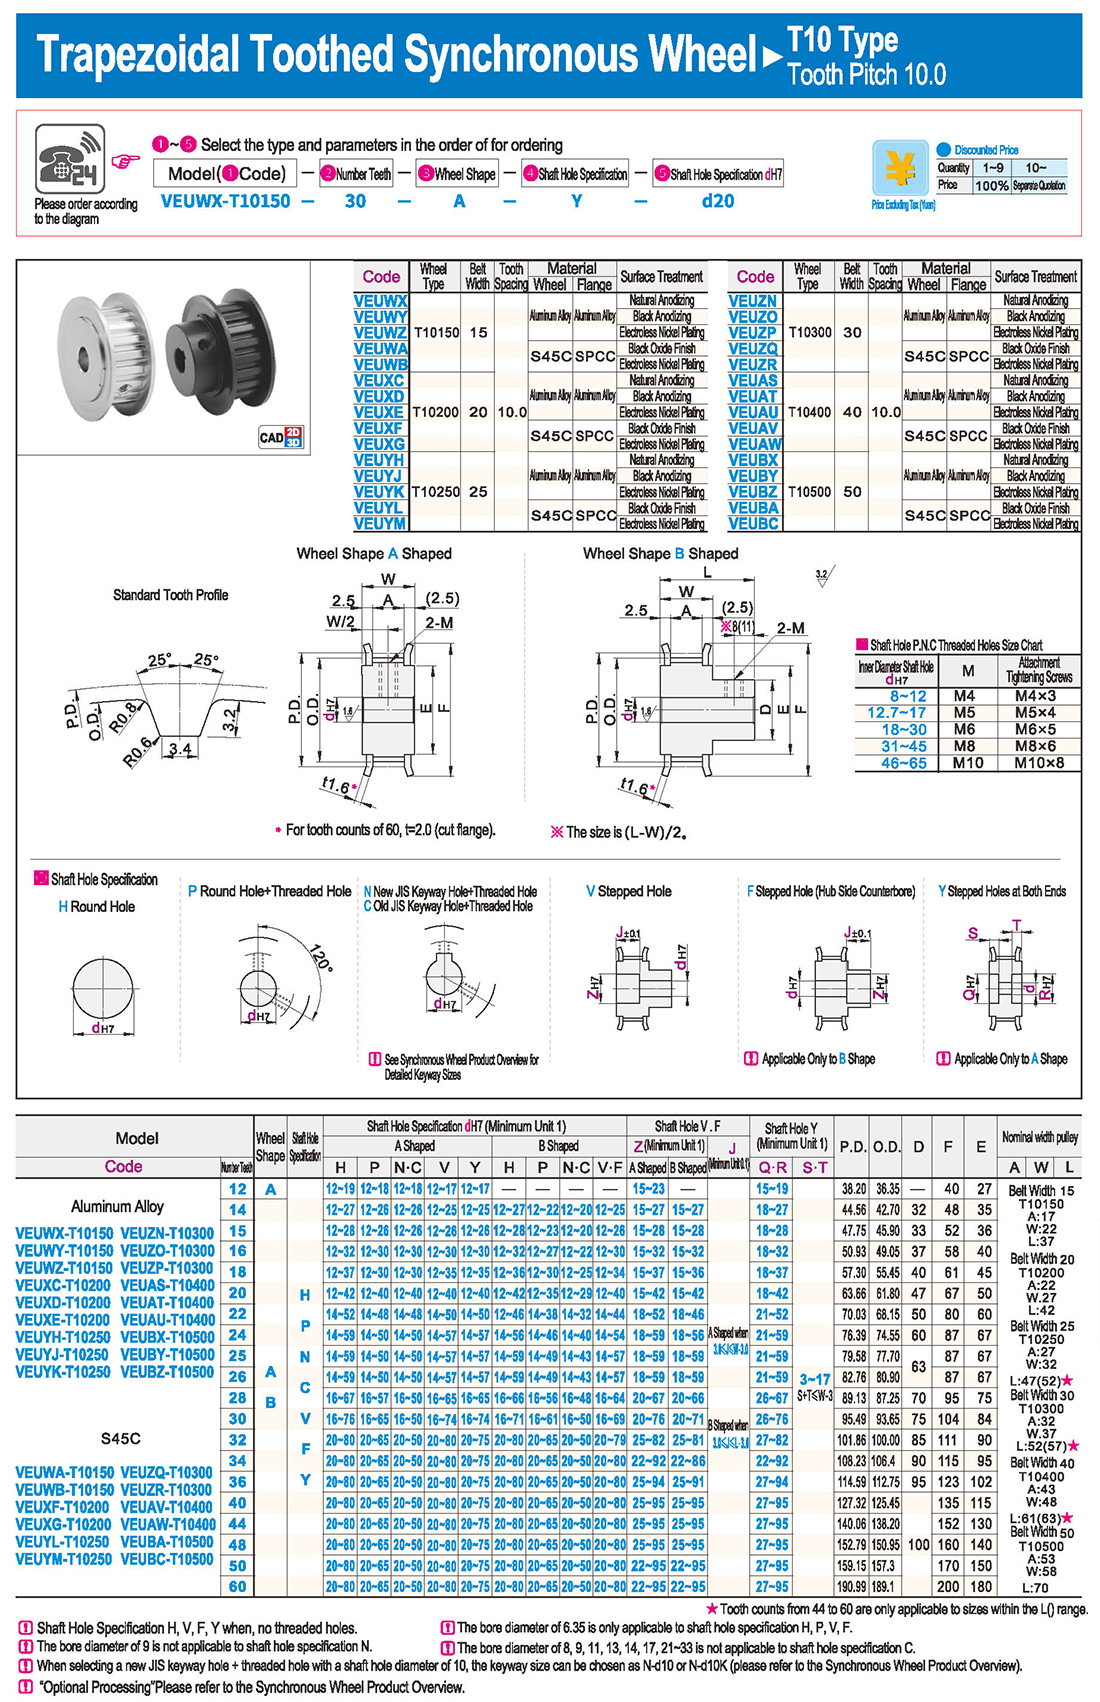
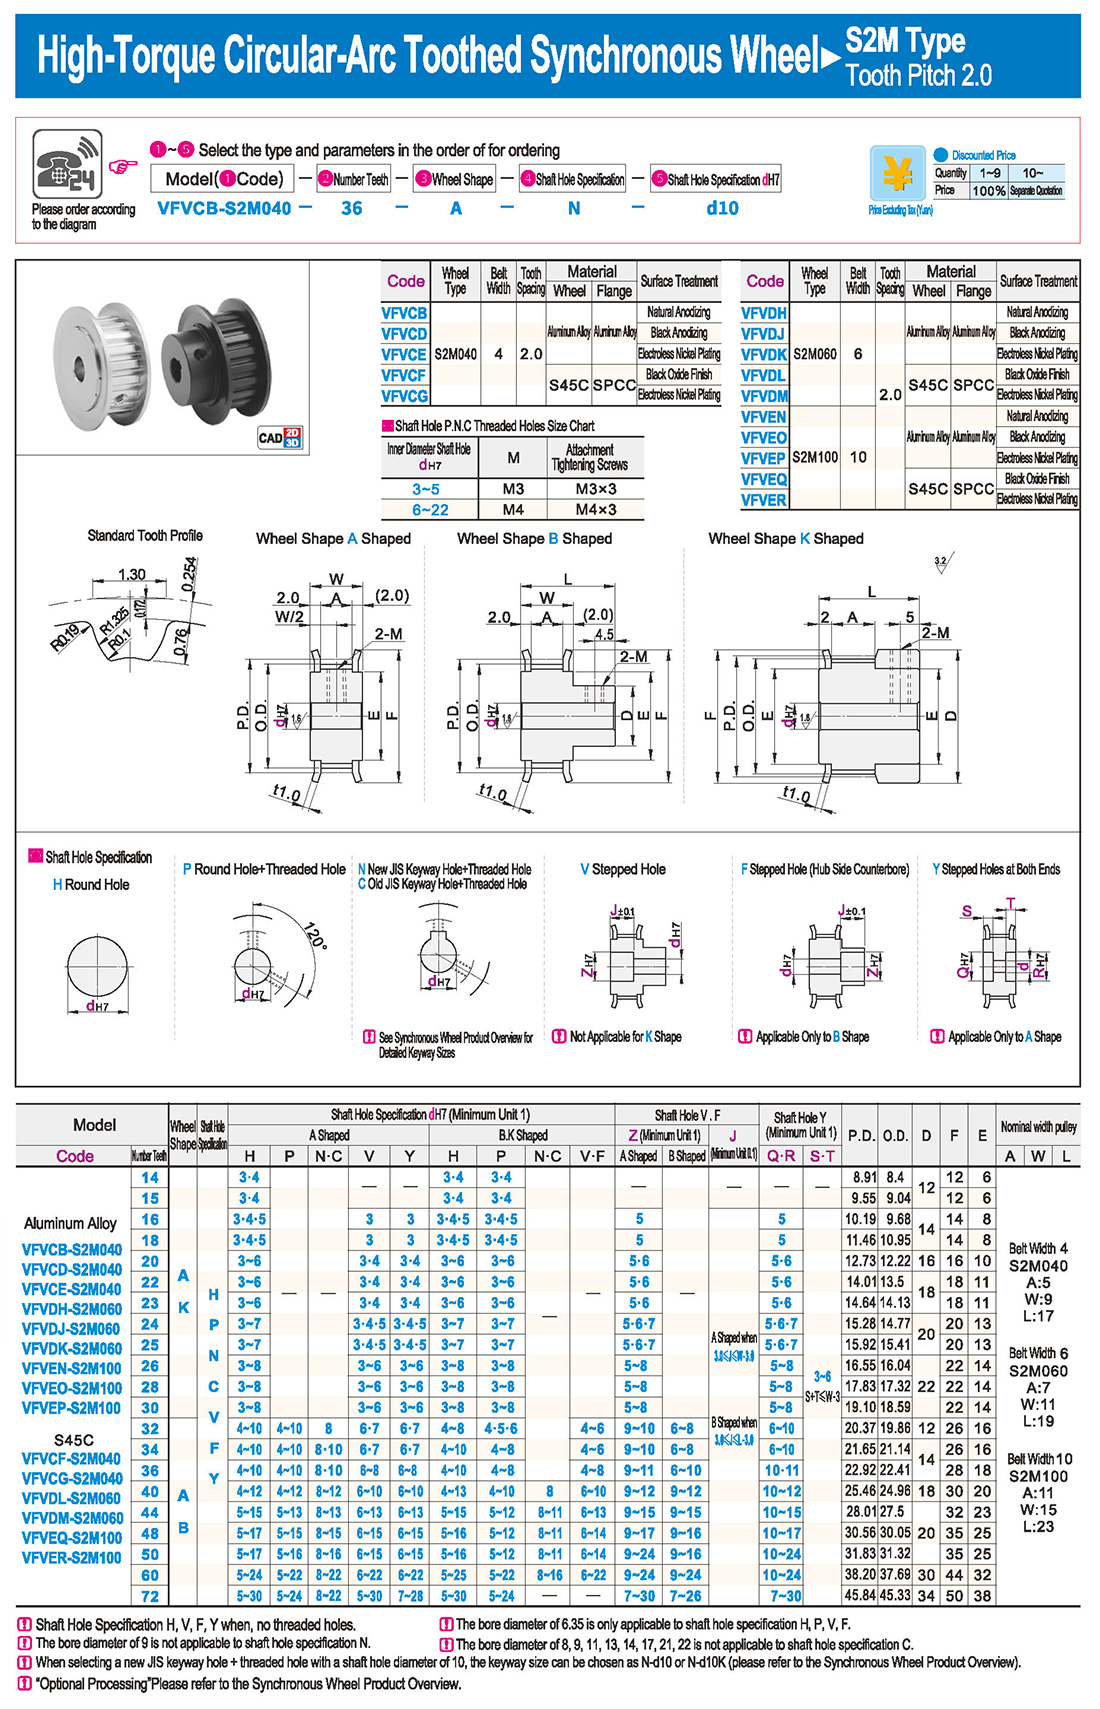
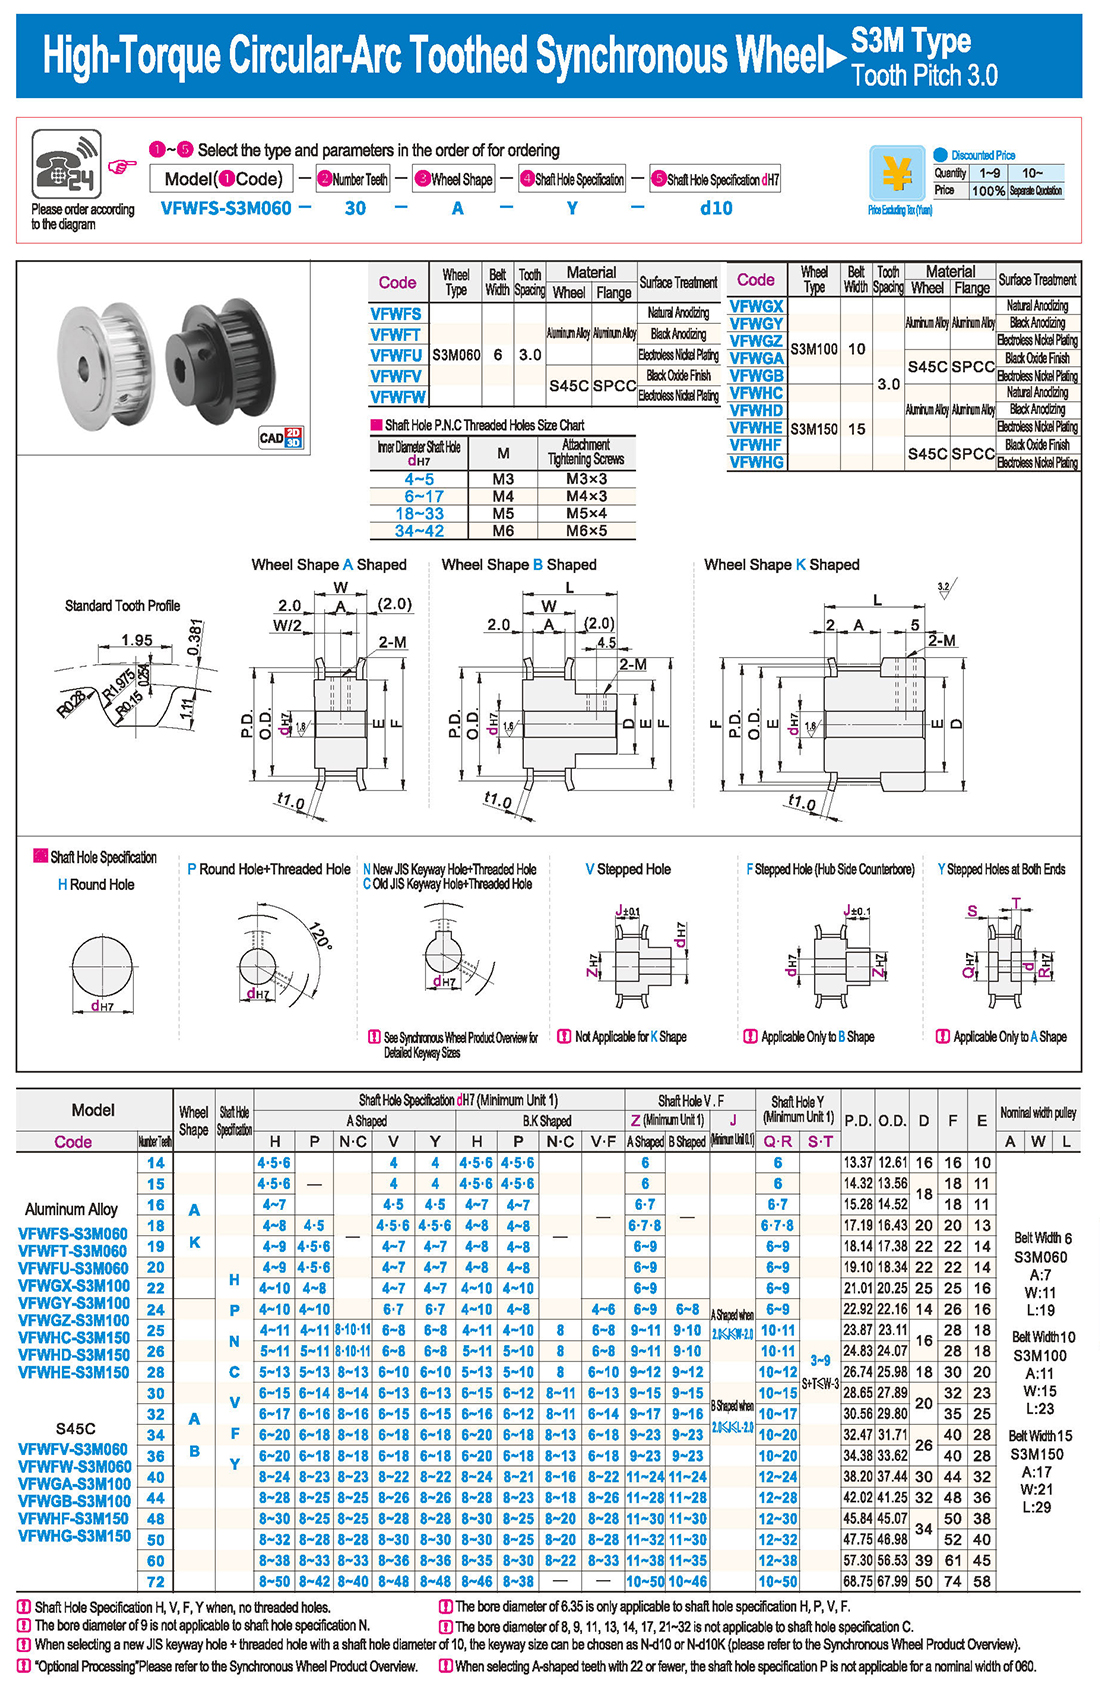
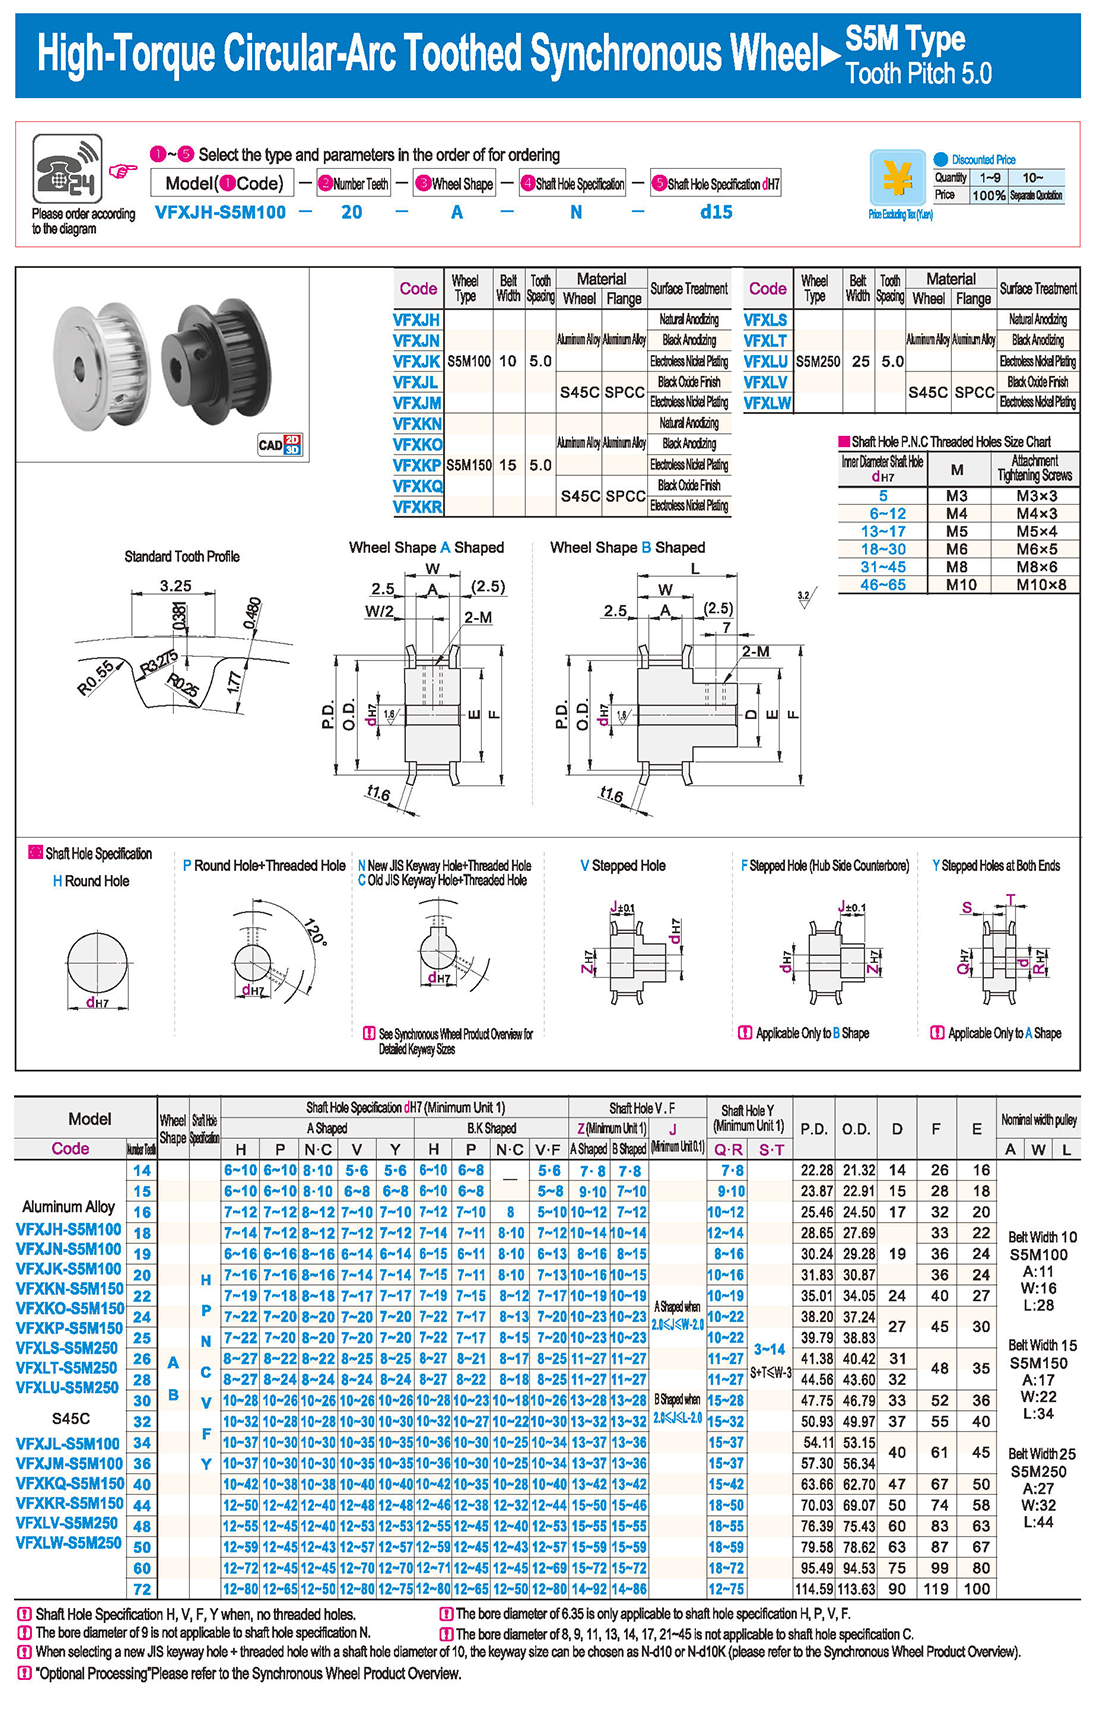
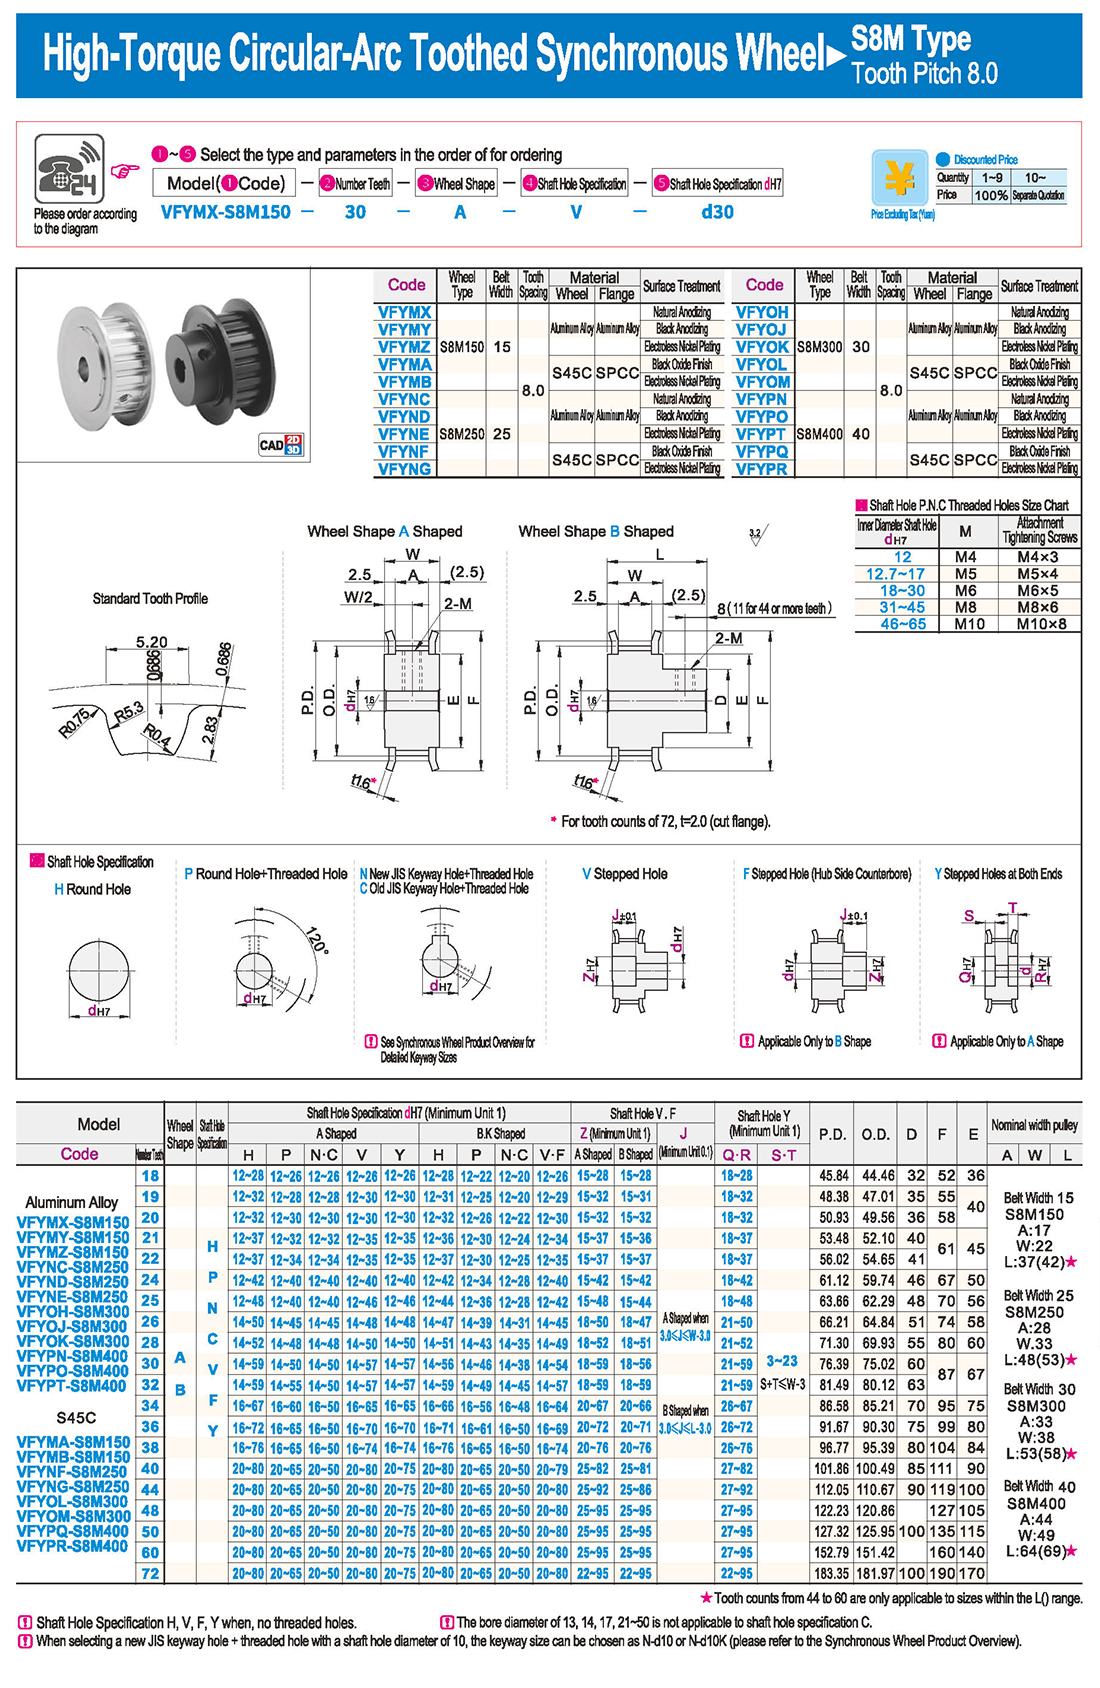
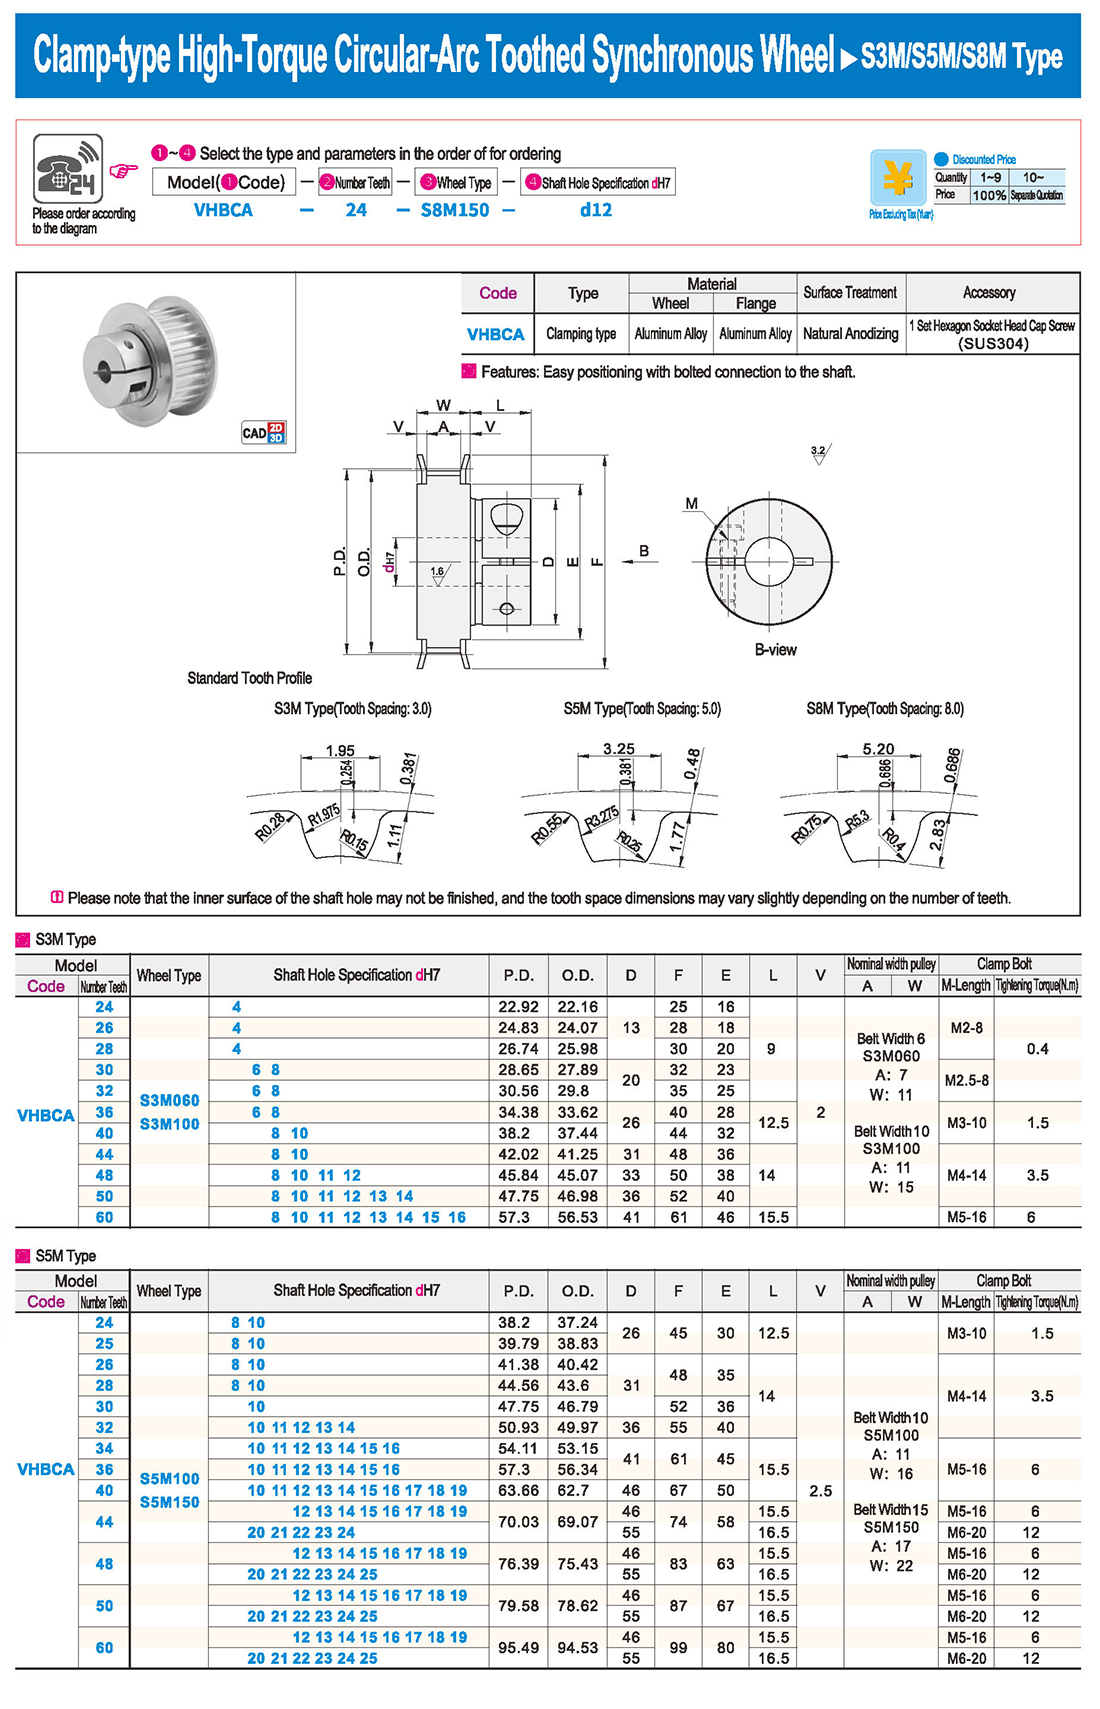
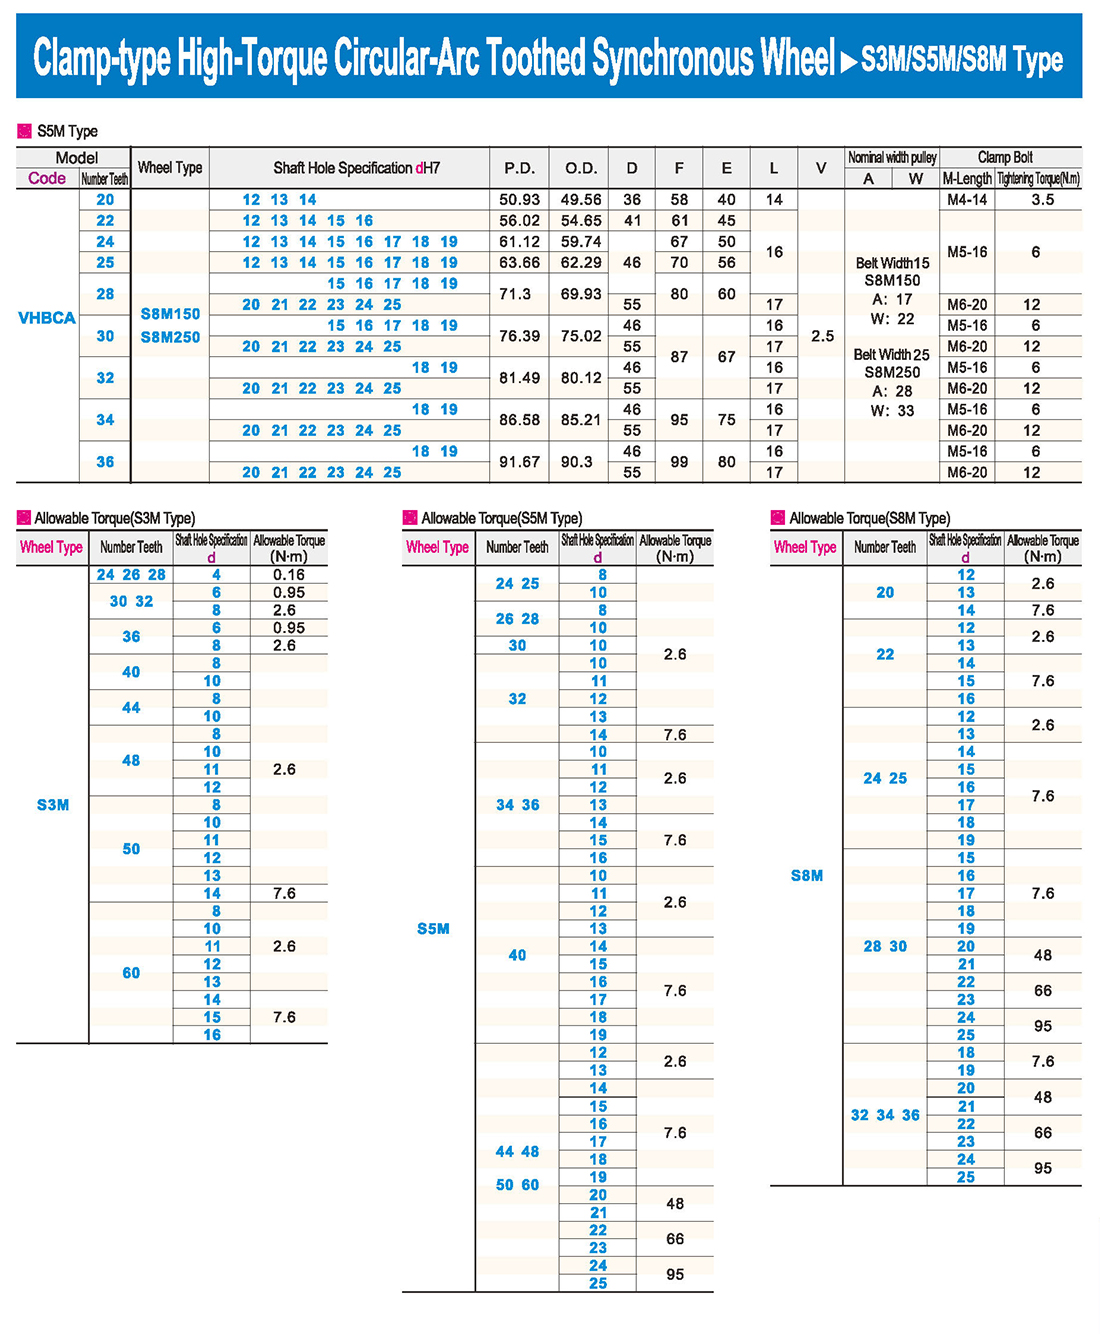
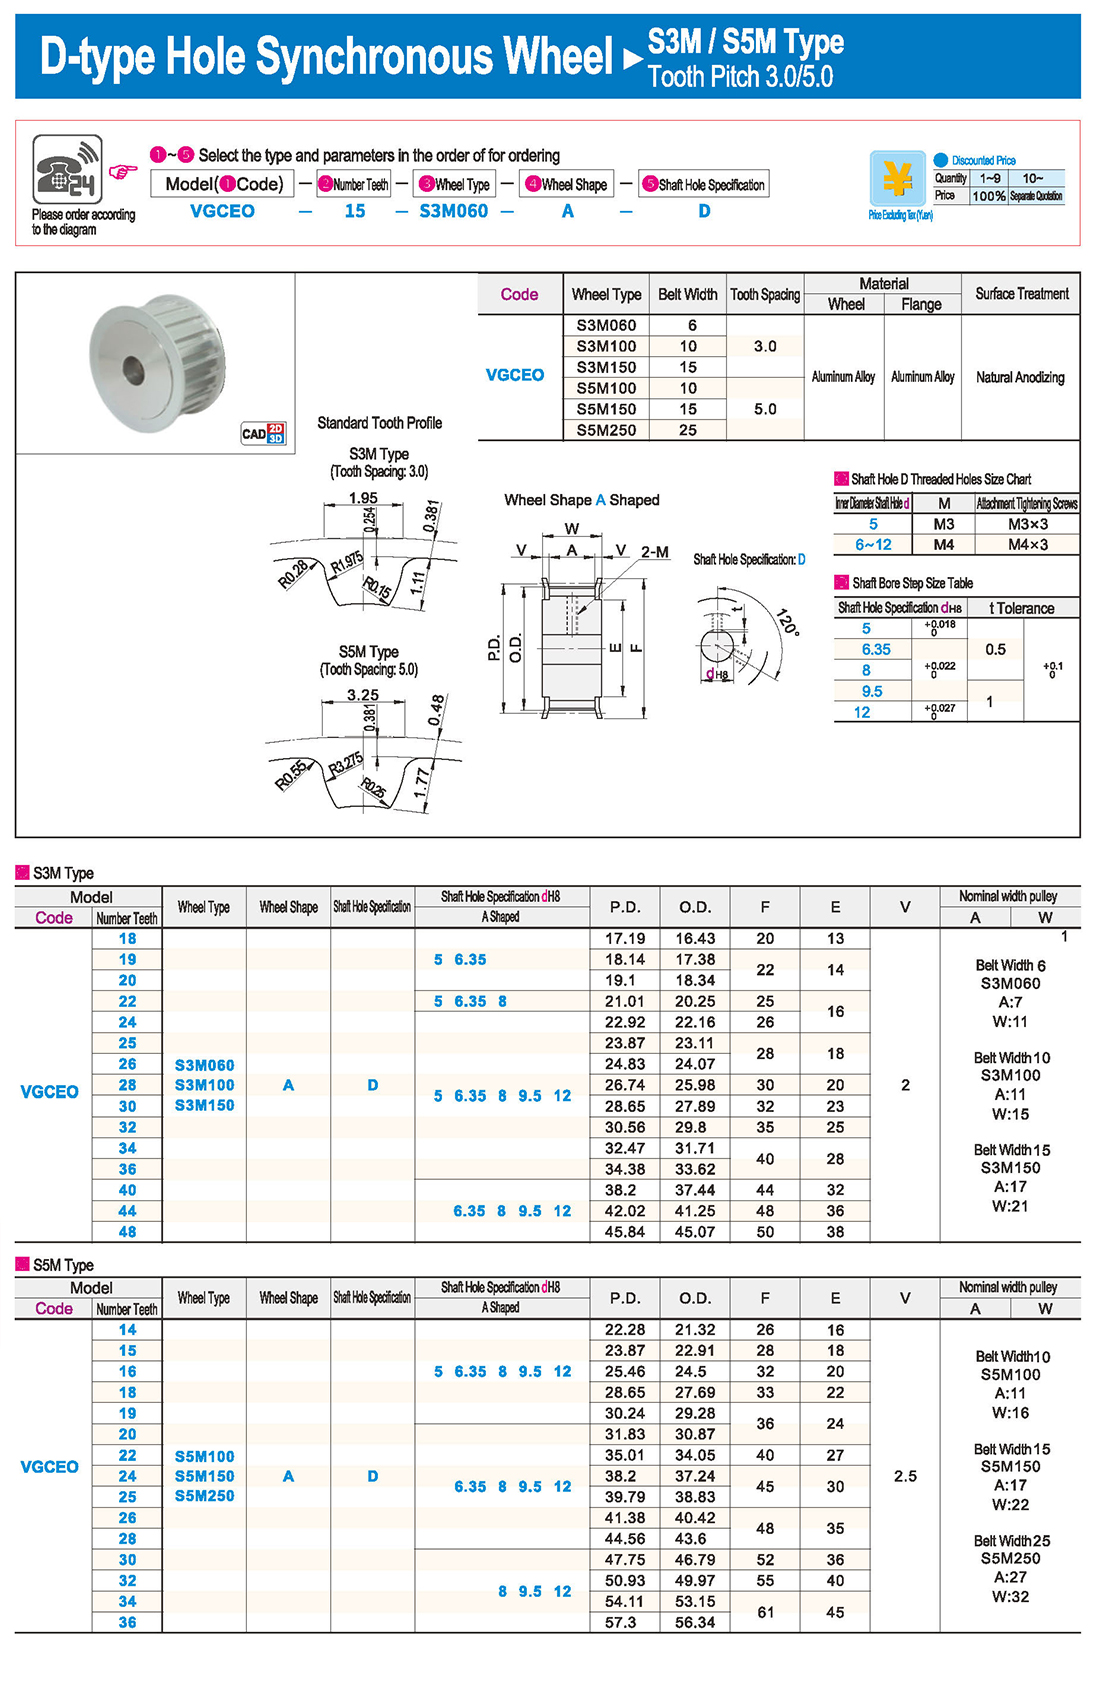
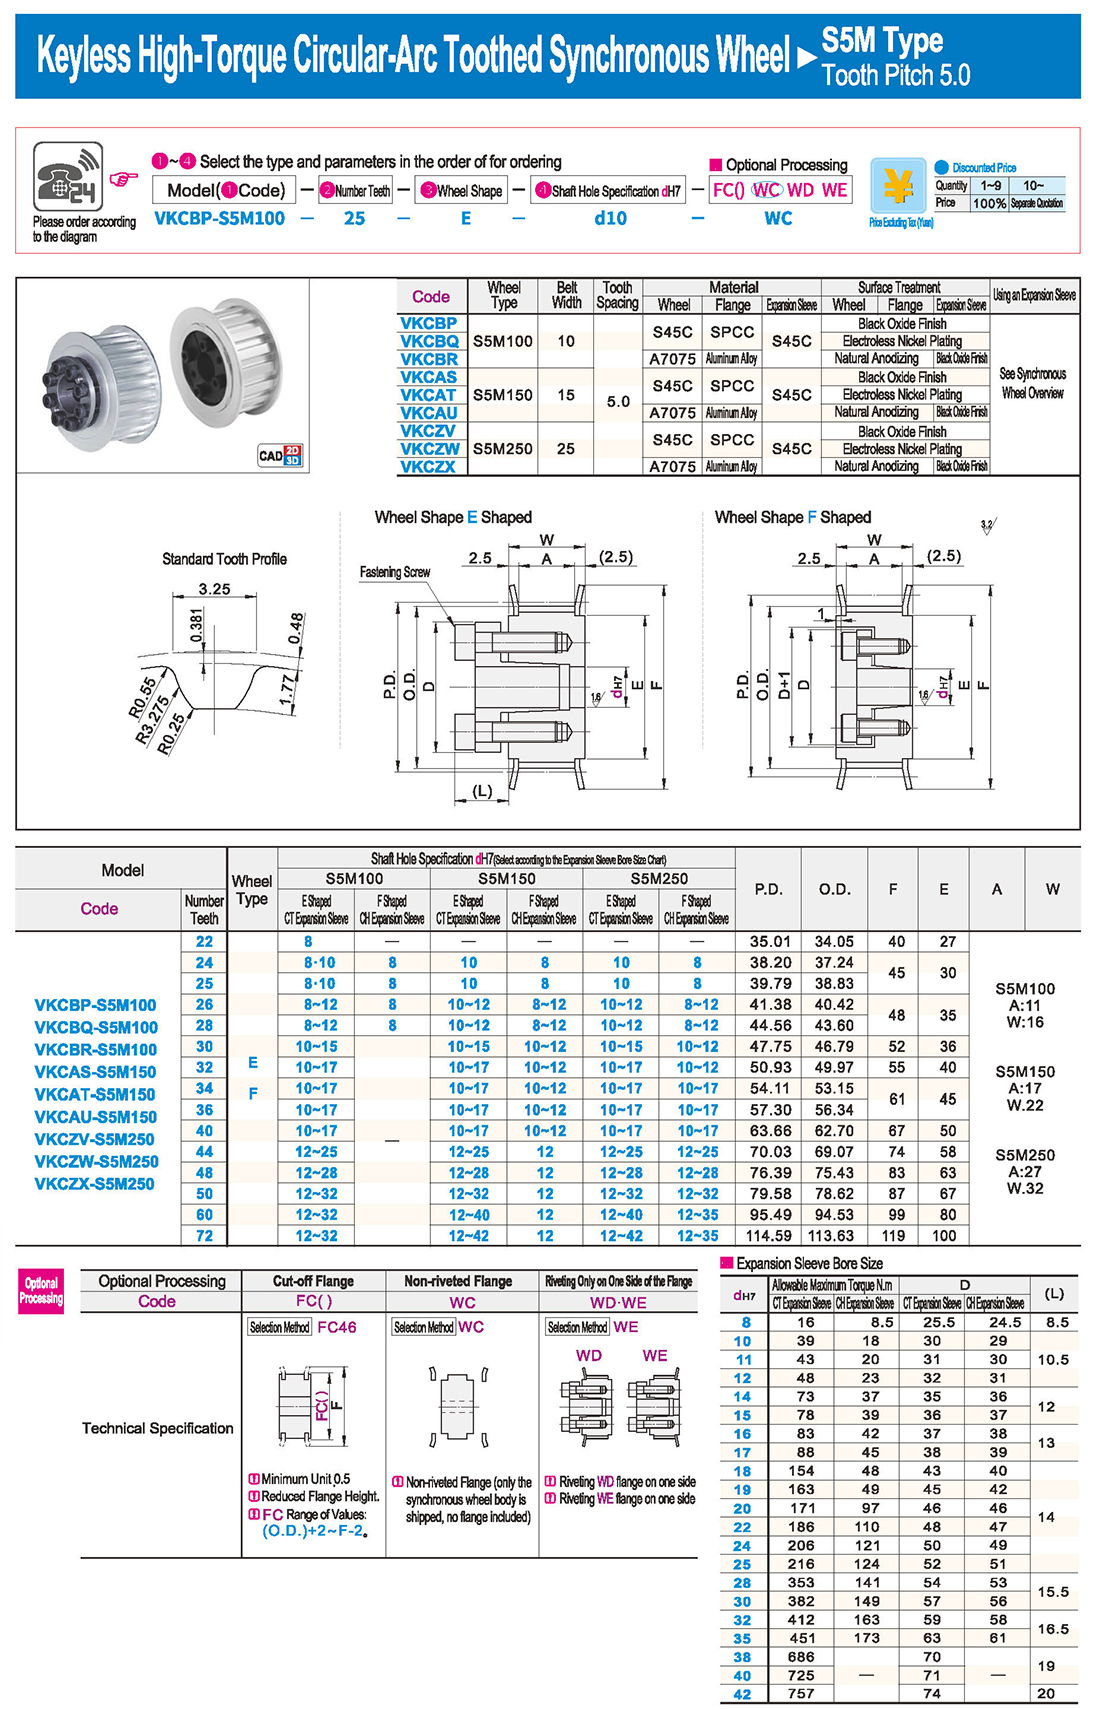
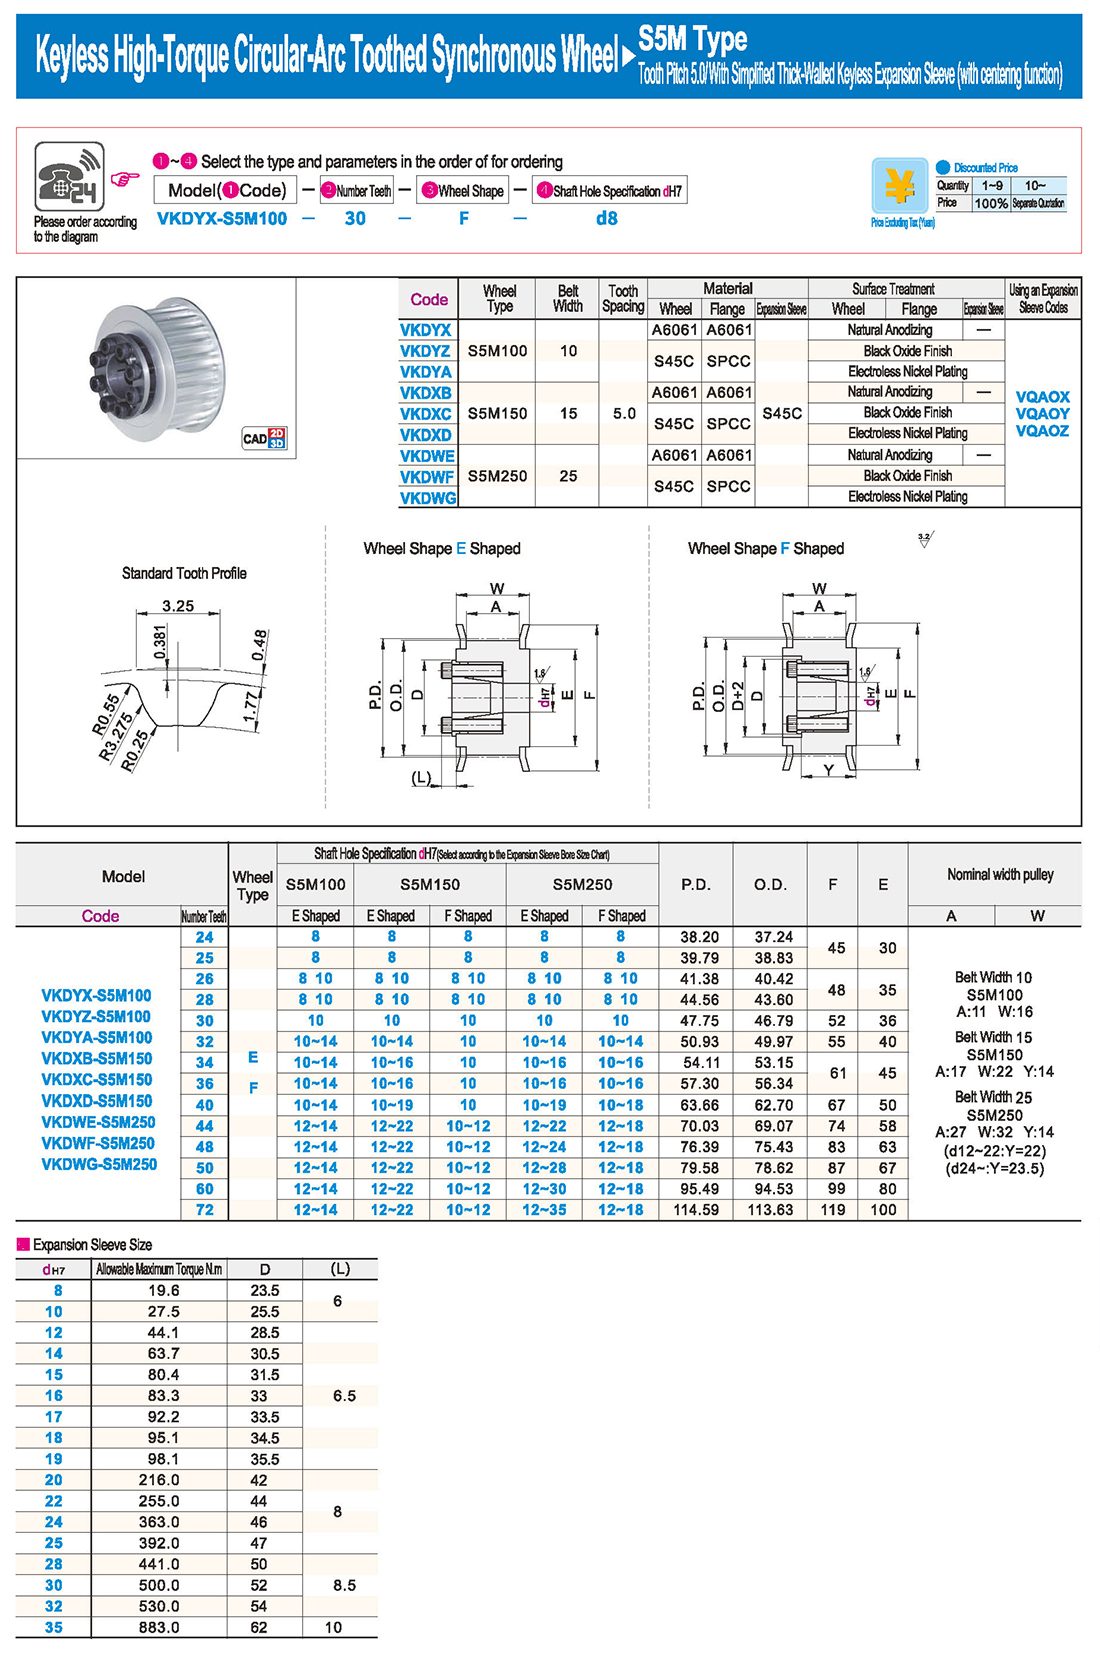
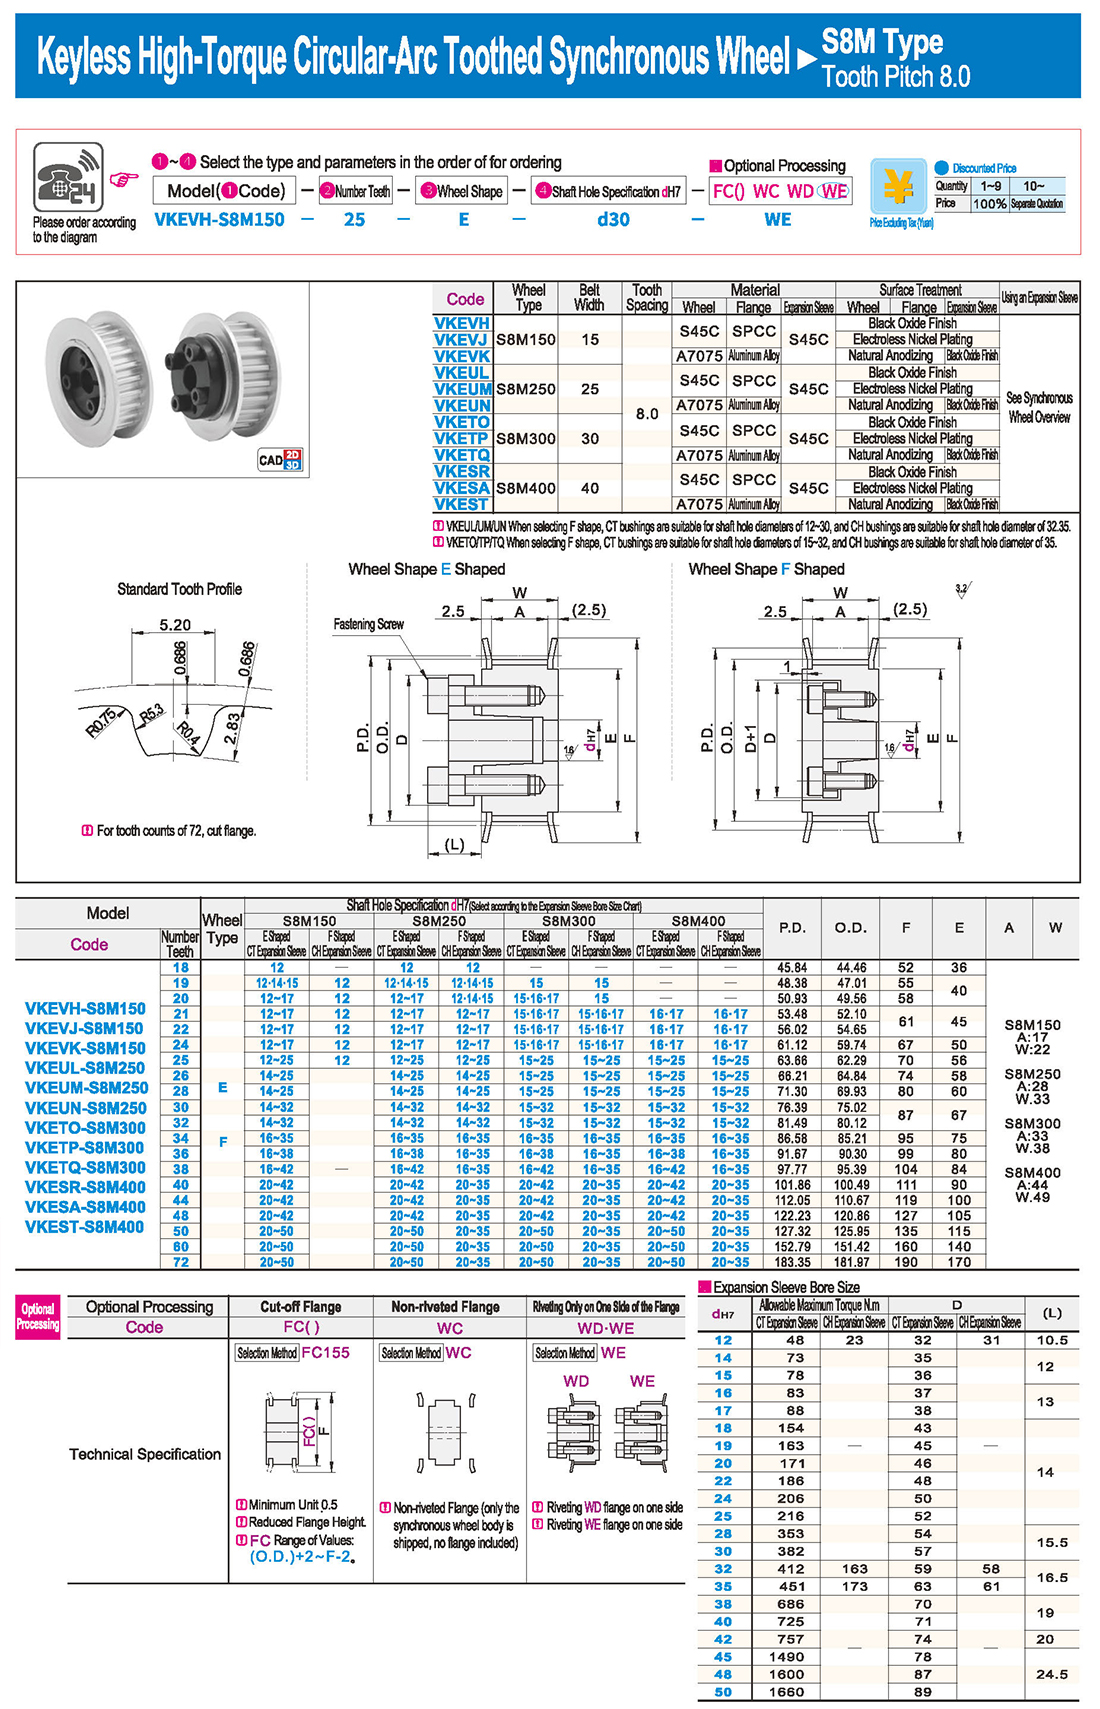
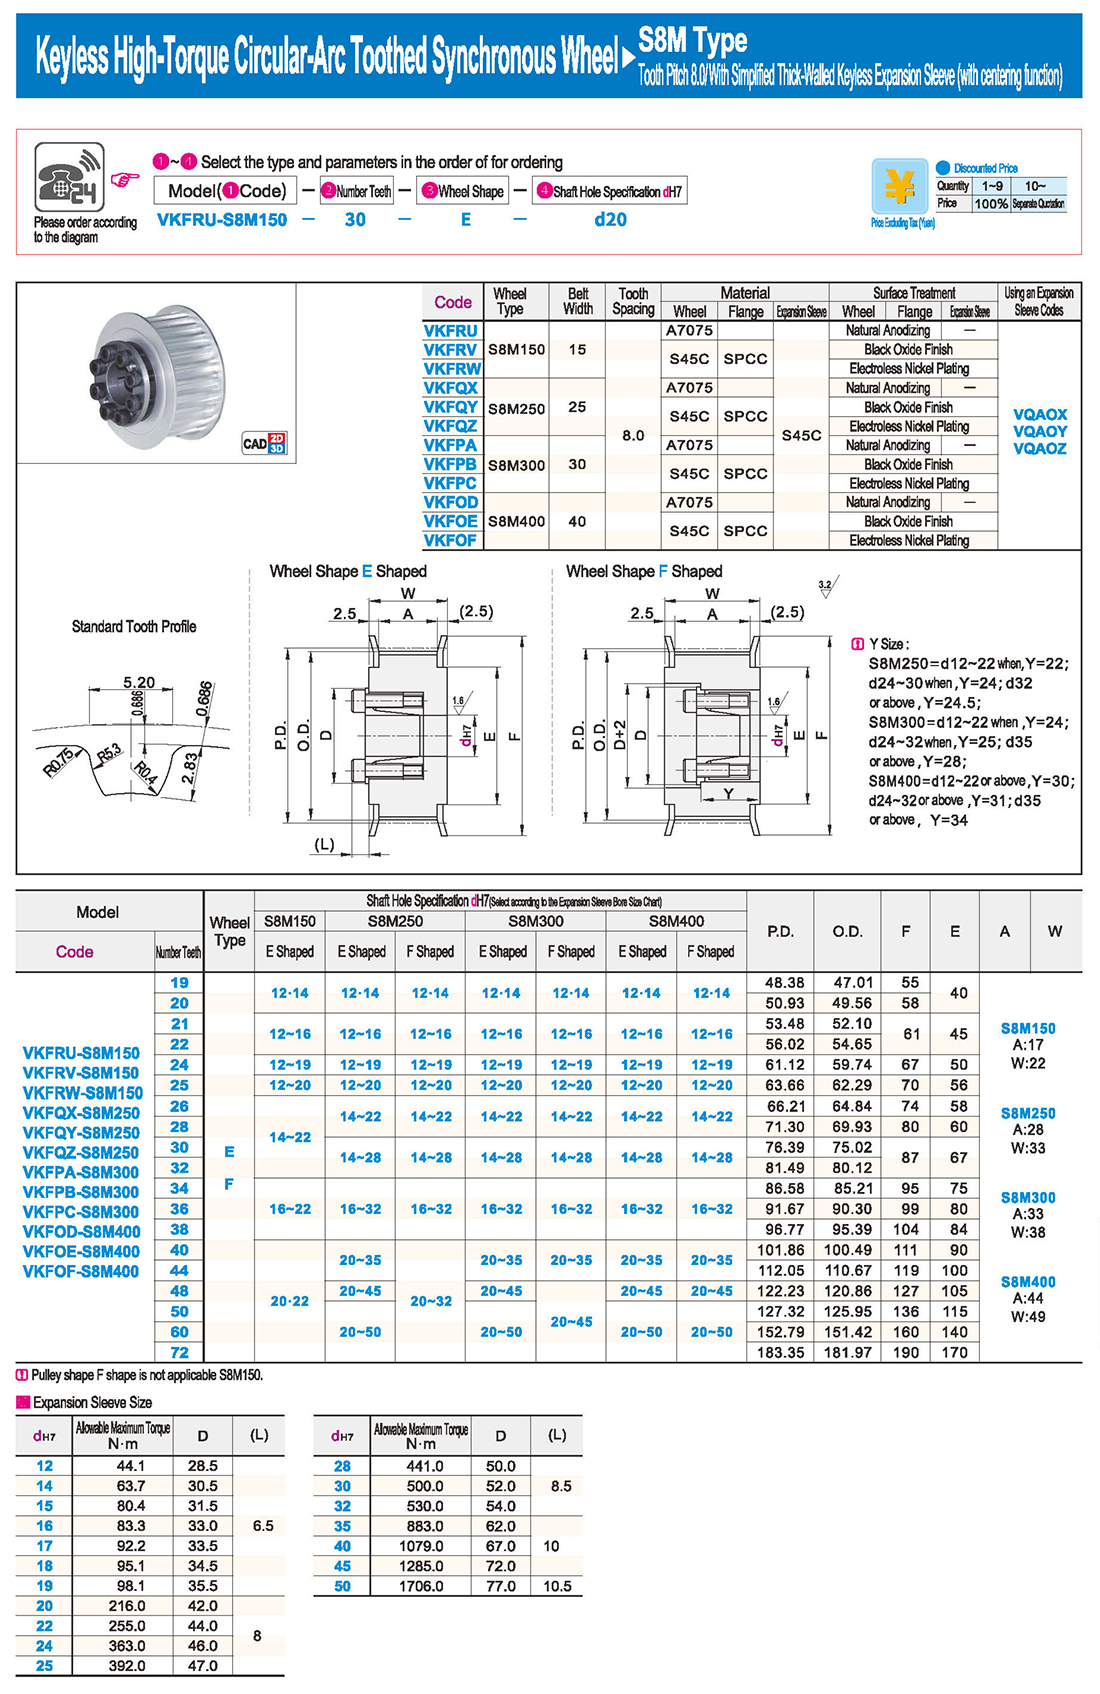
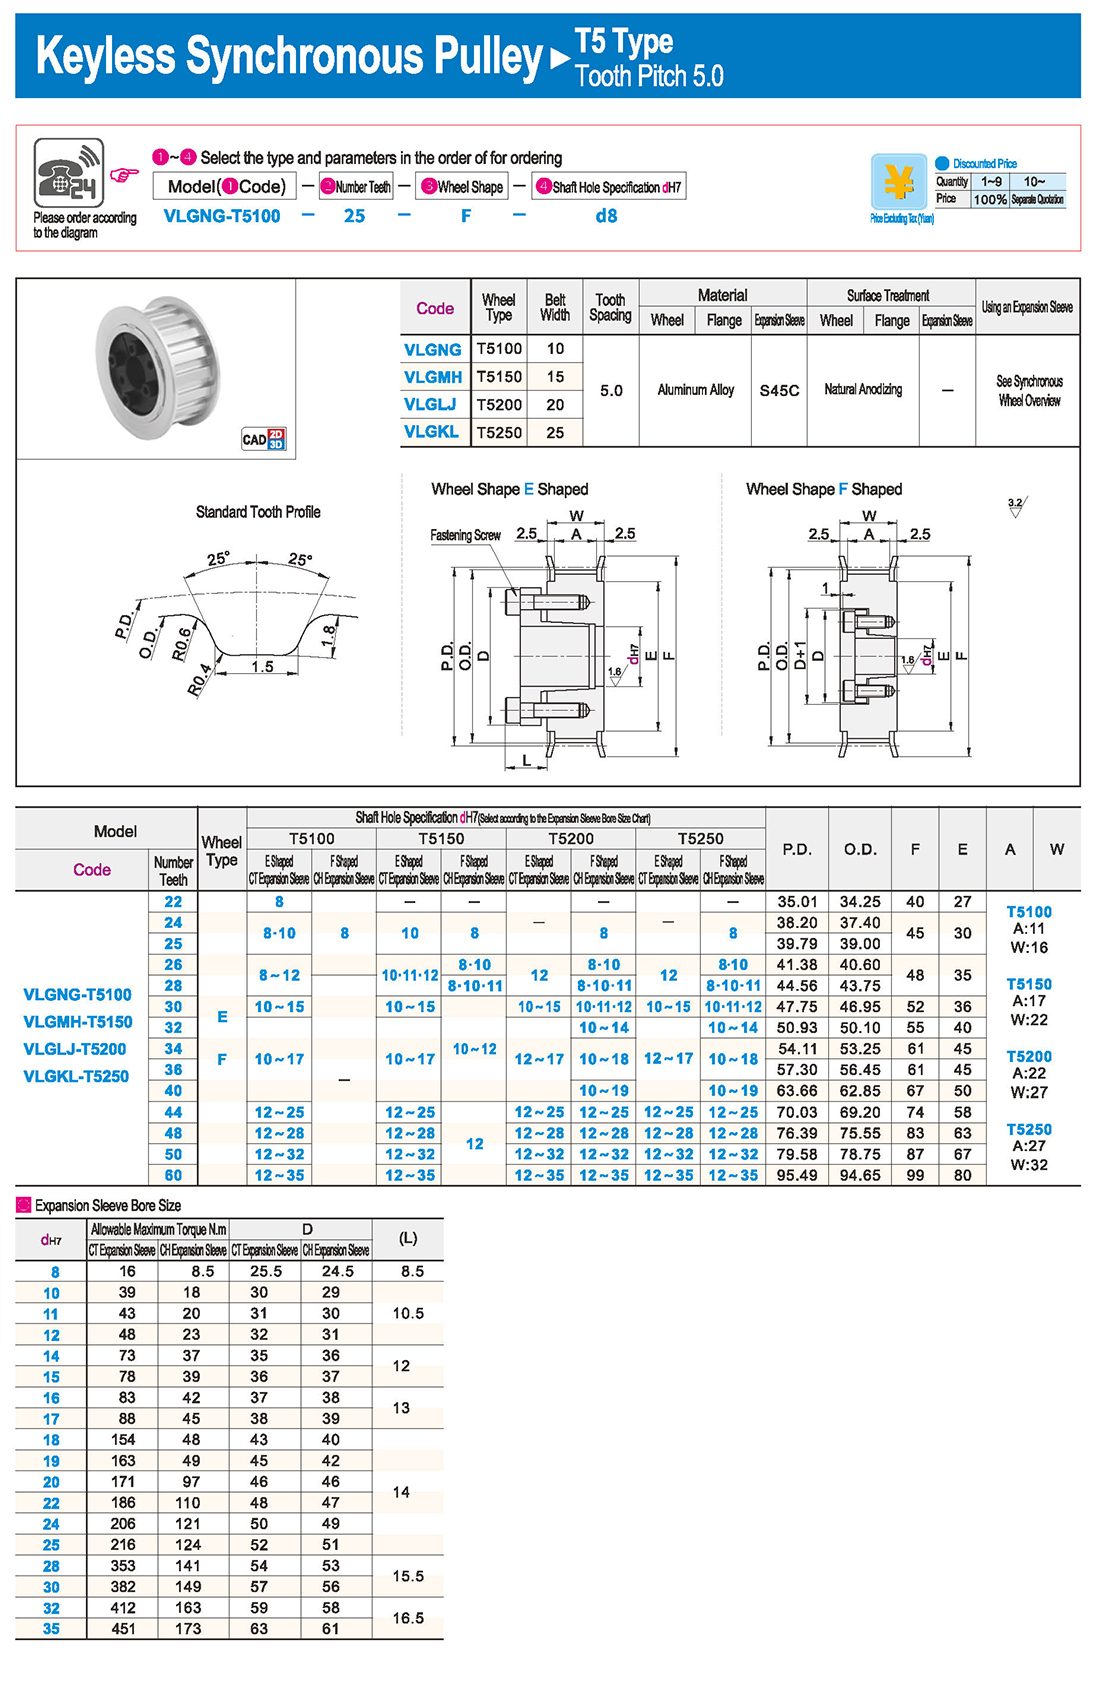
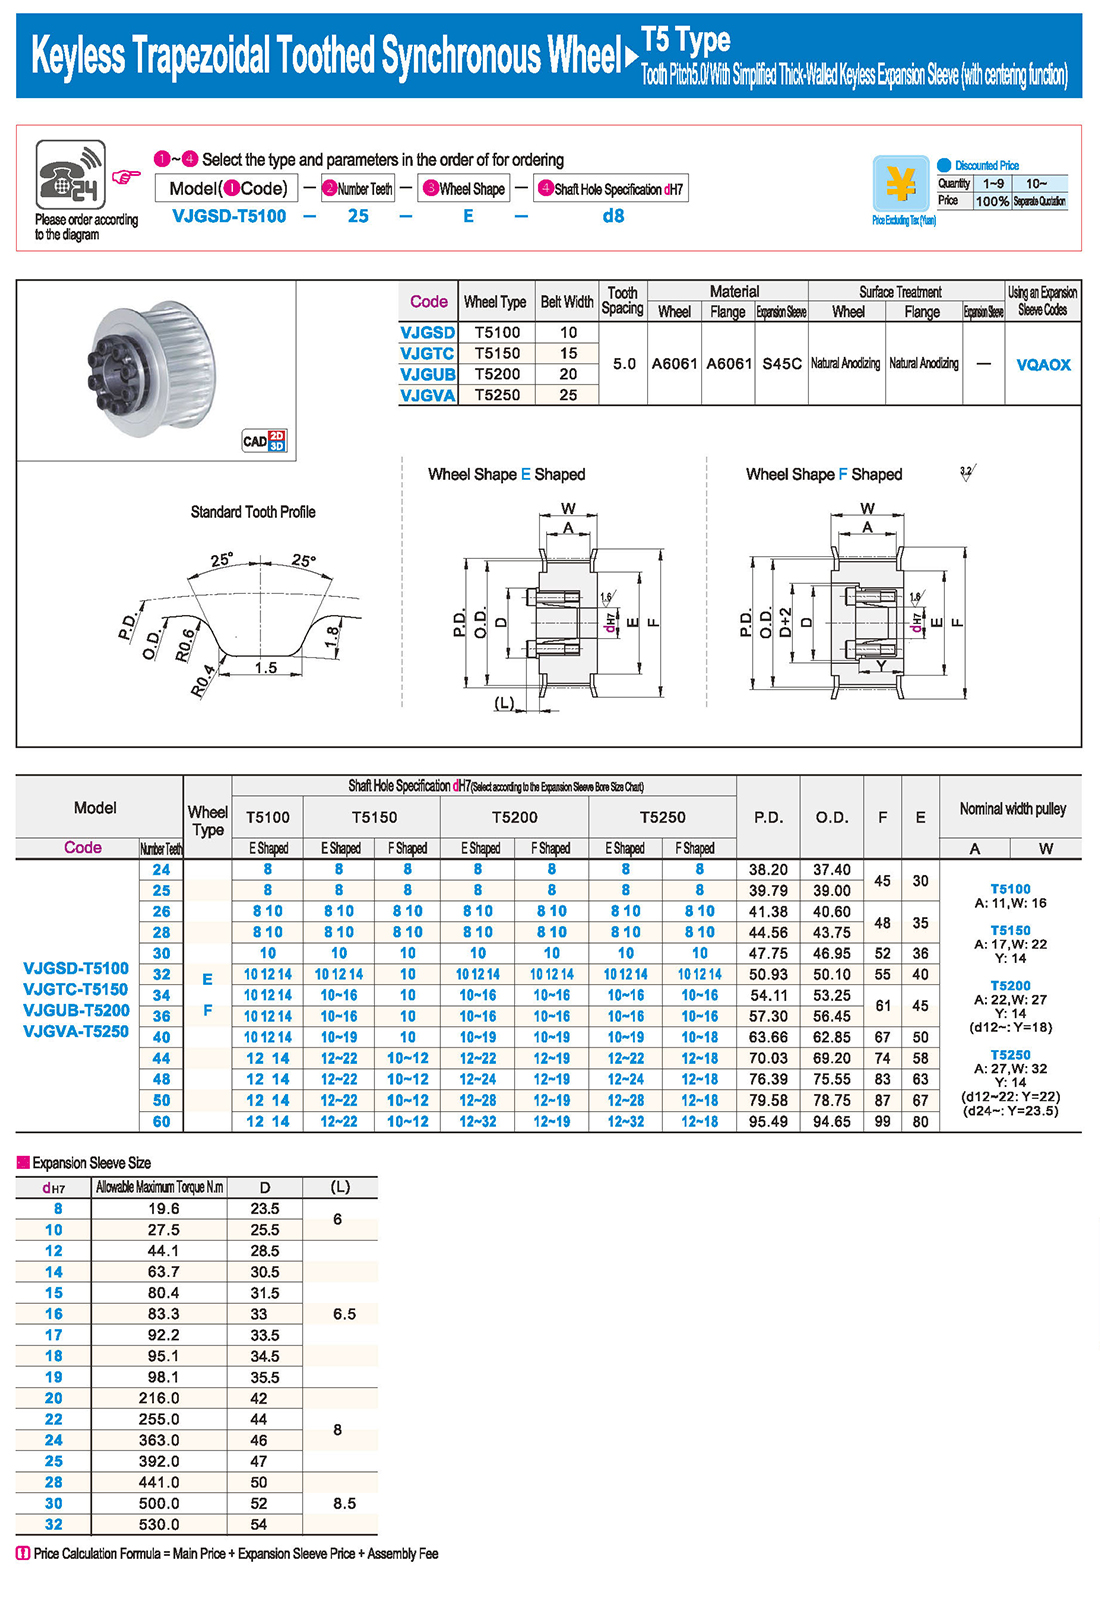
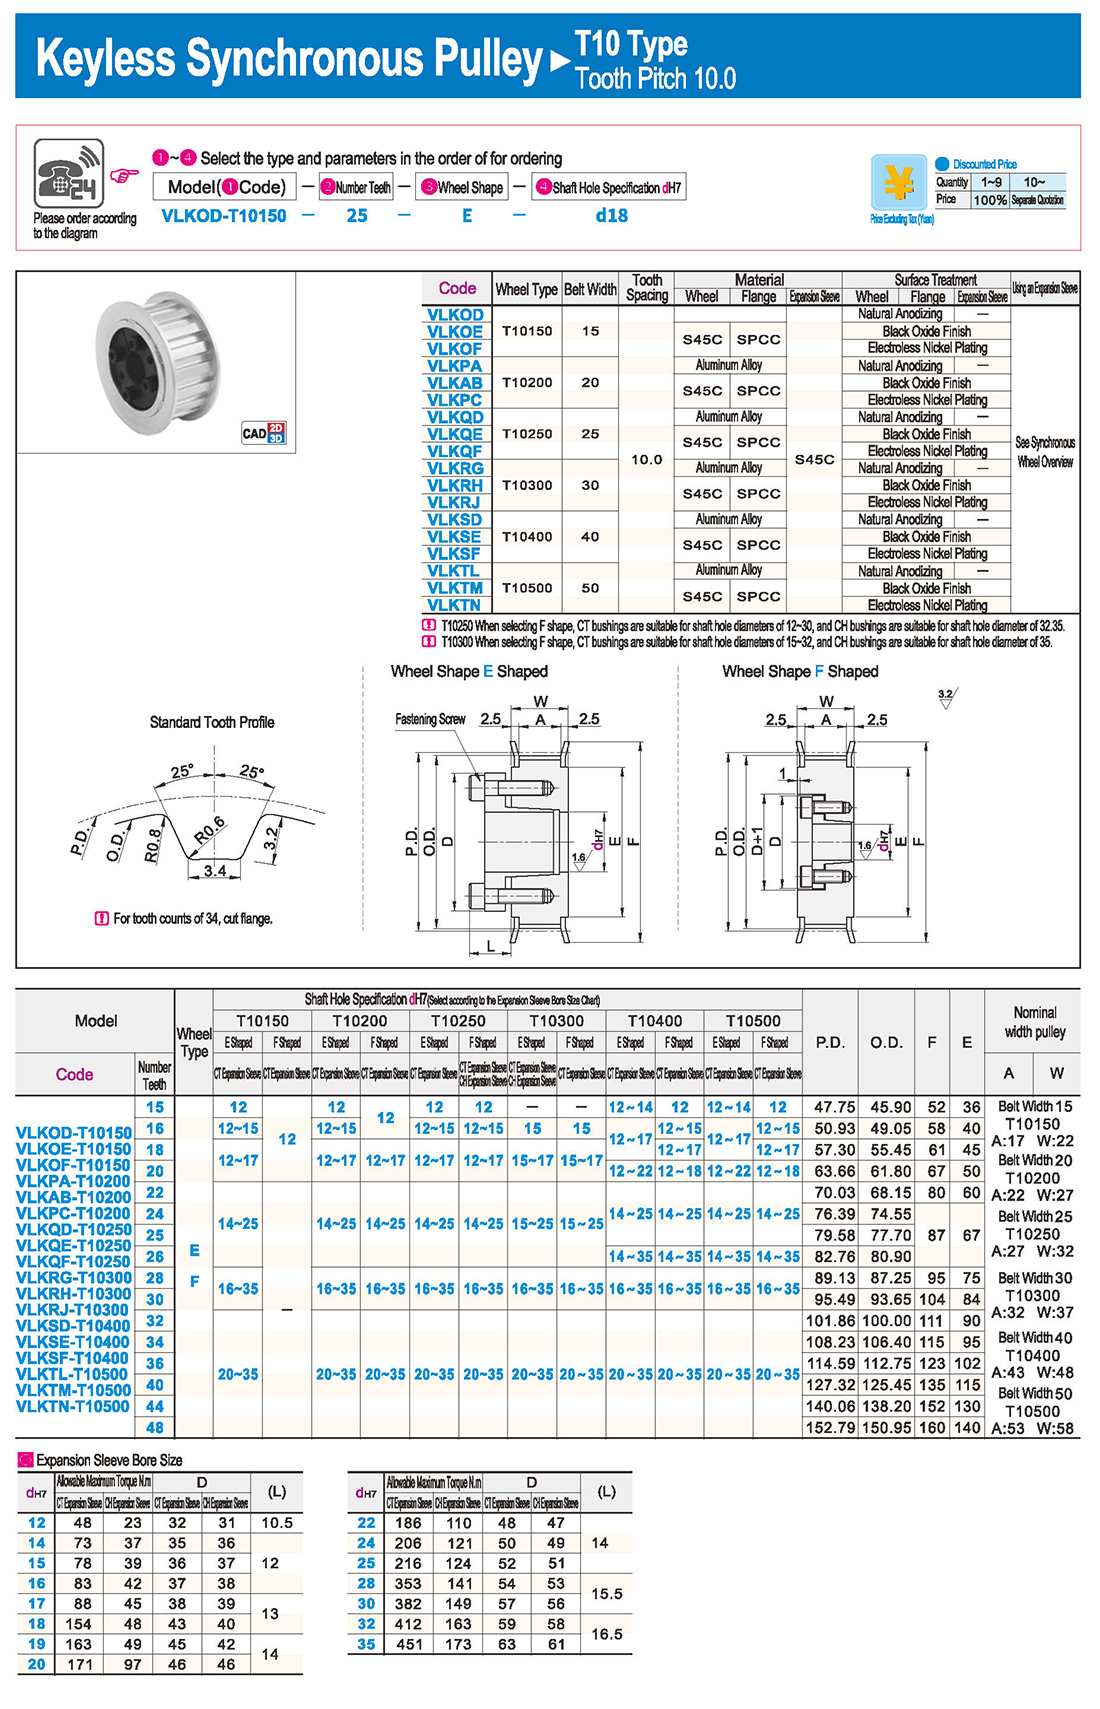
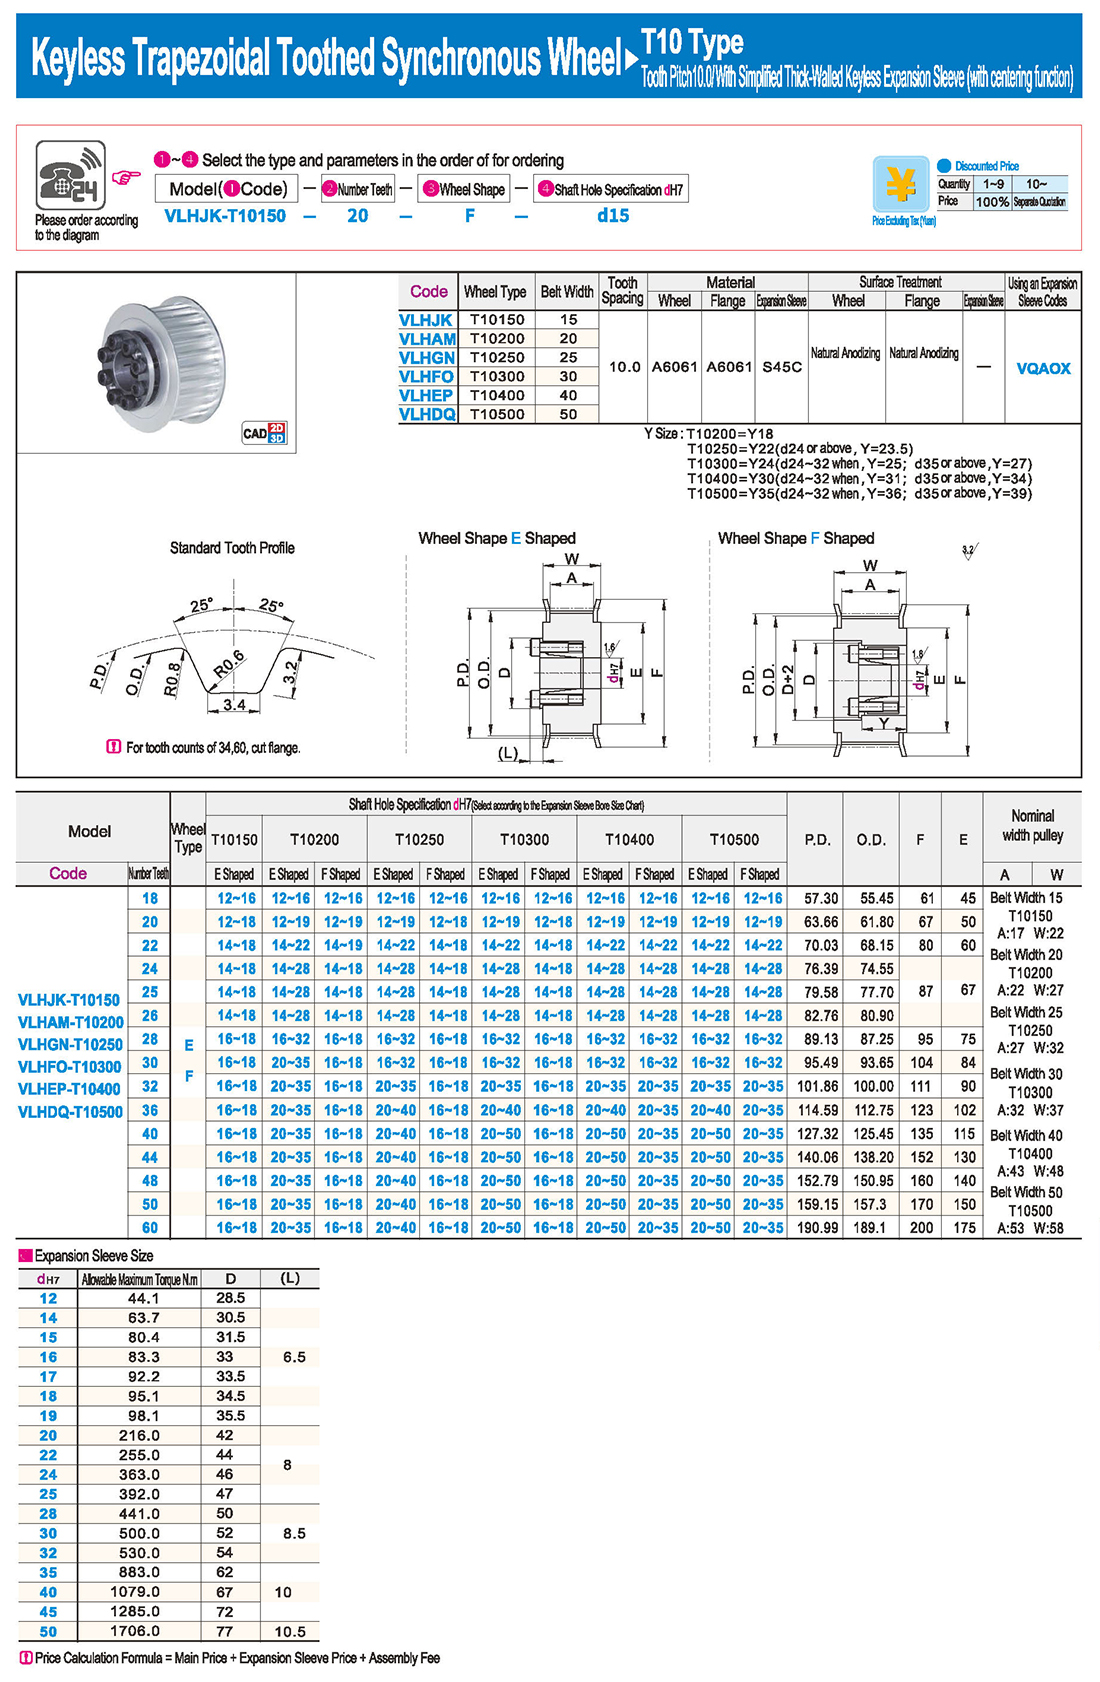
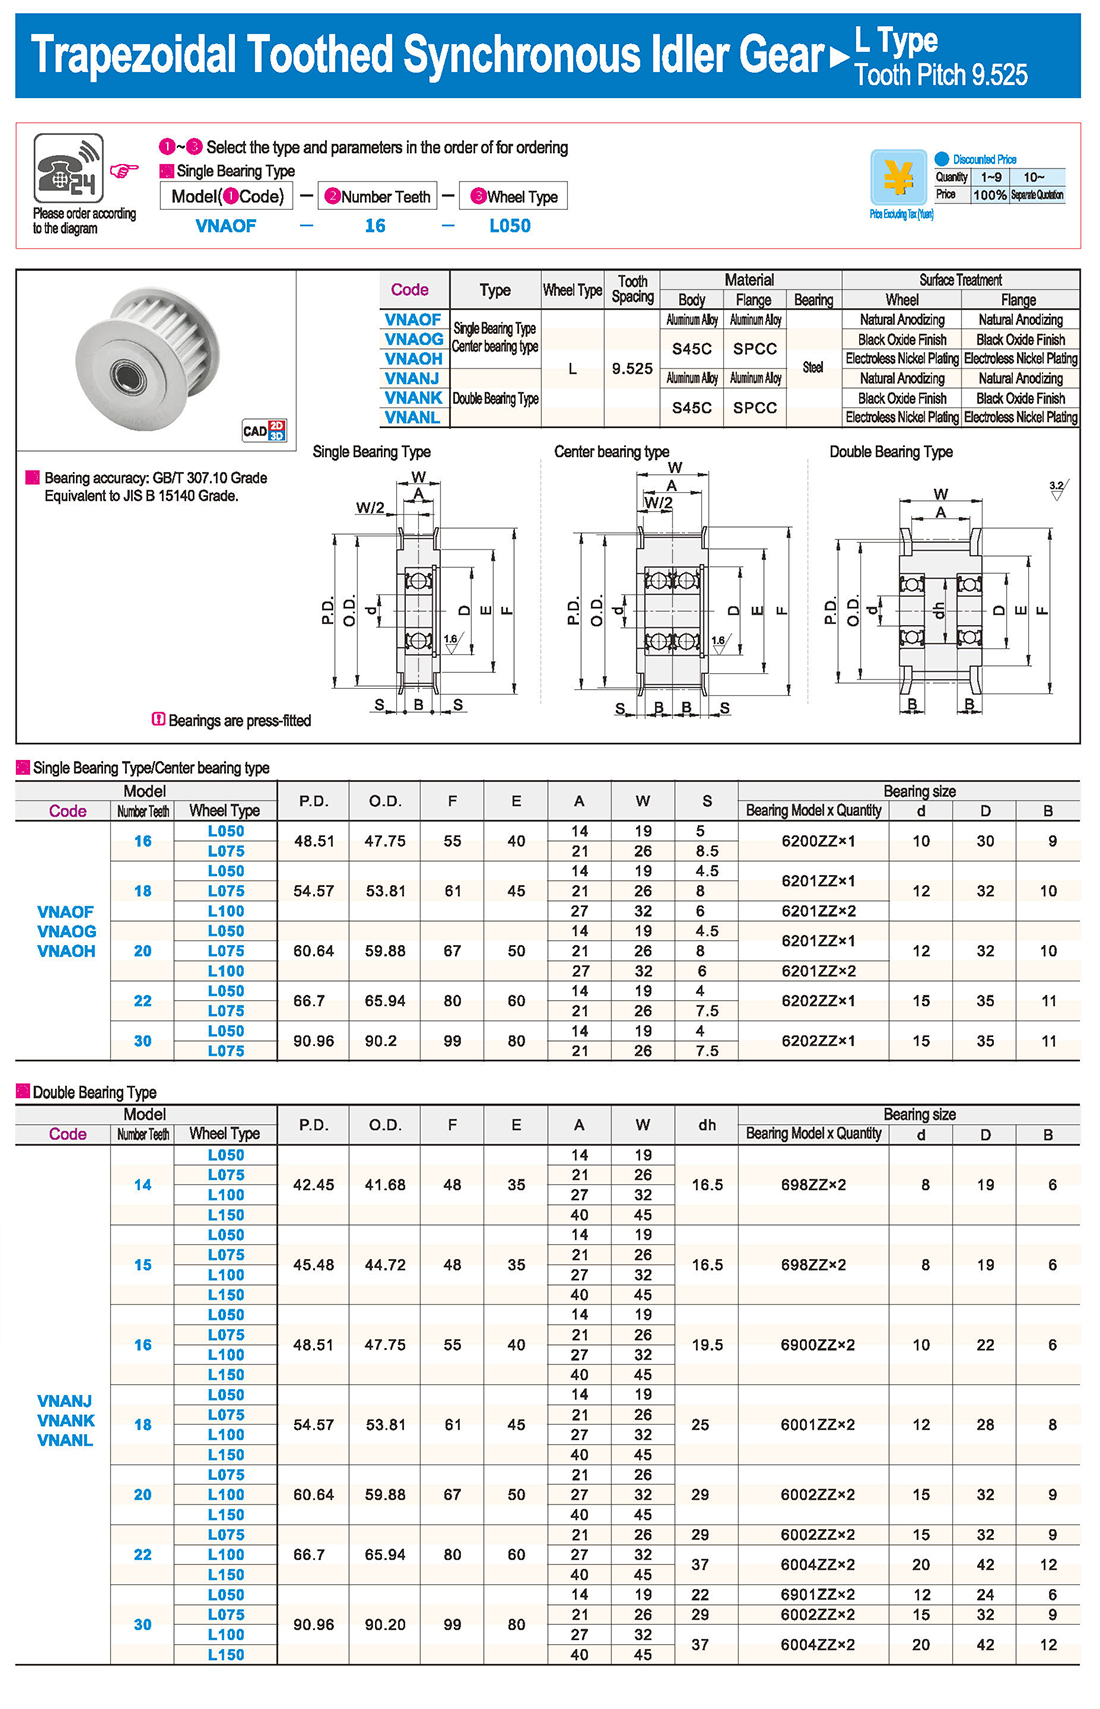
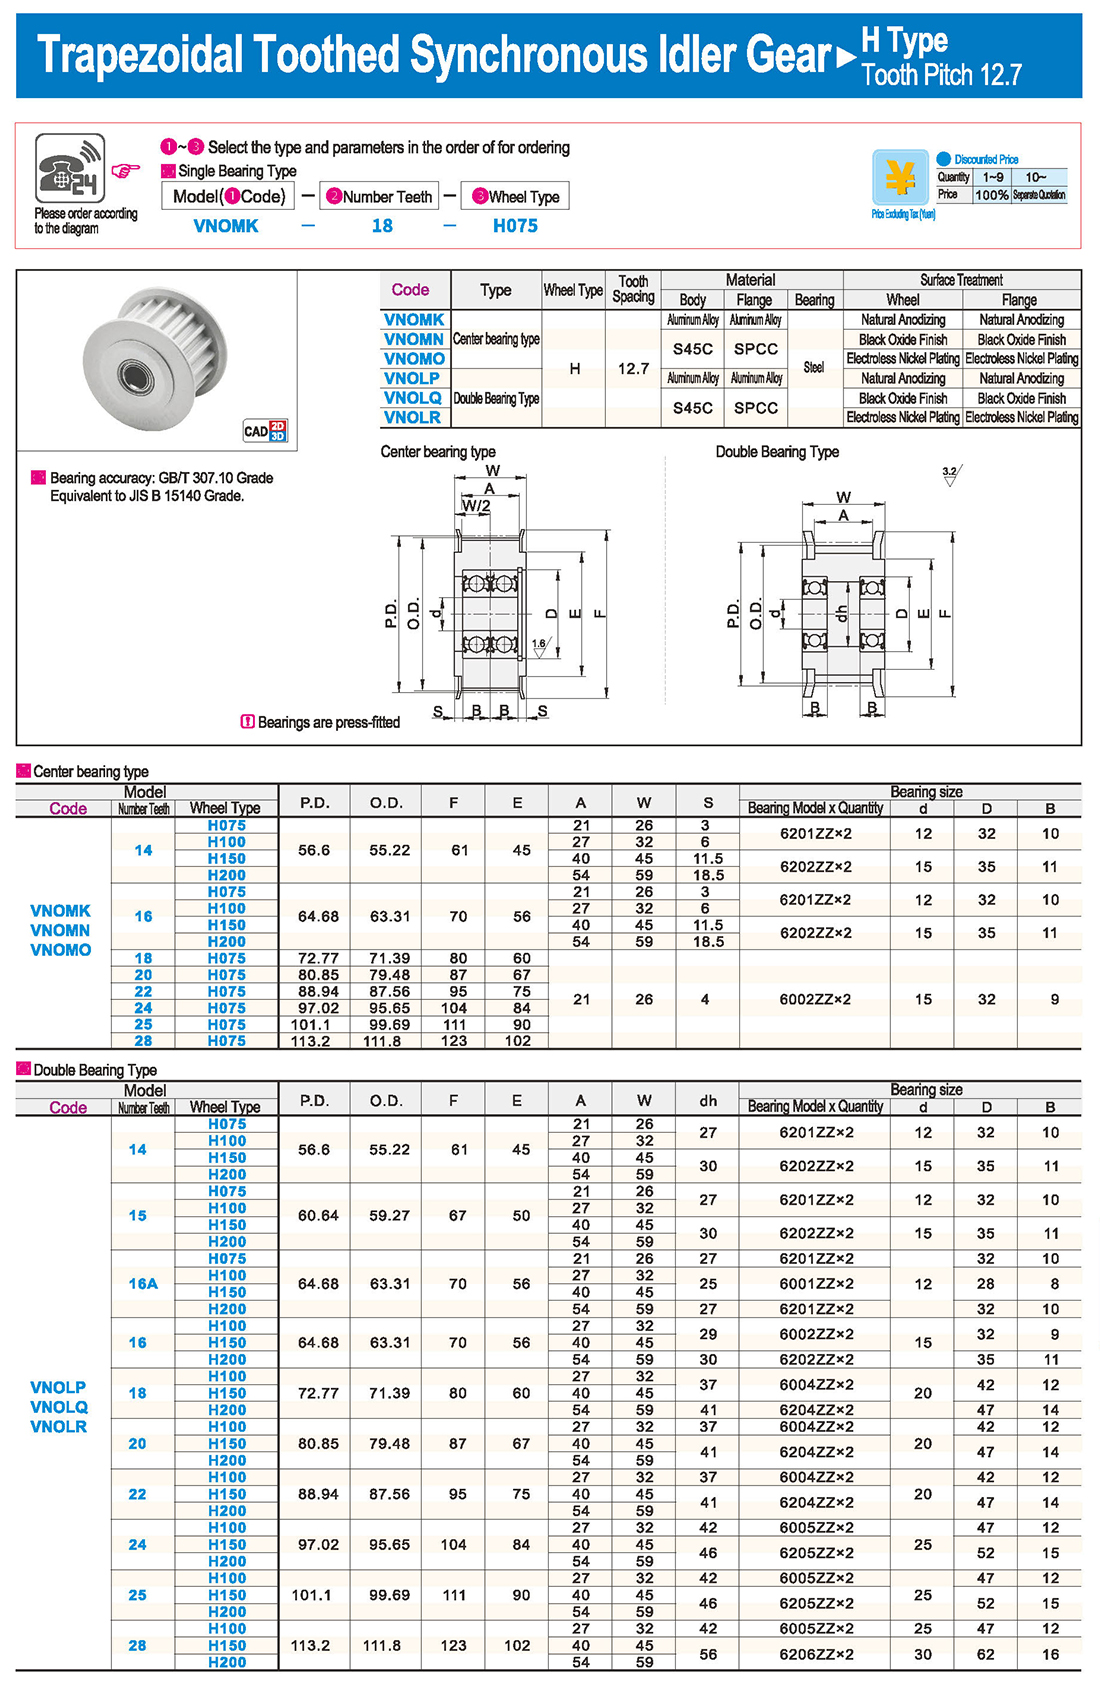
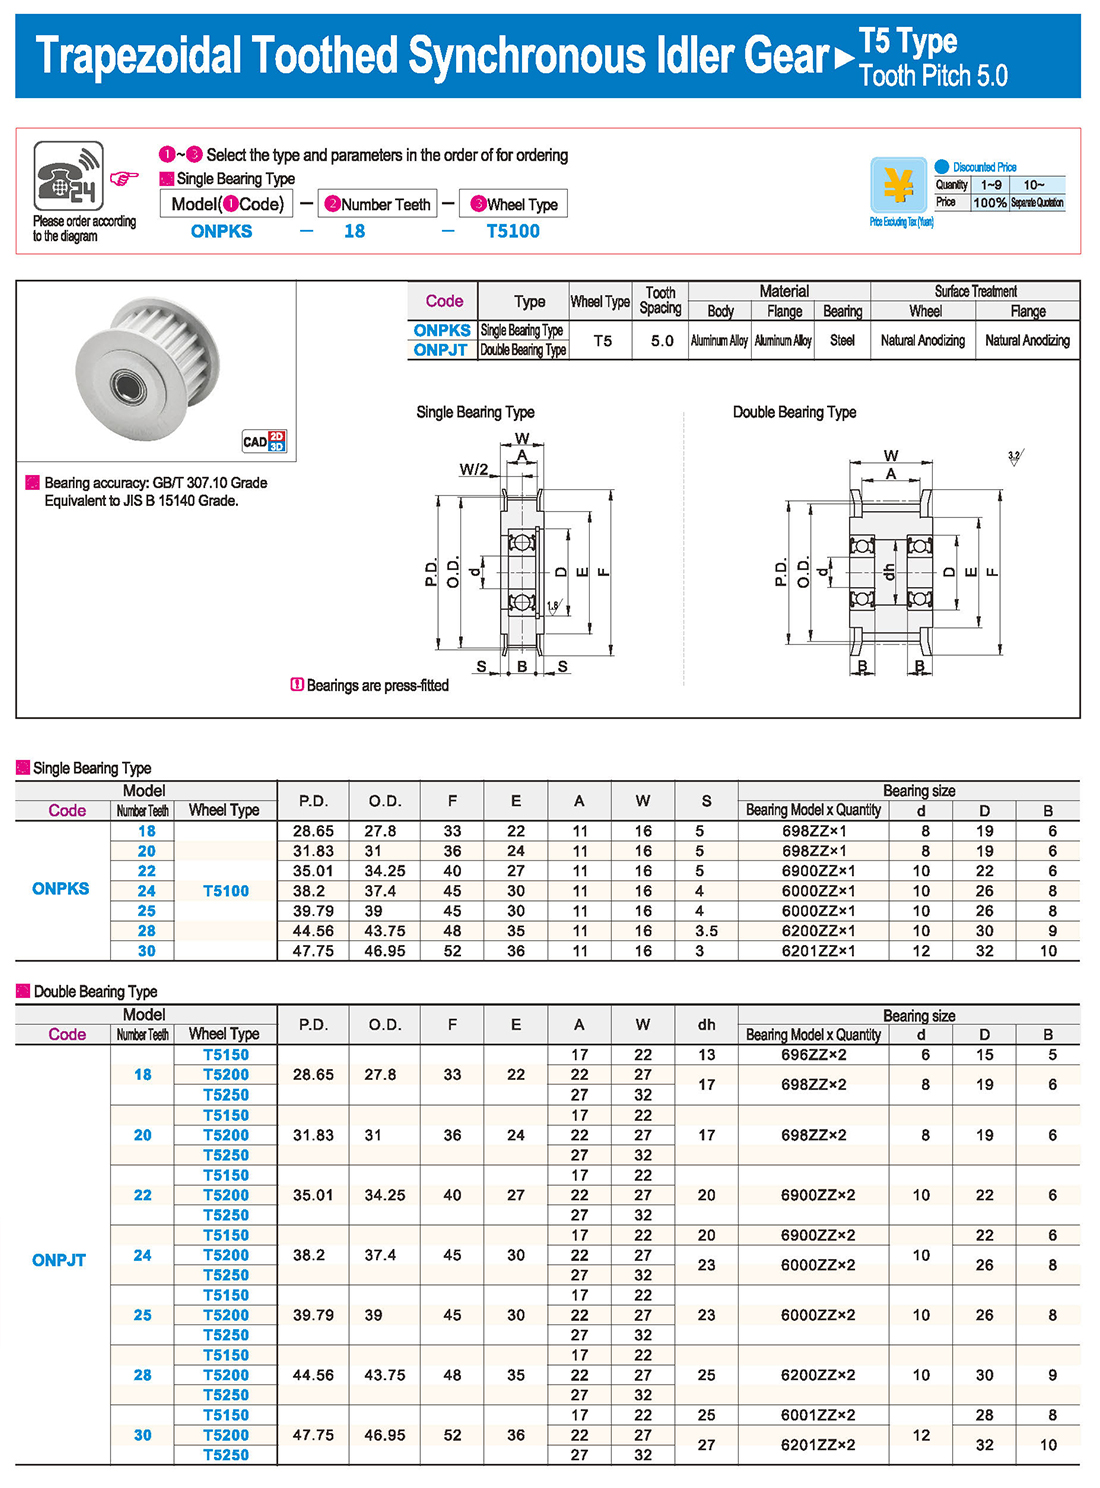
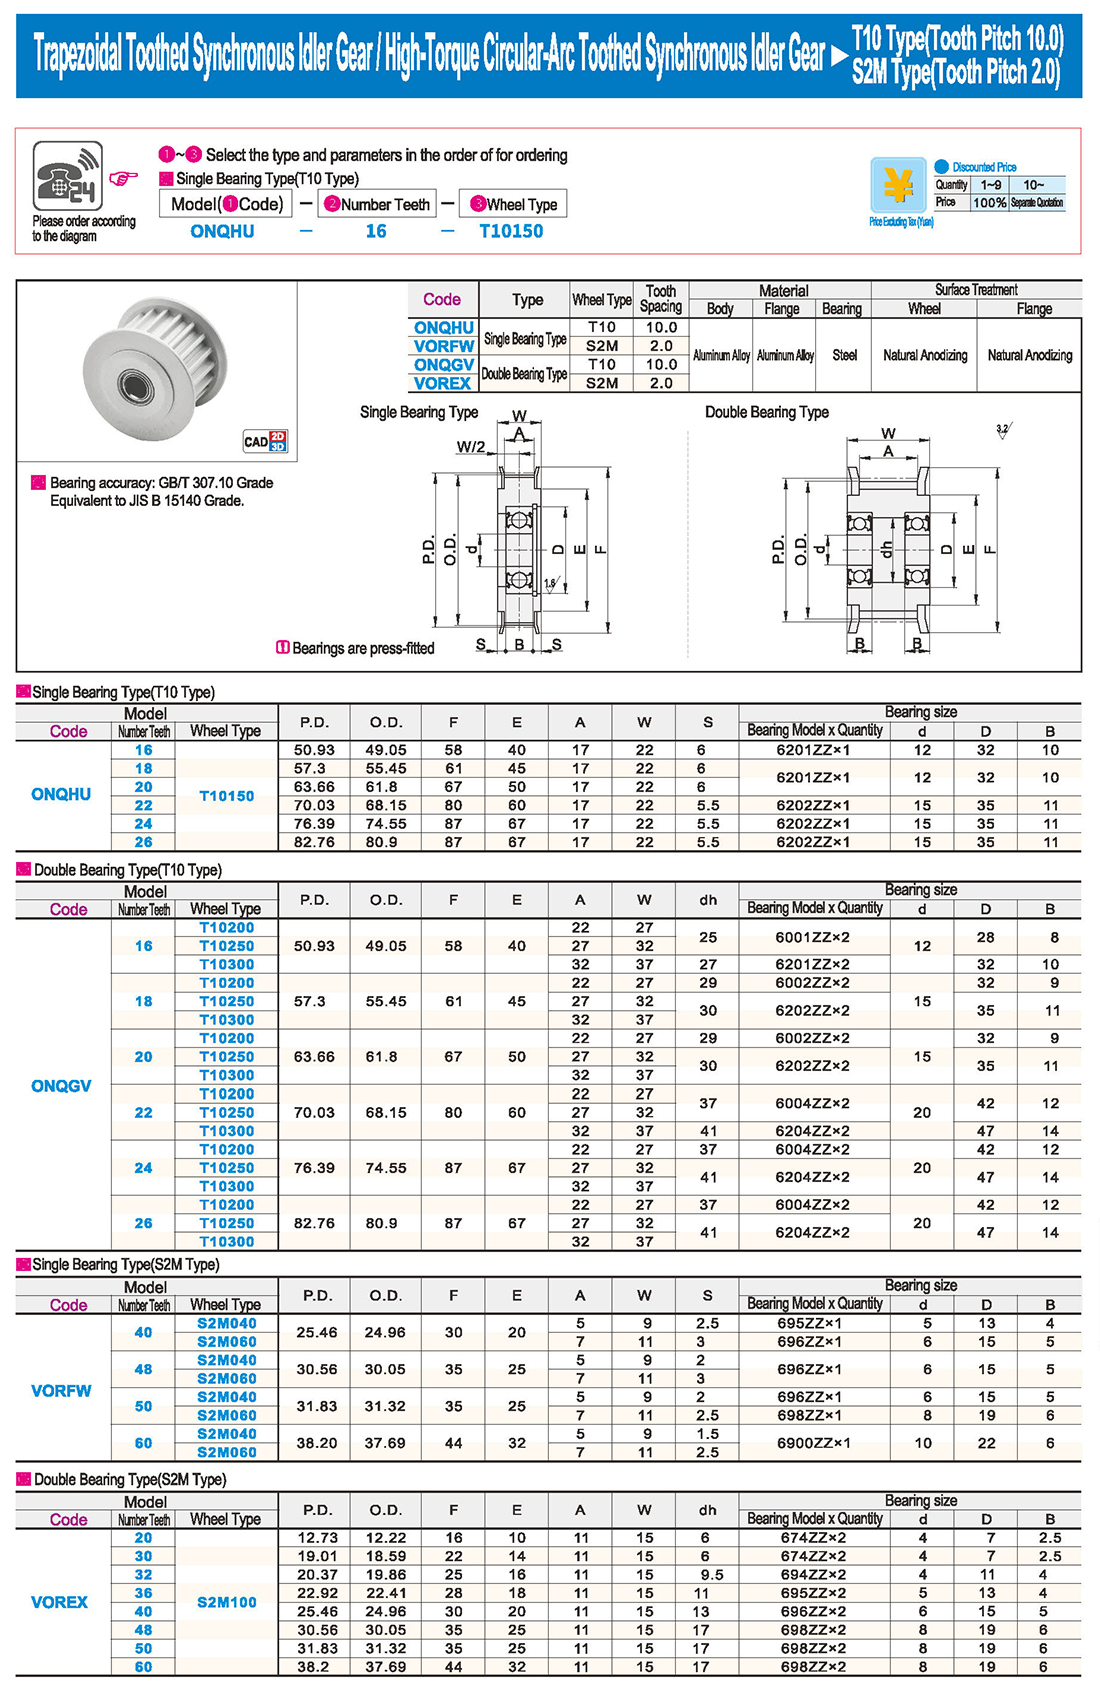
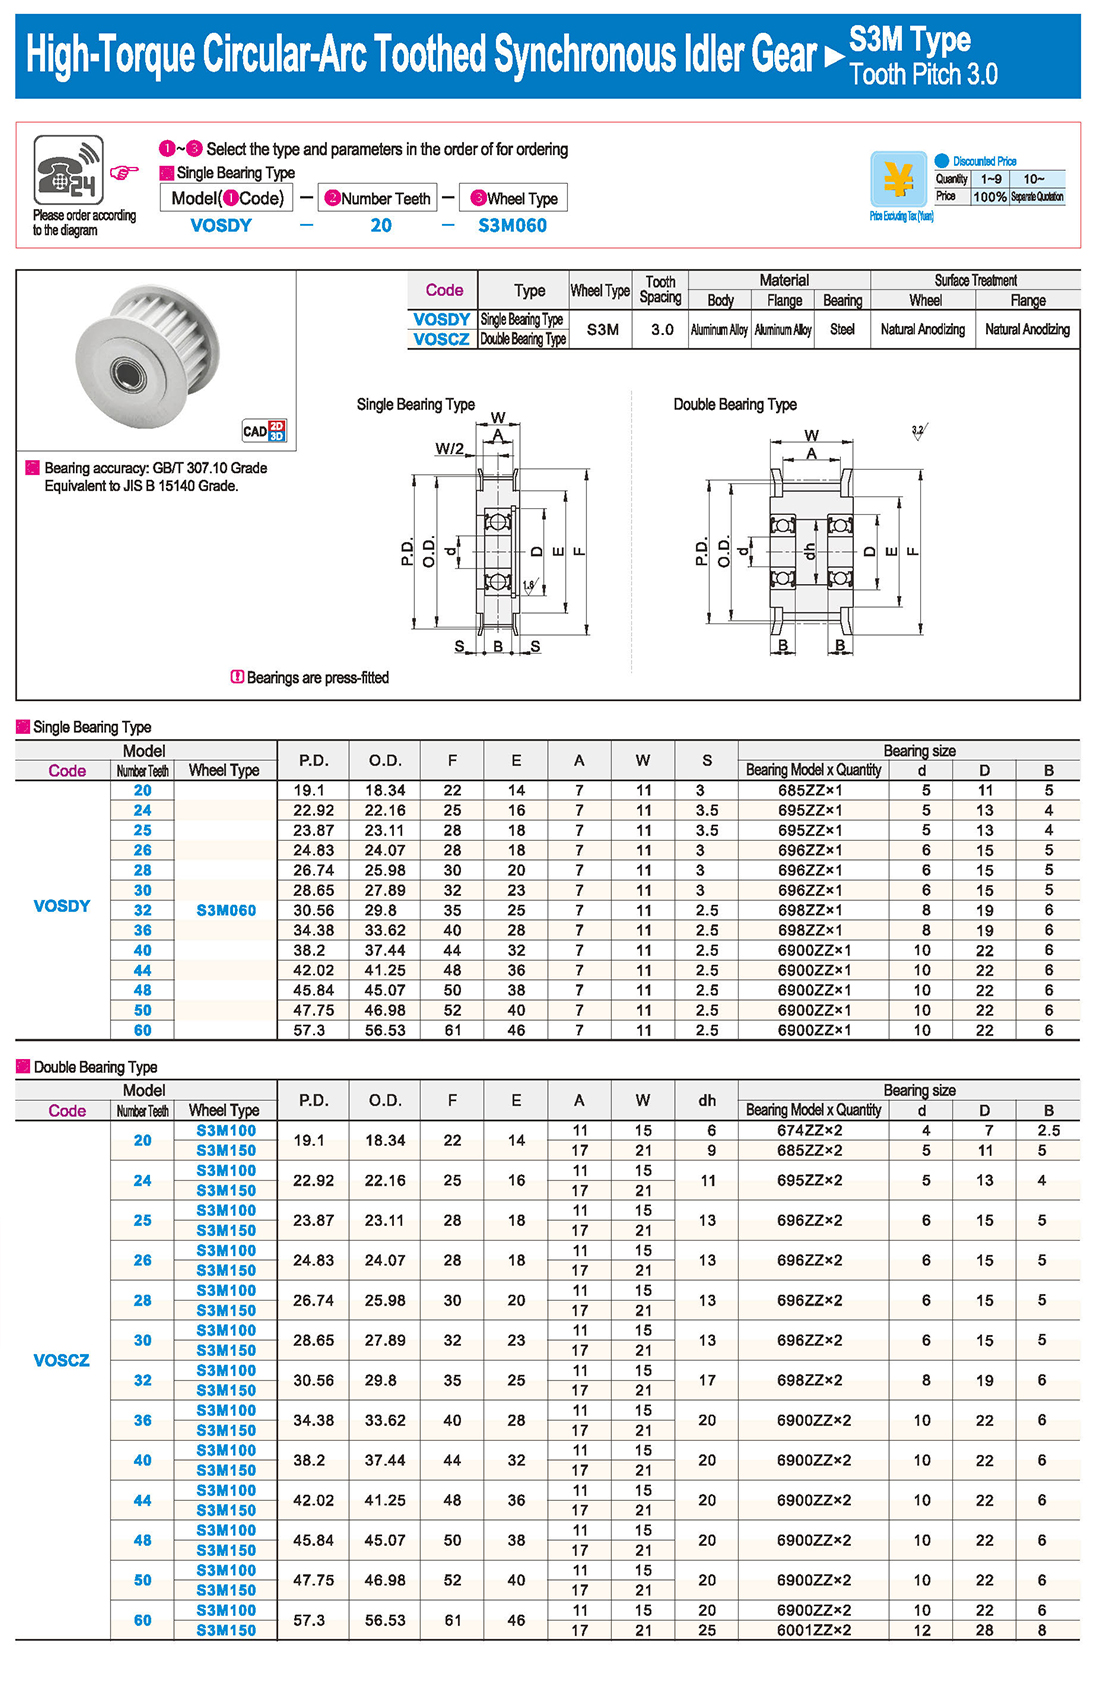
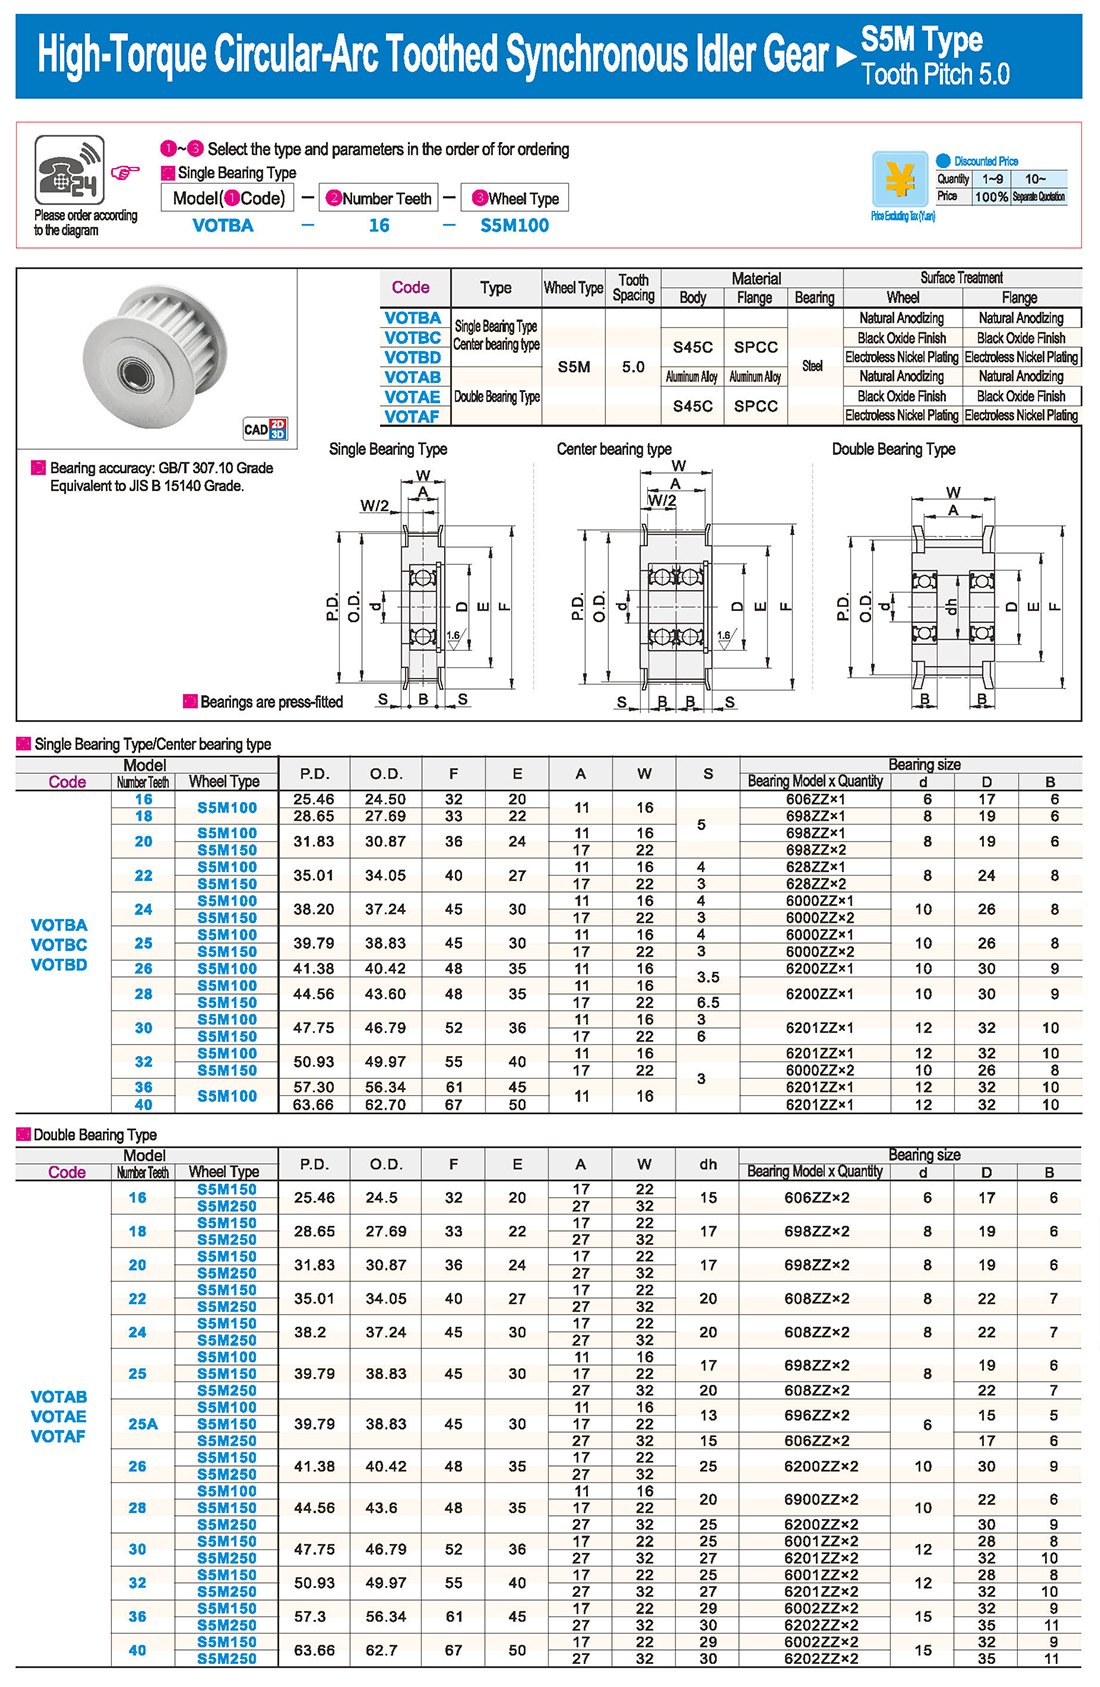
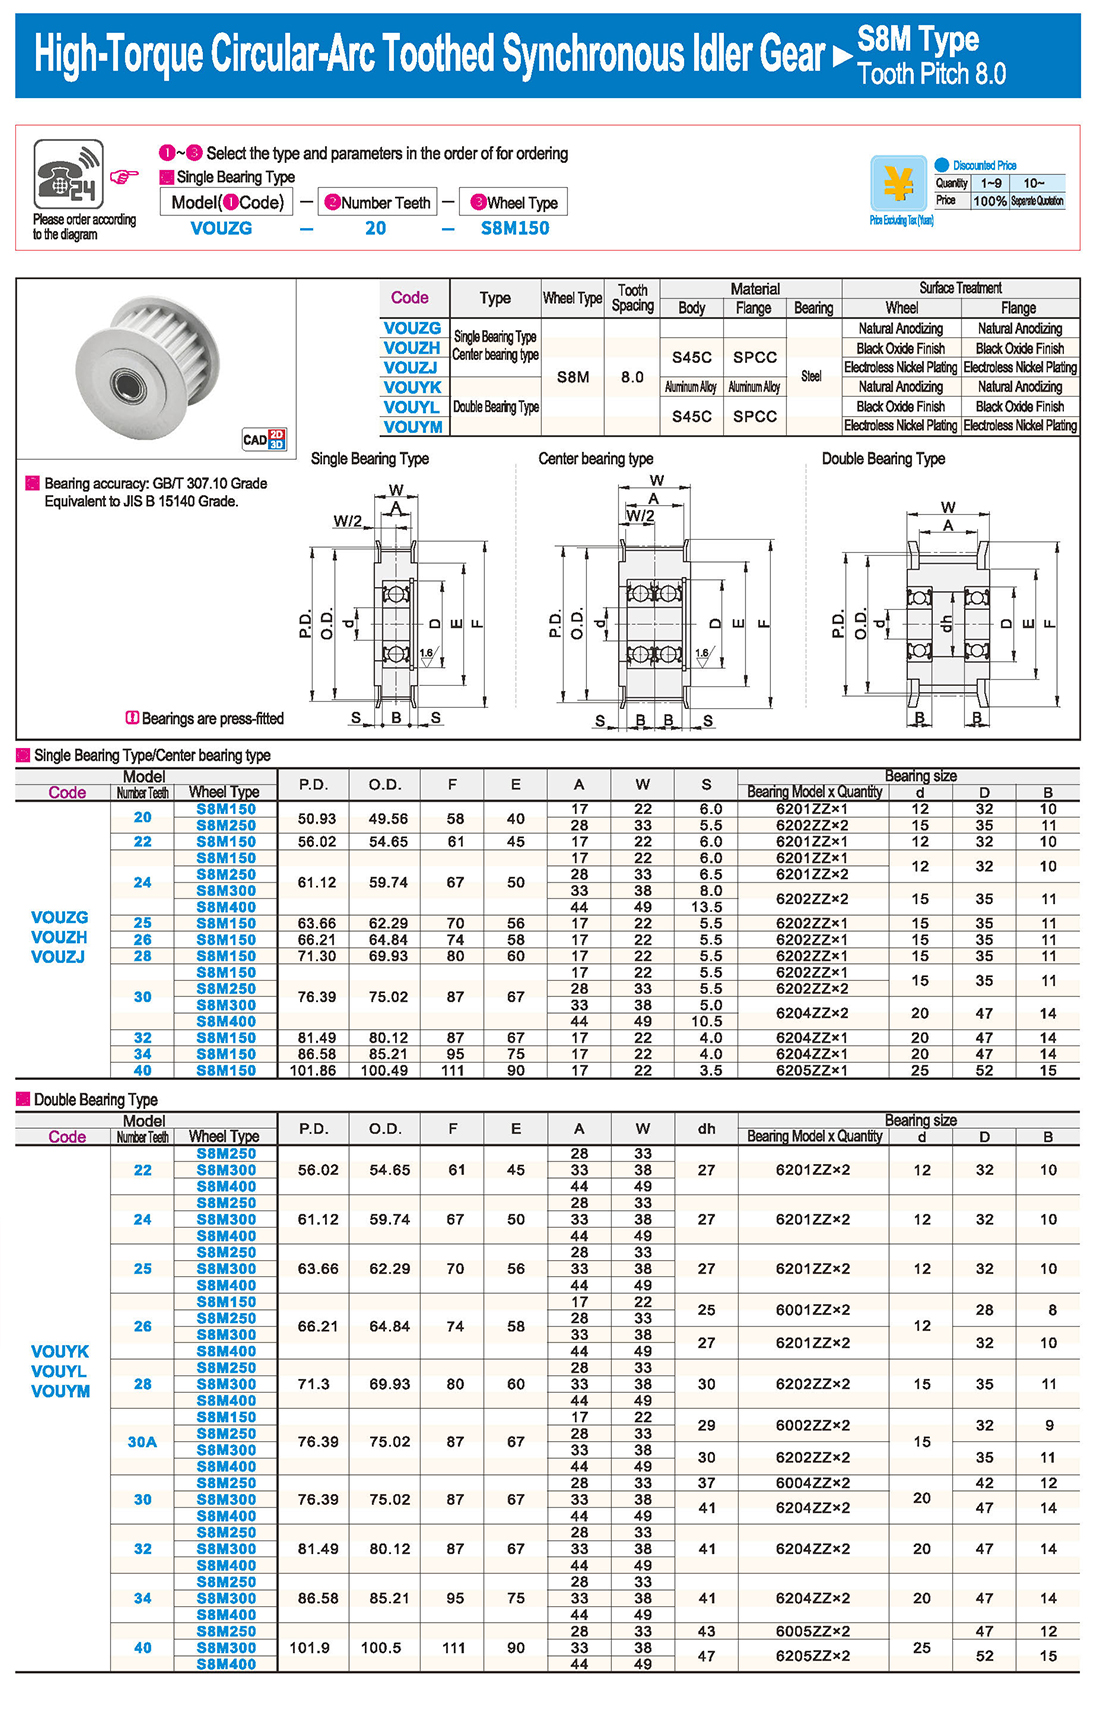
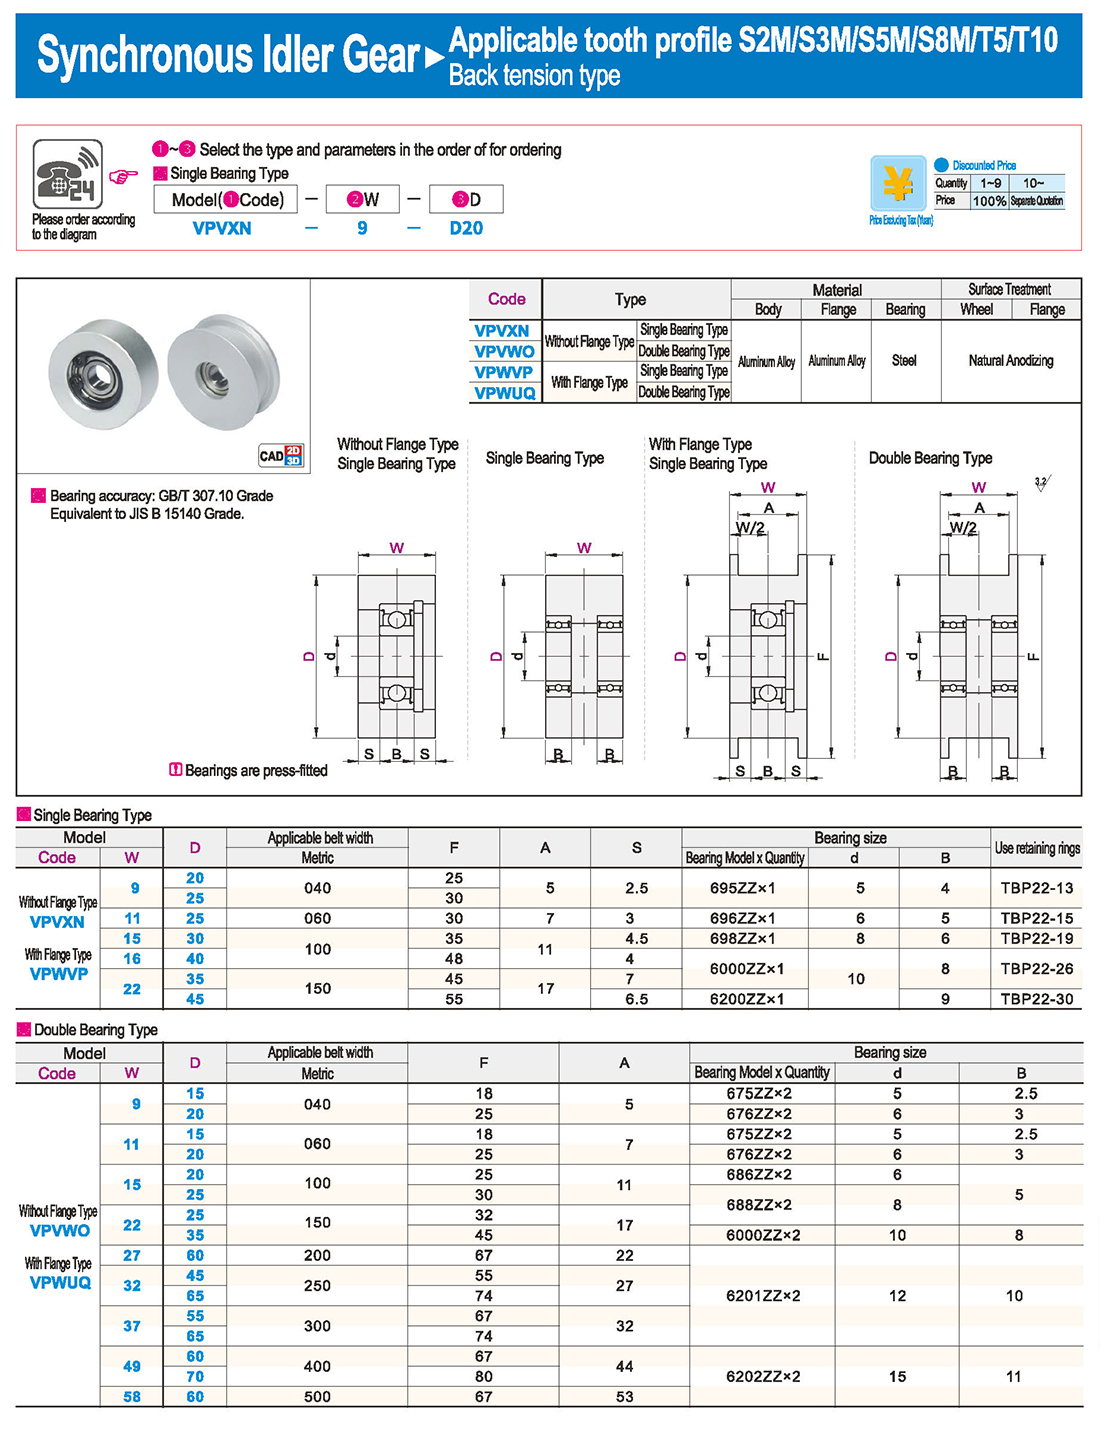
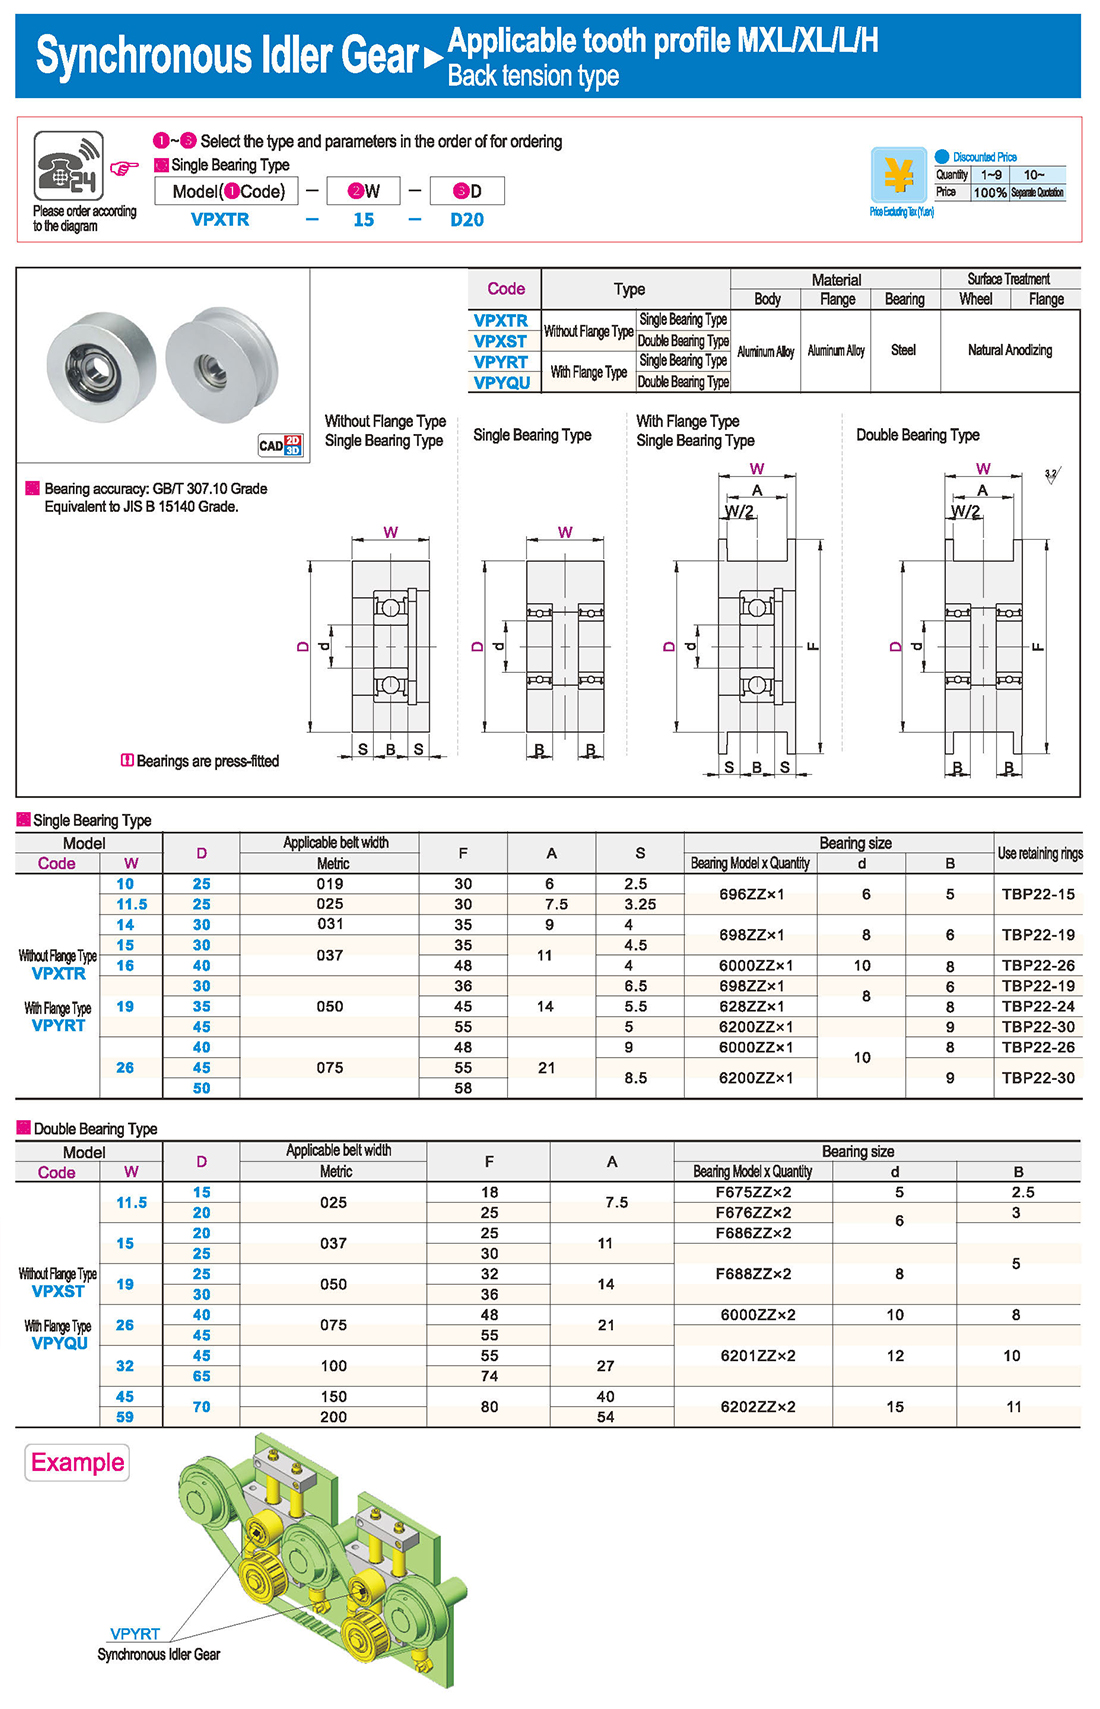
Синхронные блоки относятся к узловым компонентам, как правило, с относительно большими размерами, и их производственные процессы в основном связаны с литьем и ковкой. Более крупные литейные установки, как правило, разрабатываются с использованием таких материалов, как чугун (в силу его хороших литейных свойств), а литейная сталь используется редко (в силу ее более низких литейных свойств). Для более мелких пулей ковка является одним из вариантов, а сталь широко используется в качестве материала. Выбор различных показателей и материалов для синхронных пульлей осуществляется в соответствии с принципом минимизации сырья, обеспечения осуществимых процессов и достижения наименьших затрат при соблюдении требований к использованию. Синхронные импульсы используются в основном в сценариях, требующих передачи электроэнергии на большие расстояния, таких как мощность малых дизельных двигателей, сельскохозяйственных транспортных средств, тракторов, автомобилей, горной техники, обрабатывающего оборудования, текстильной техники, упаковочной техники, токарных станков, ковковочных прессов, малых конных двигателей мотоцикла передачи энергии, сельскохозяйственной техники передачи энергии, воздушных компрессоров, редукторов, генераторов, ginning машины и многое другое.
Особенности сайта
Точность передачи, отсутствие скачков во время работы и постоянный коэффициент передачи.
Гладкая передача, с амортизацией, амортизацией и низким уровнем шума.
Высокая эффективность передачи, достигающая 0,98, со значительным энергосбережением.
Удобство обслуживания, смазка не требуется, и низкие затраты на обслуживание.
Диапазон скоростей, как правило, до 10, с линейной скоростью до 50 м/с. Способен передавать большой диапазон мощности, от нескольких ватт до сотен ватт.
Подходит для передачи на большие расстояния, с центром расстояния более 10 м.
Возможность работы в местах, где загрязнение не допускается и где условия труда являются тяжелыми.
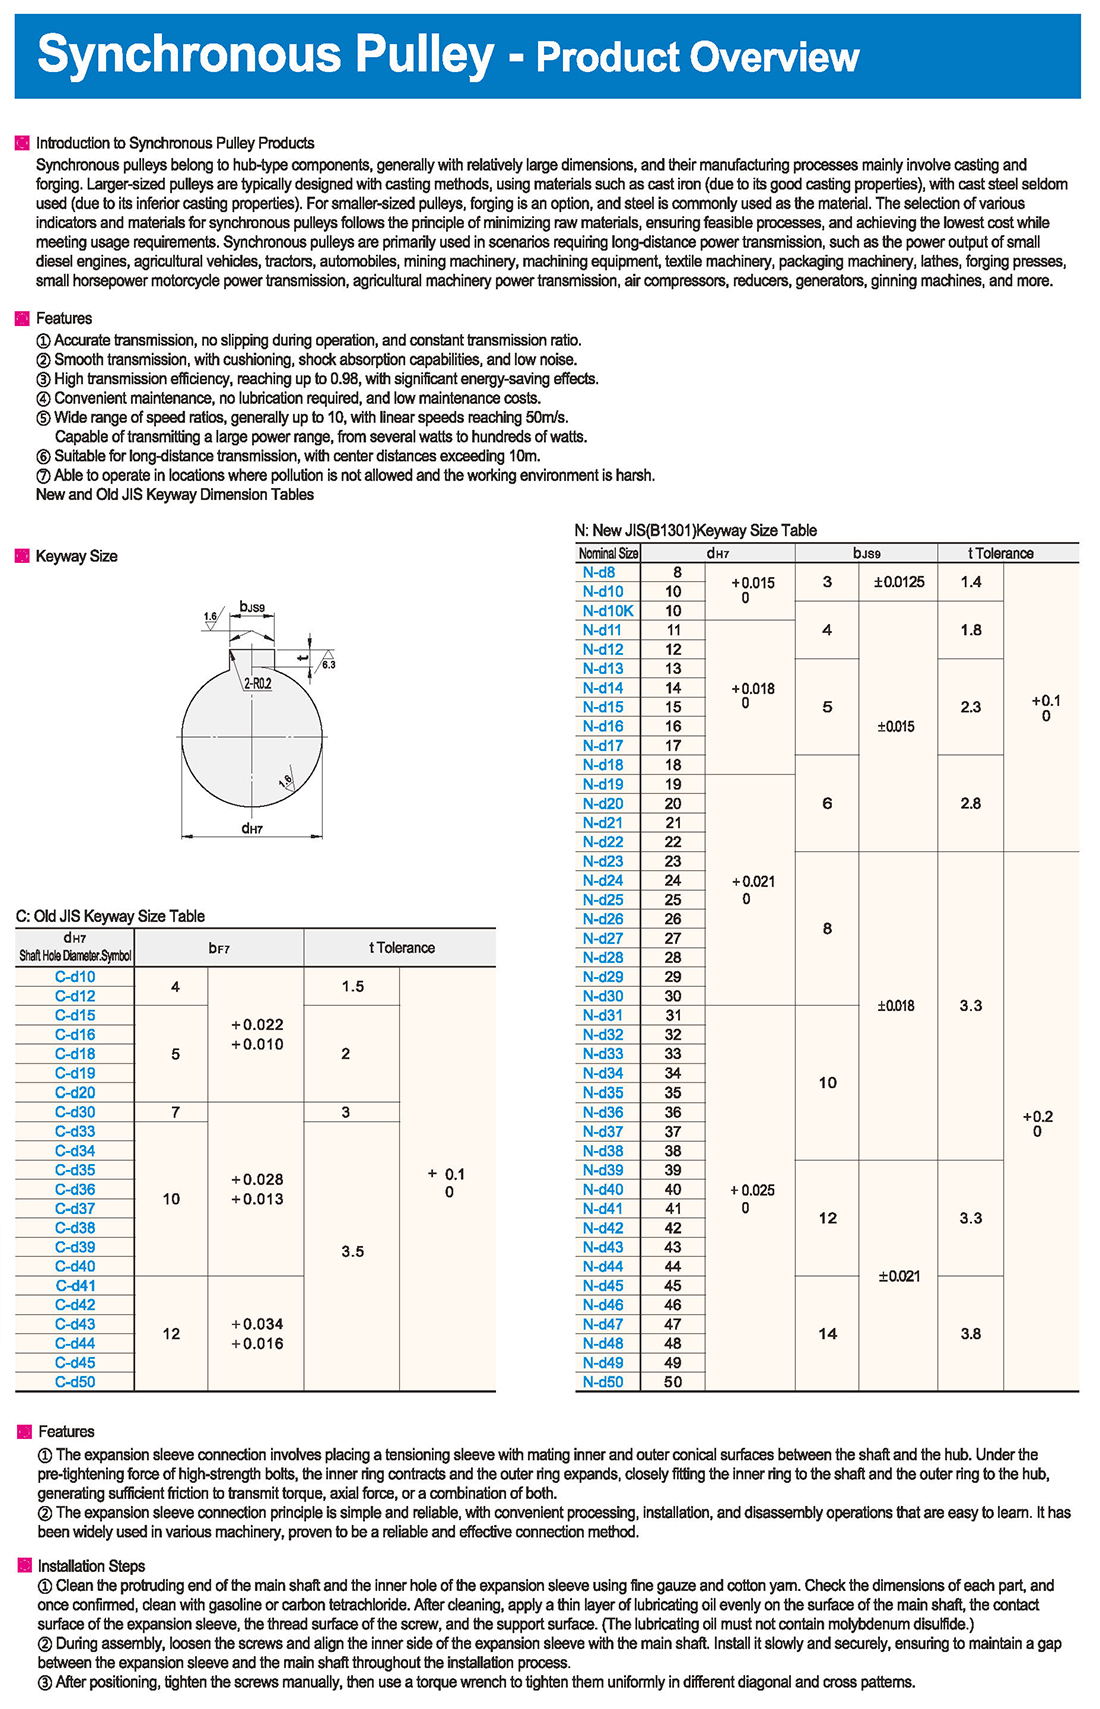
Новые и старые таблицы измерения JIS Keyway
Подшипники CAM могут выдерживать большие радиальные и осевые нагрузки, а также ударные и вибрационные нагрузки, подходящие для различных тяжелых условий работы.
Features
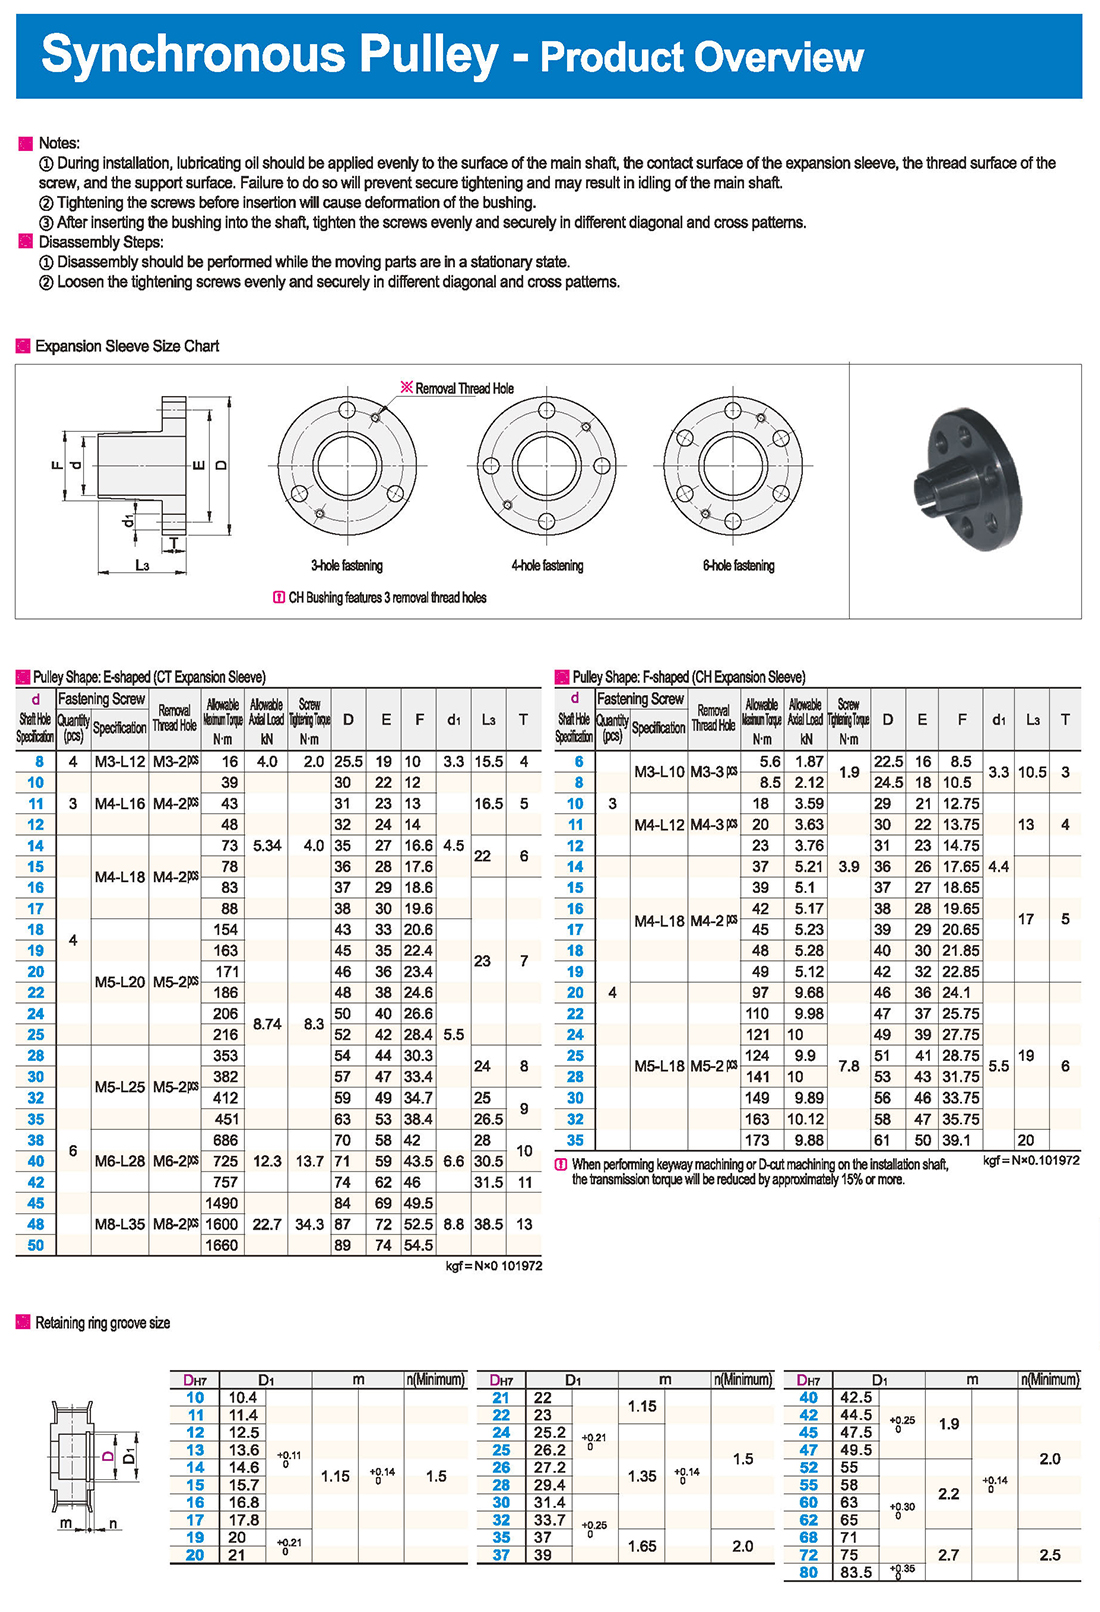
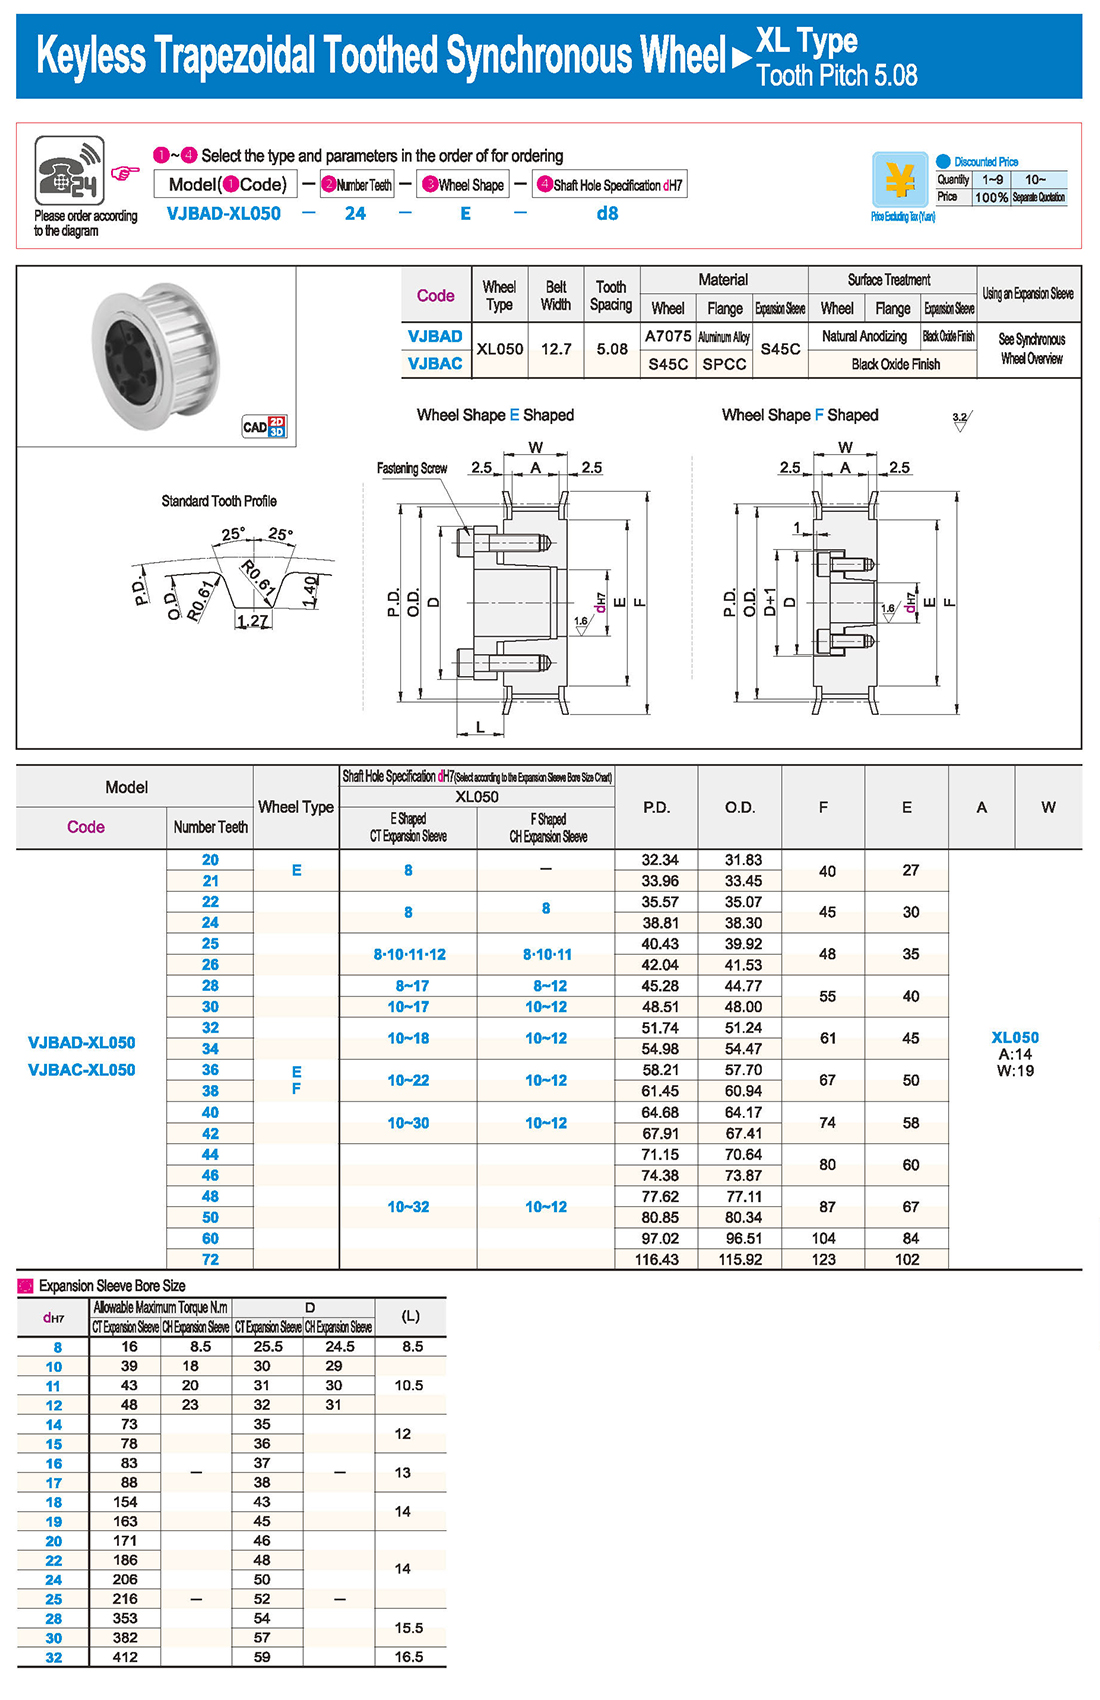
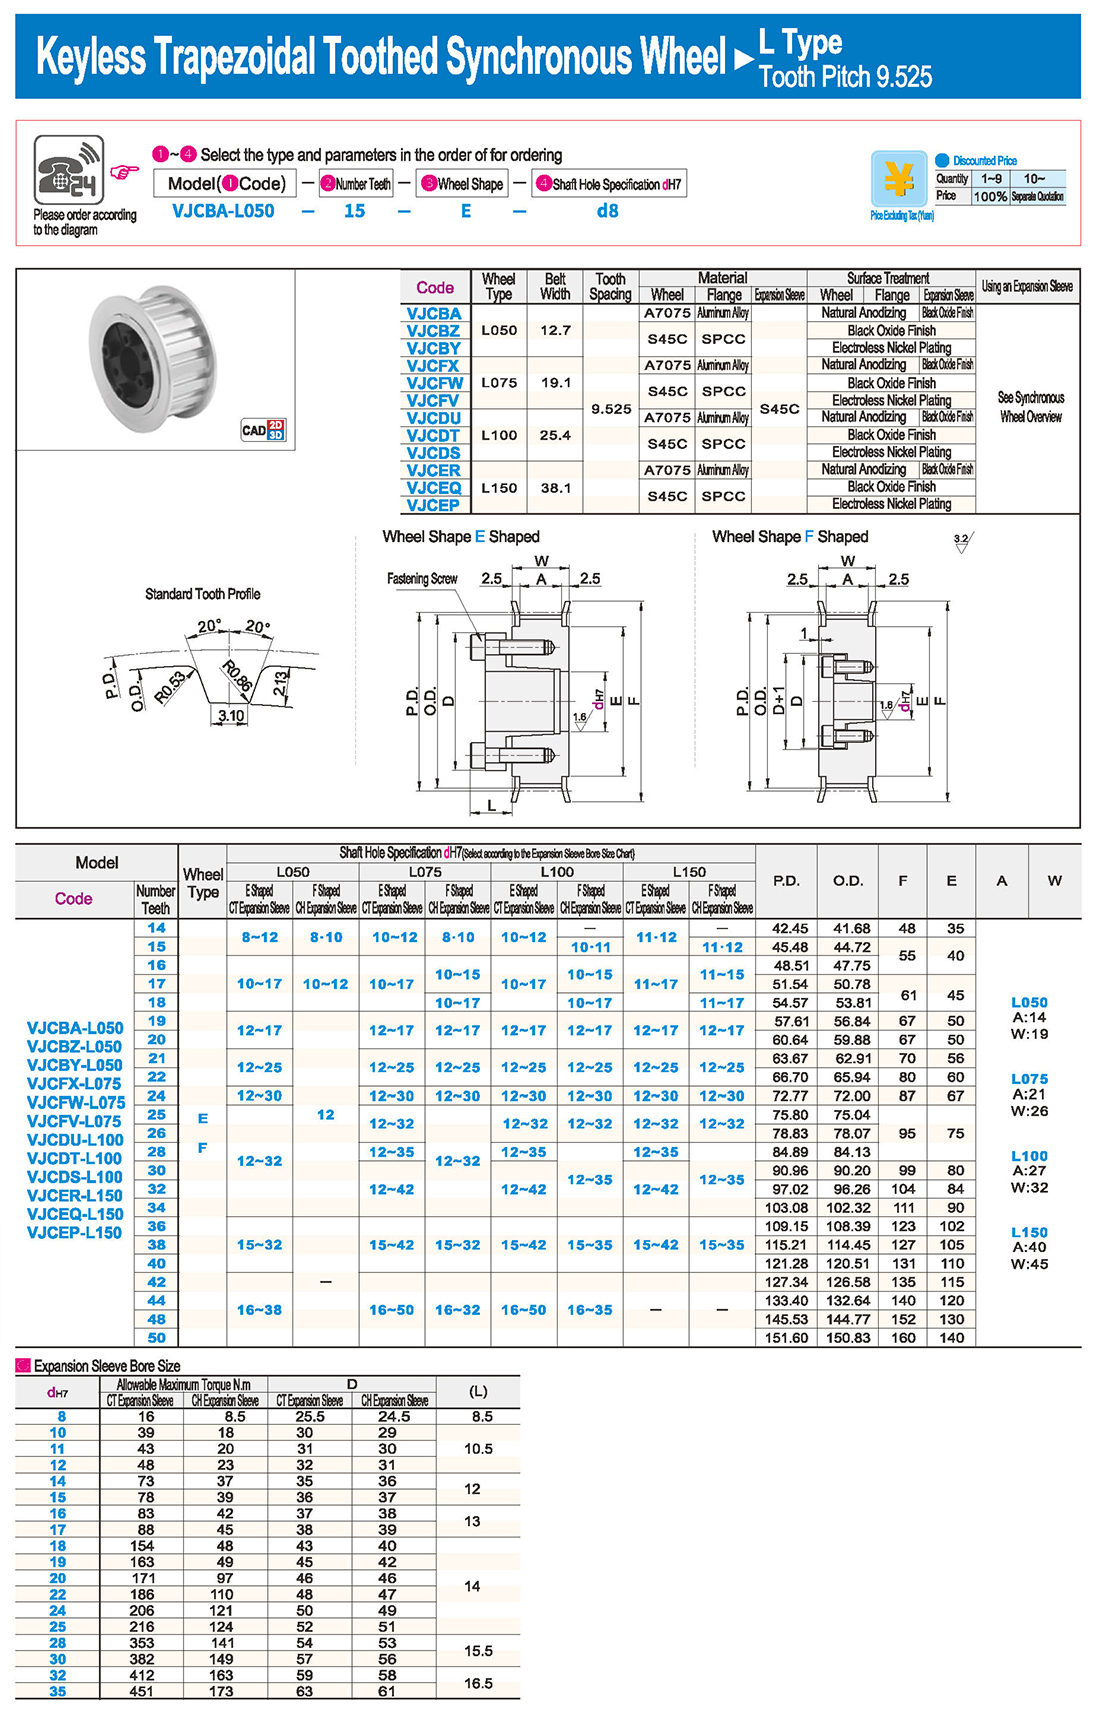
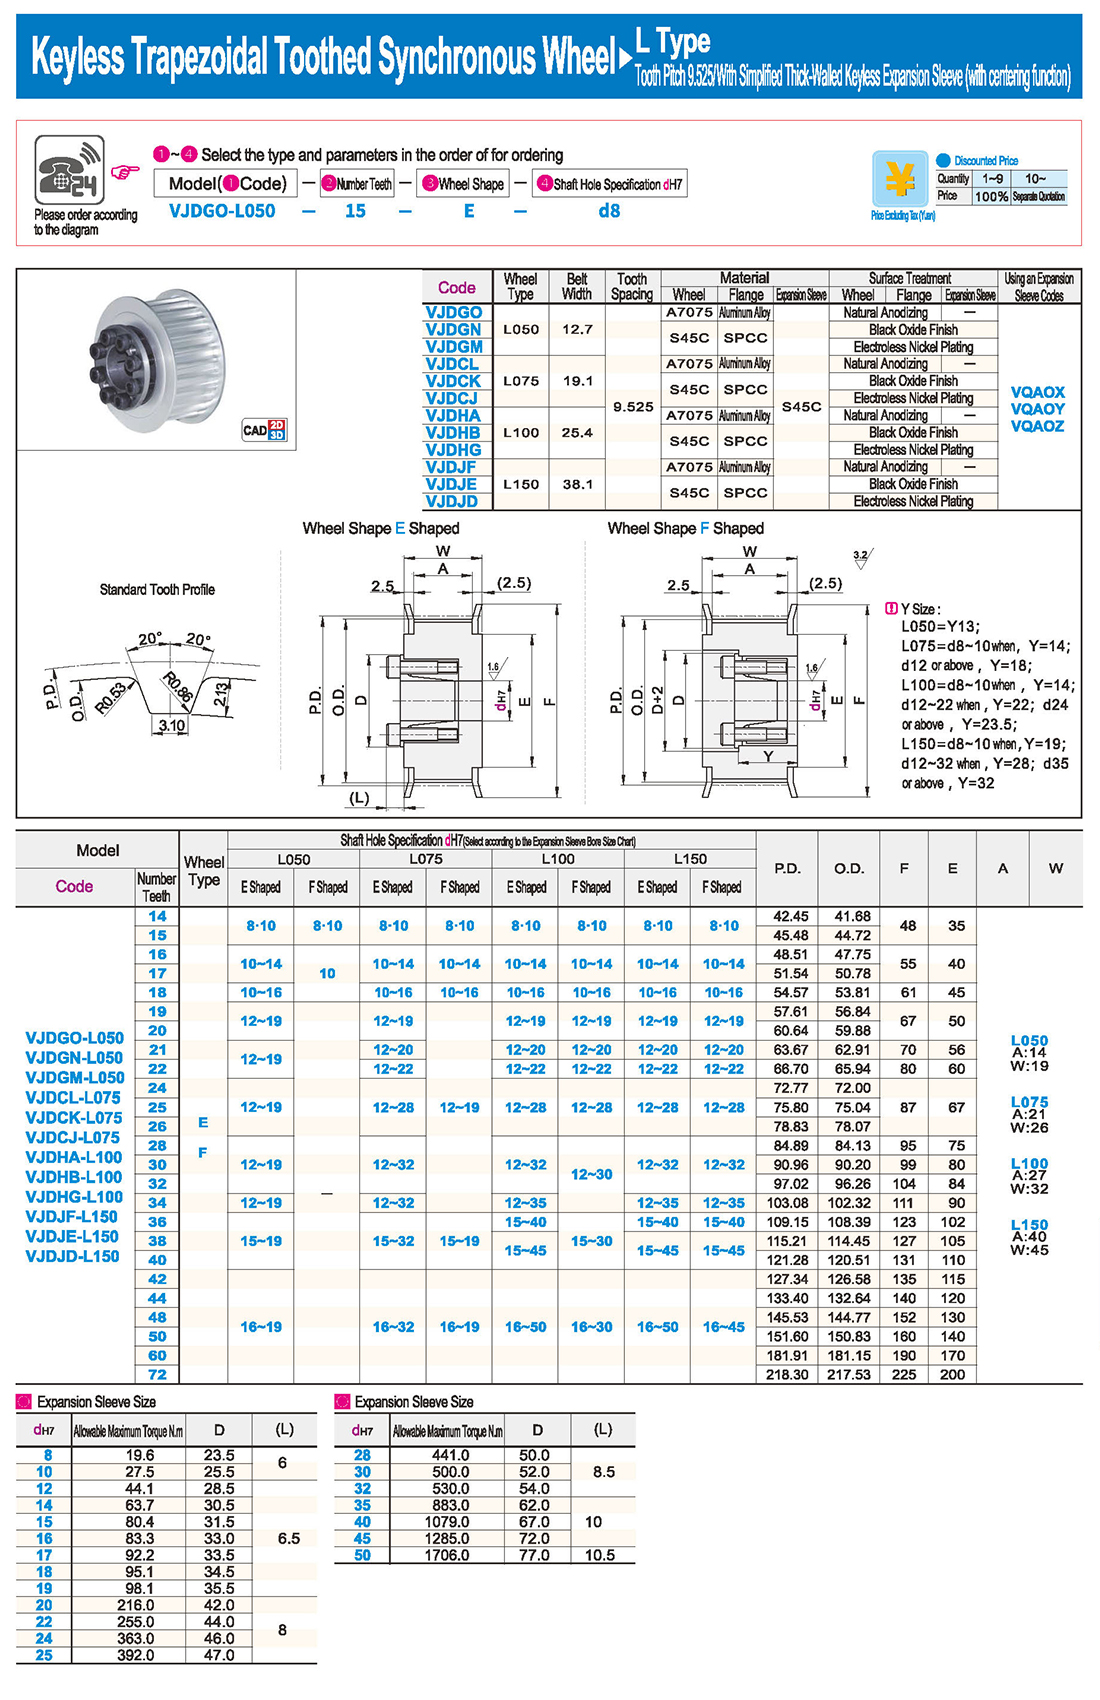
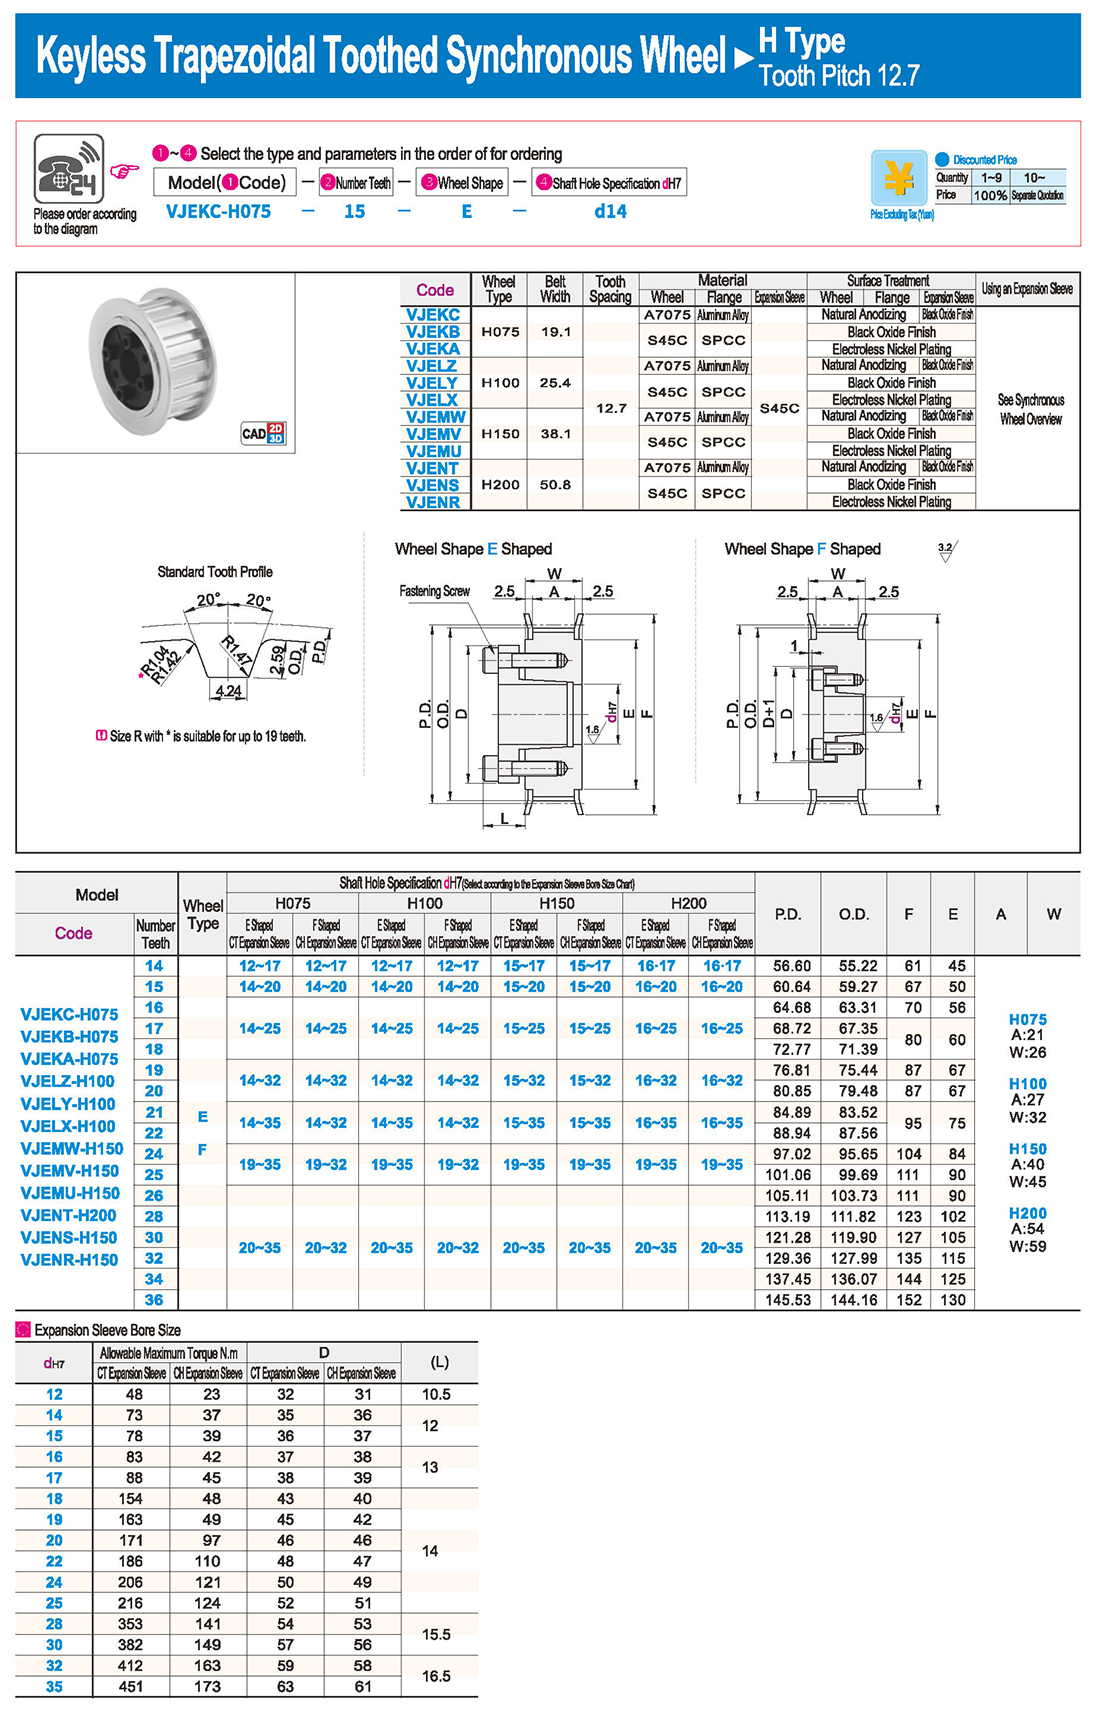
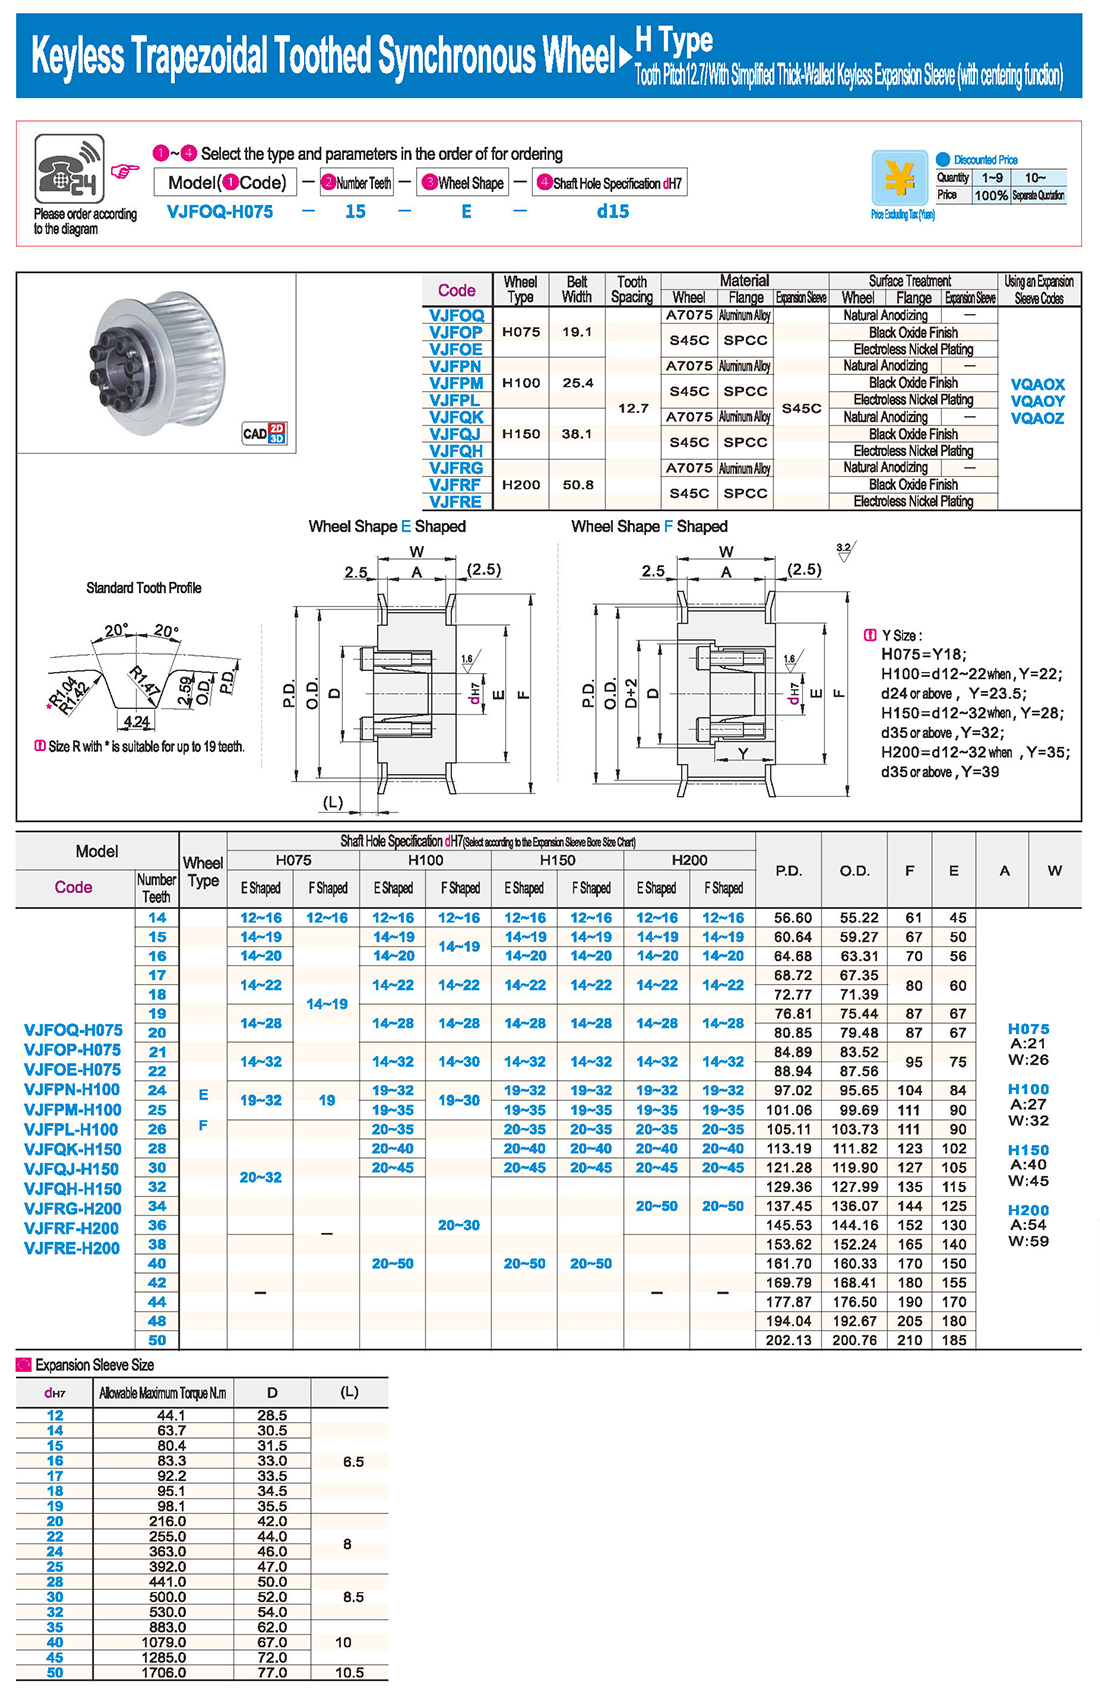
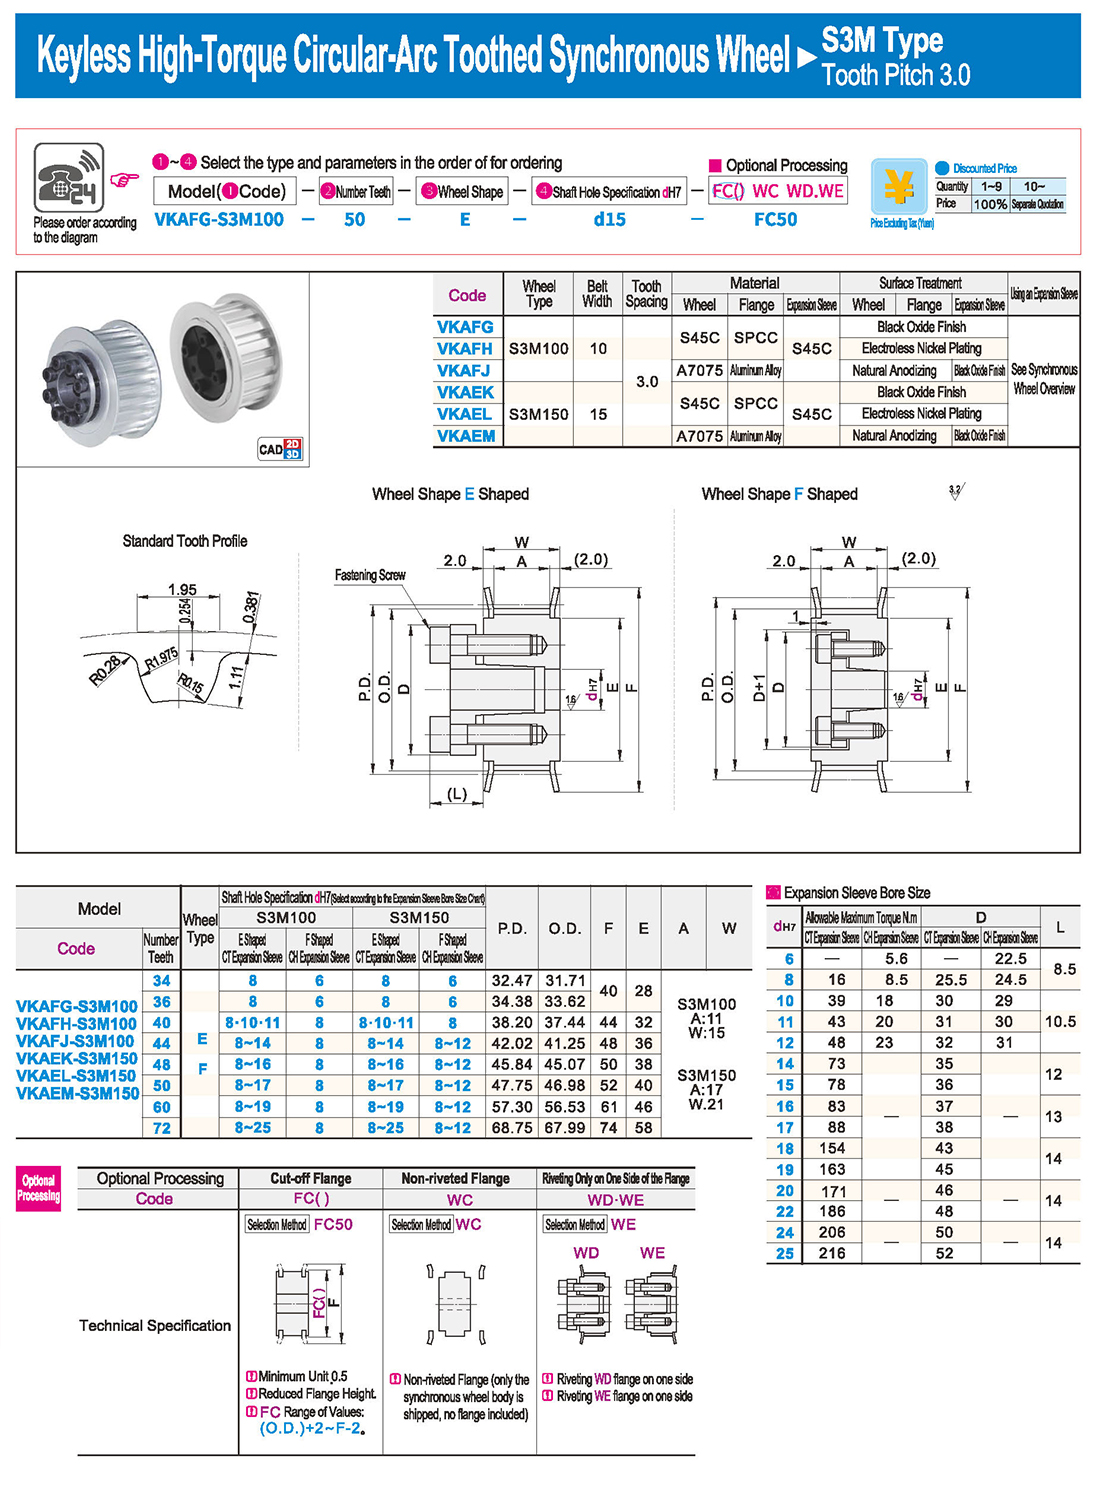
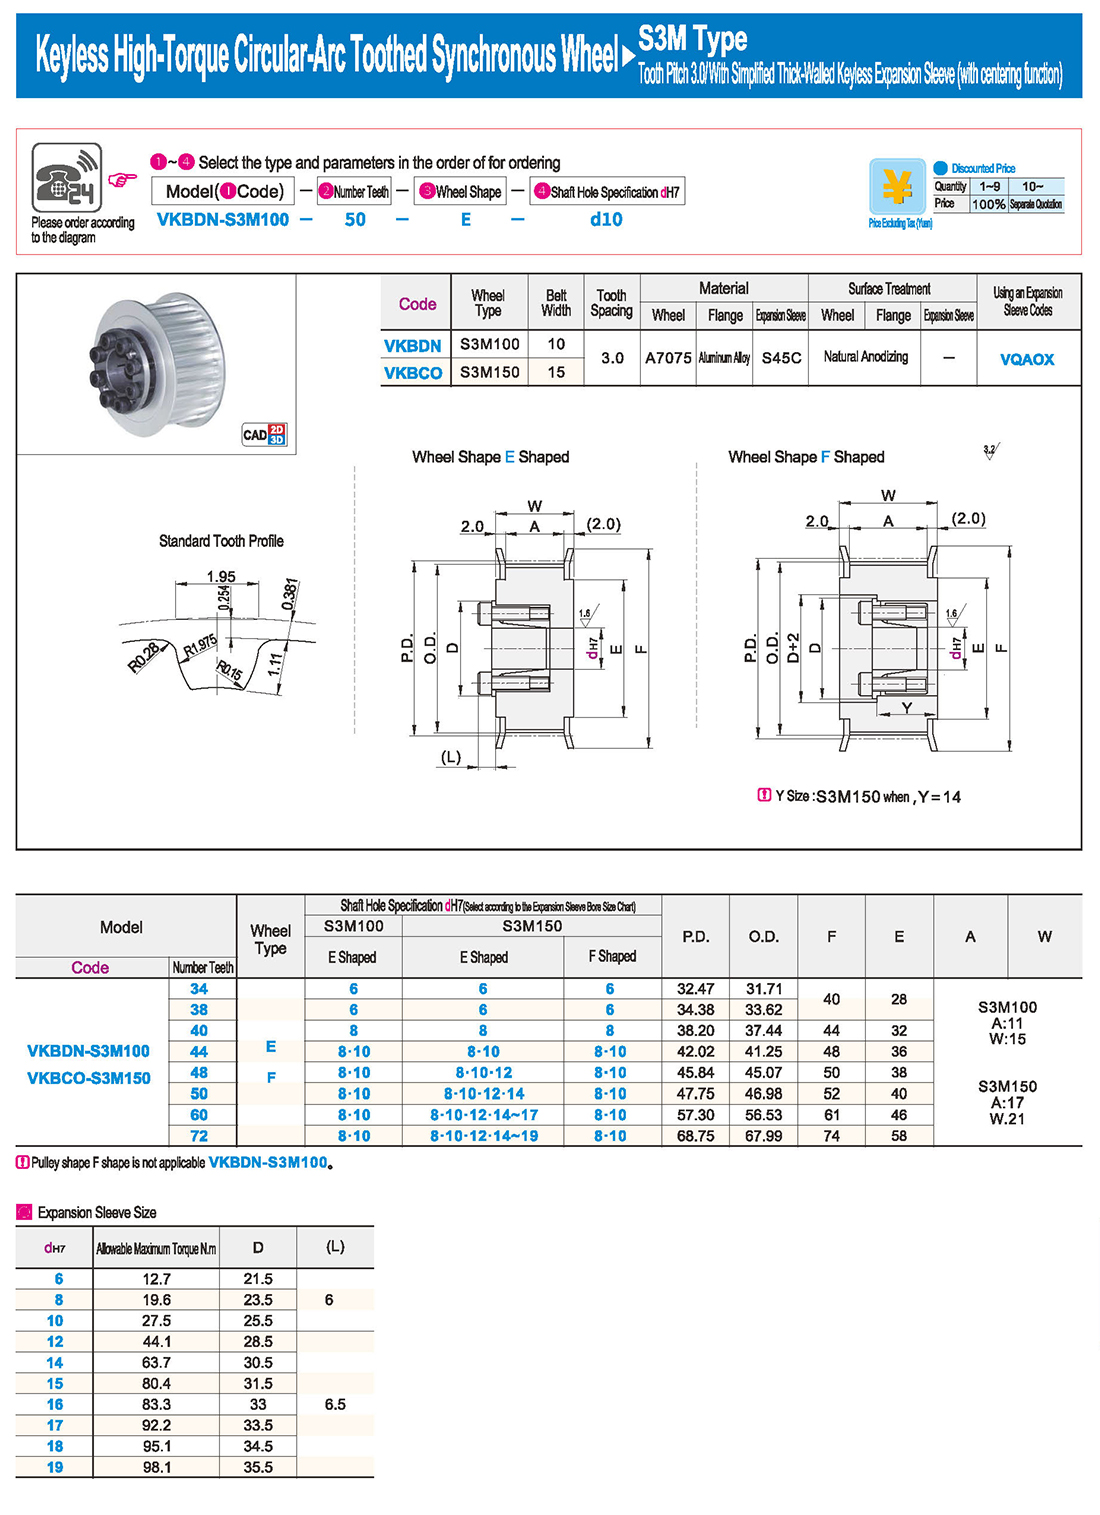
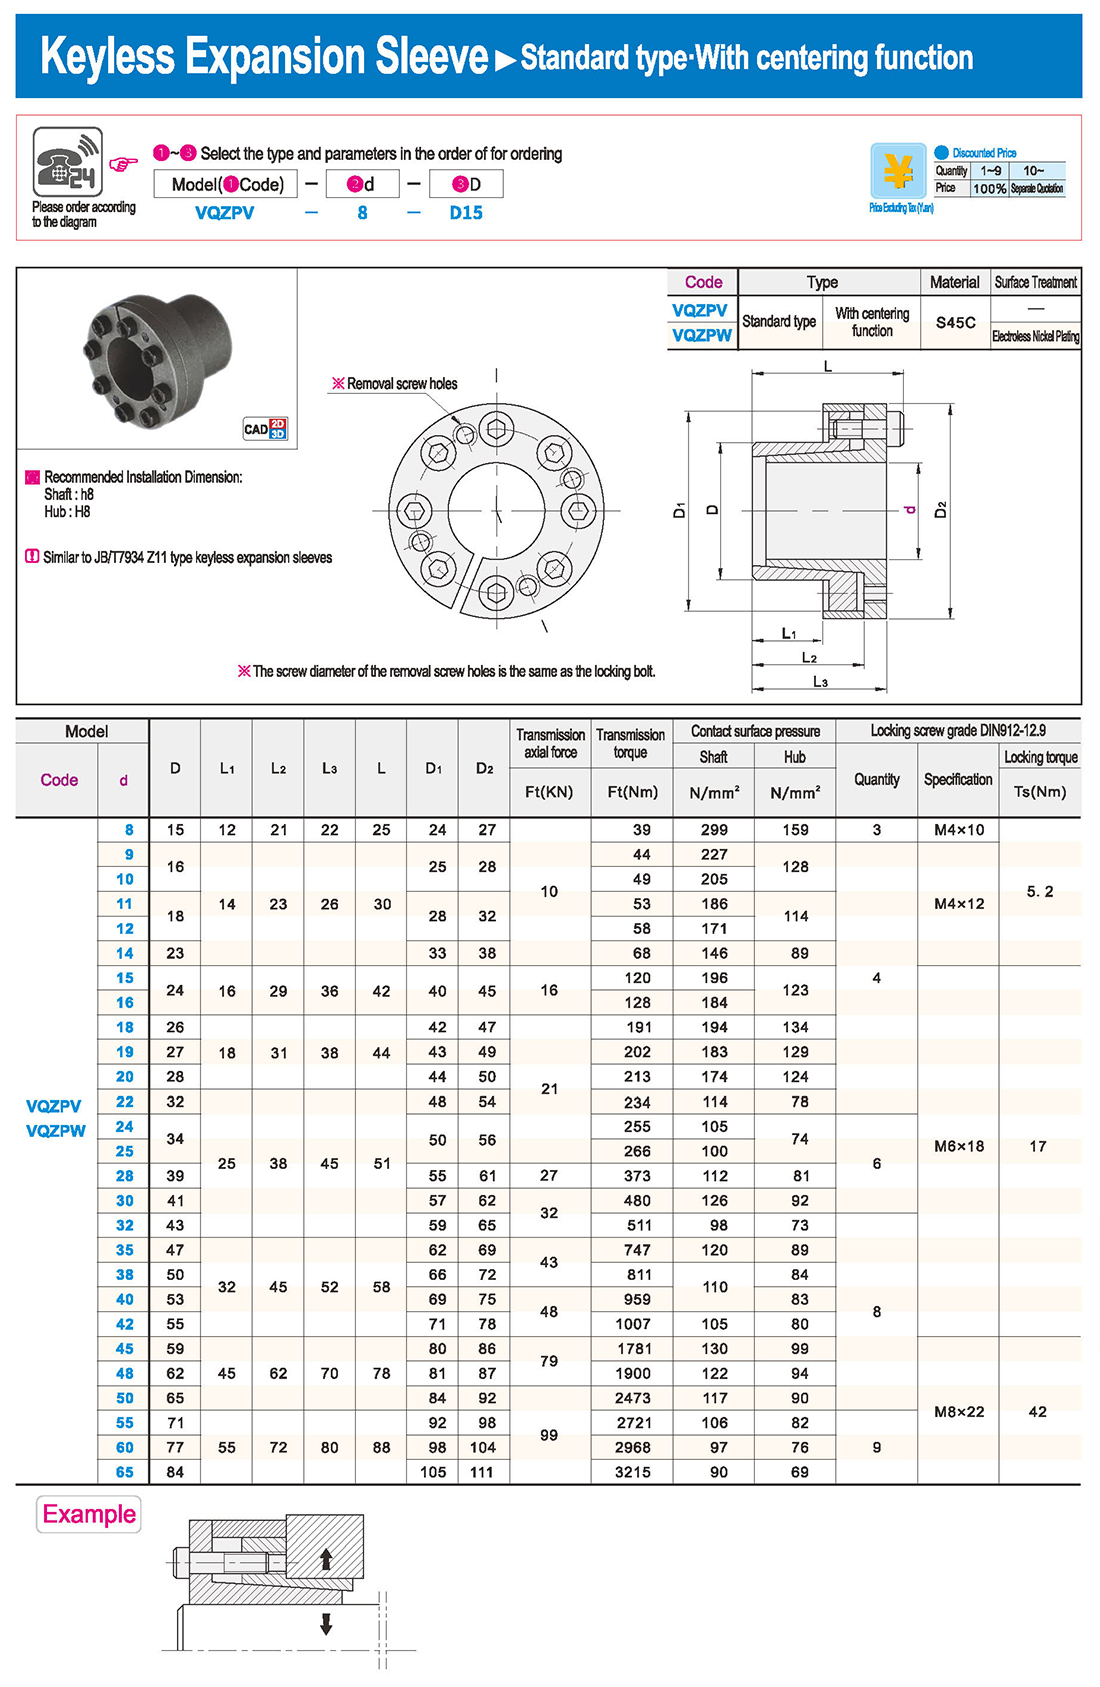
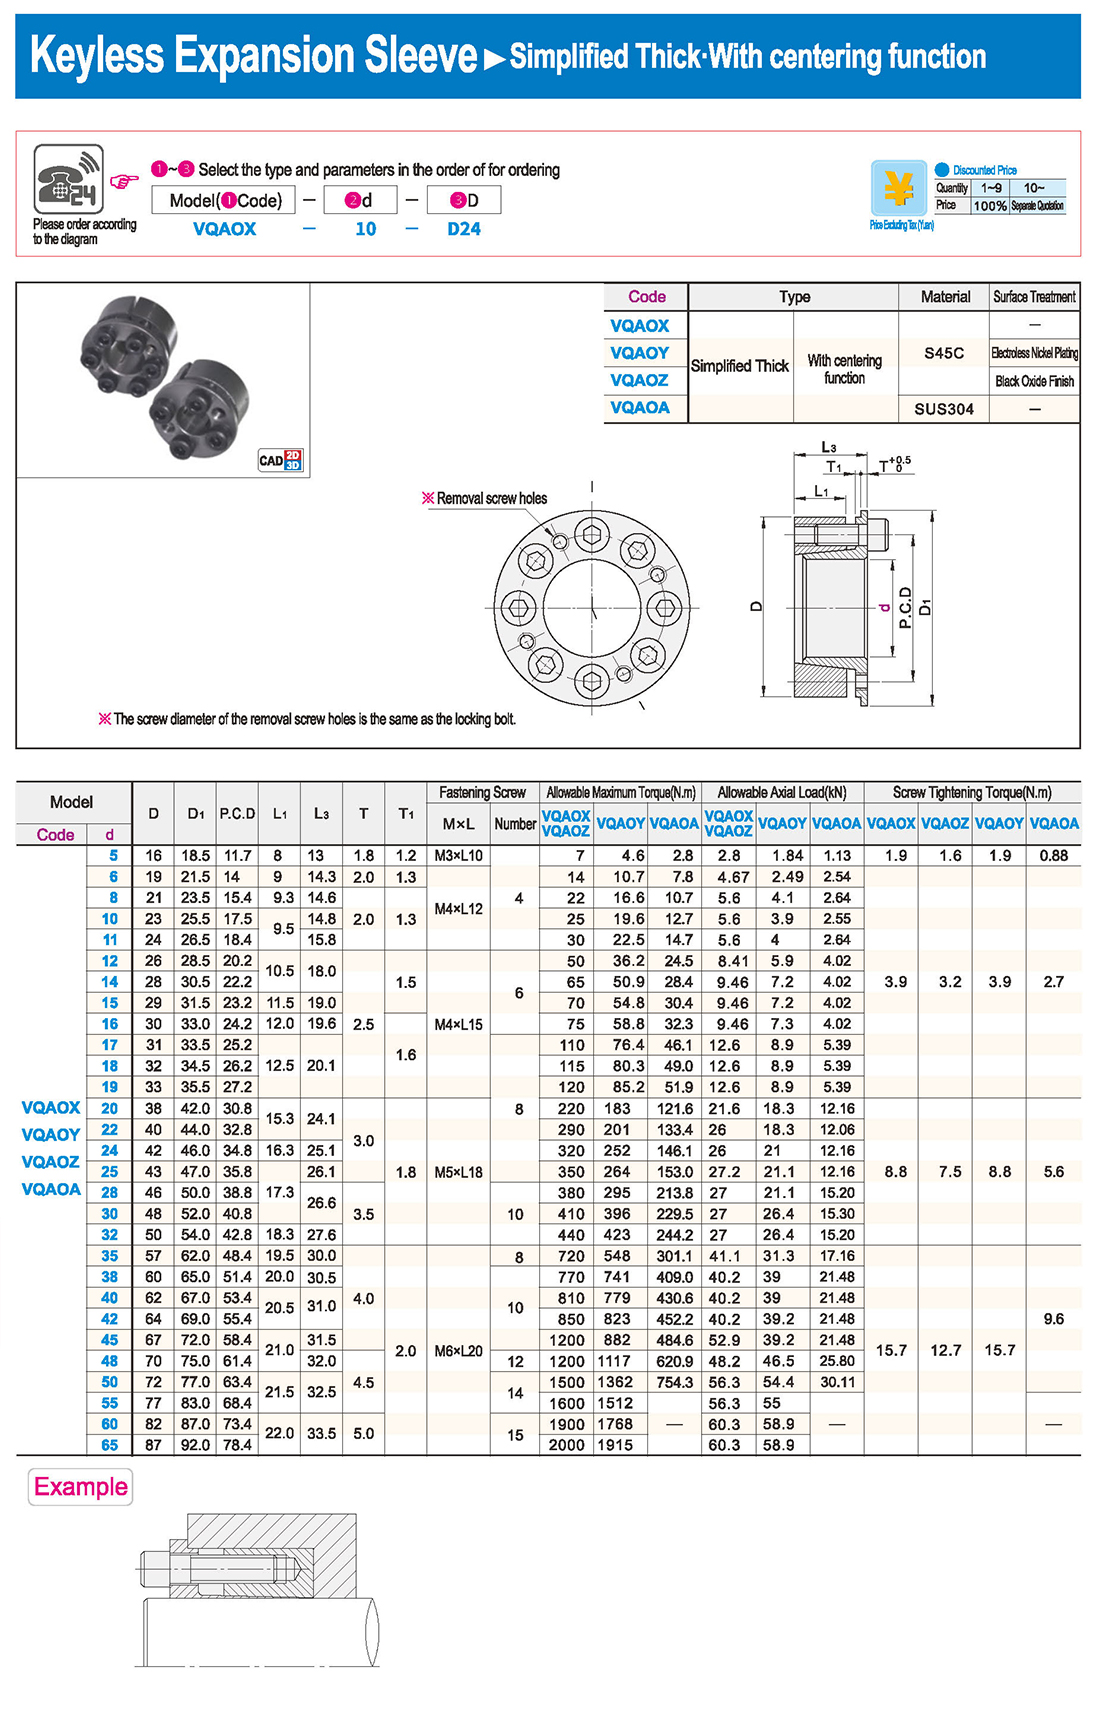
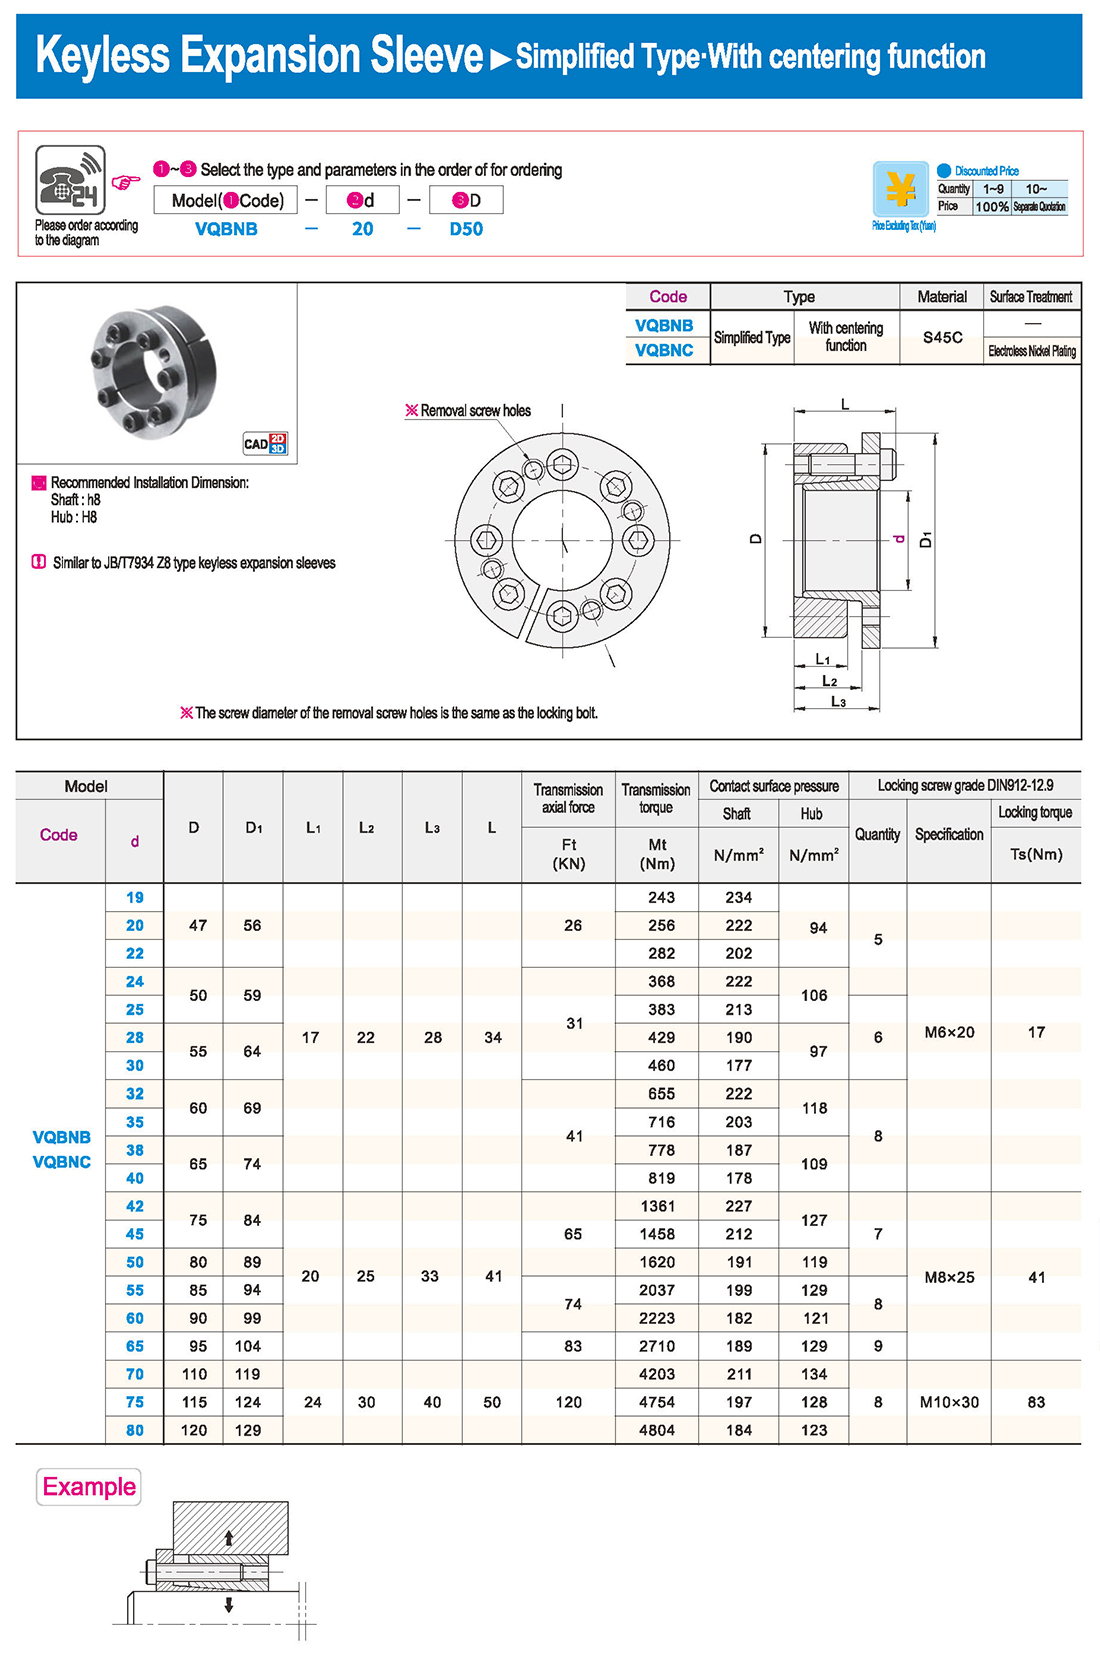
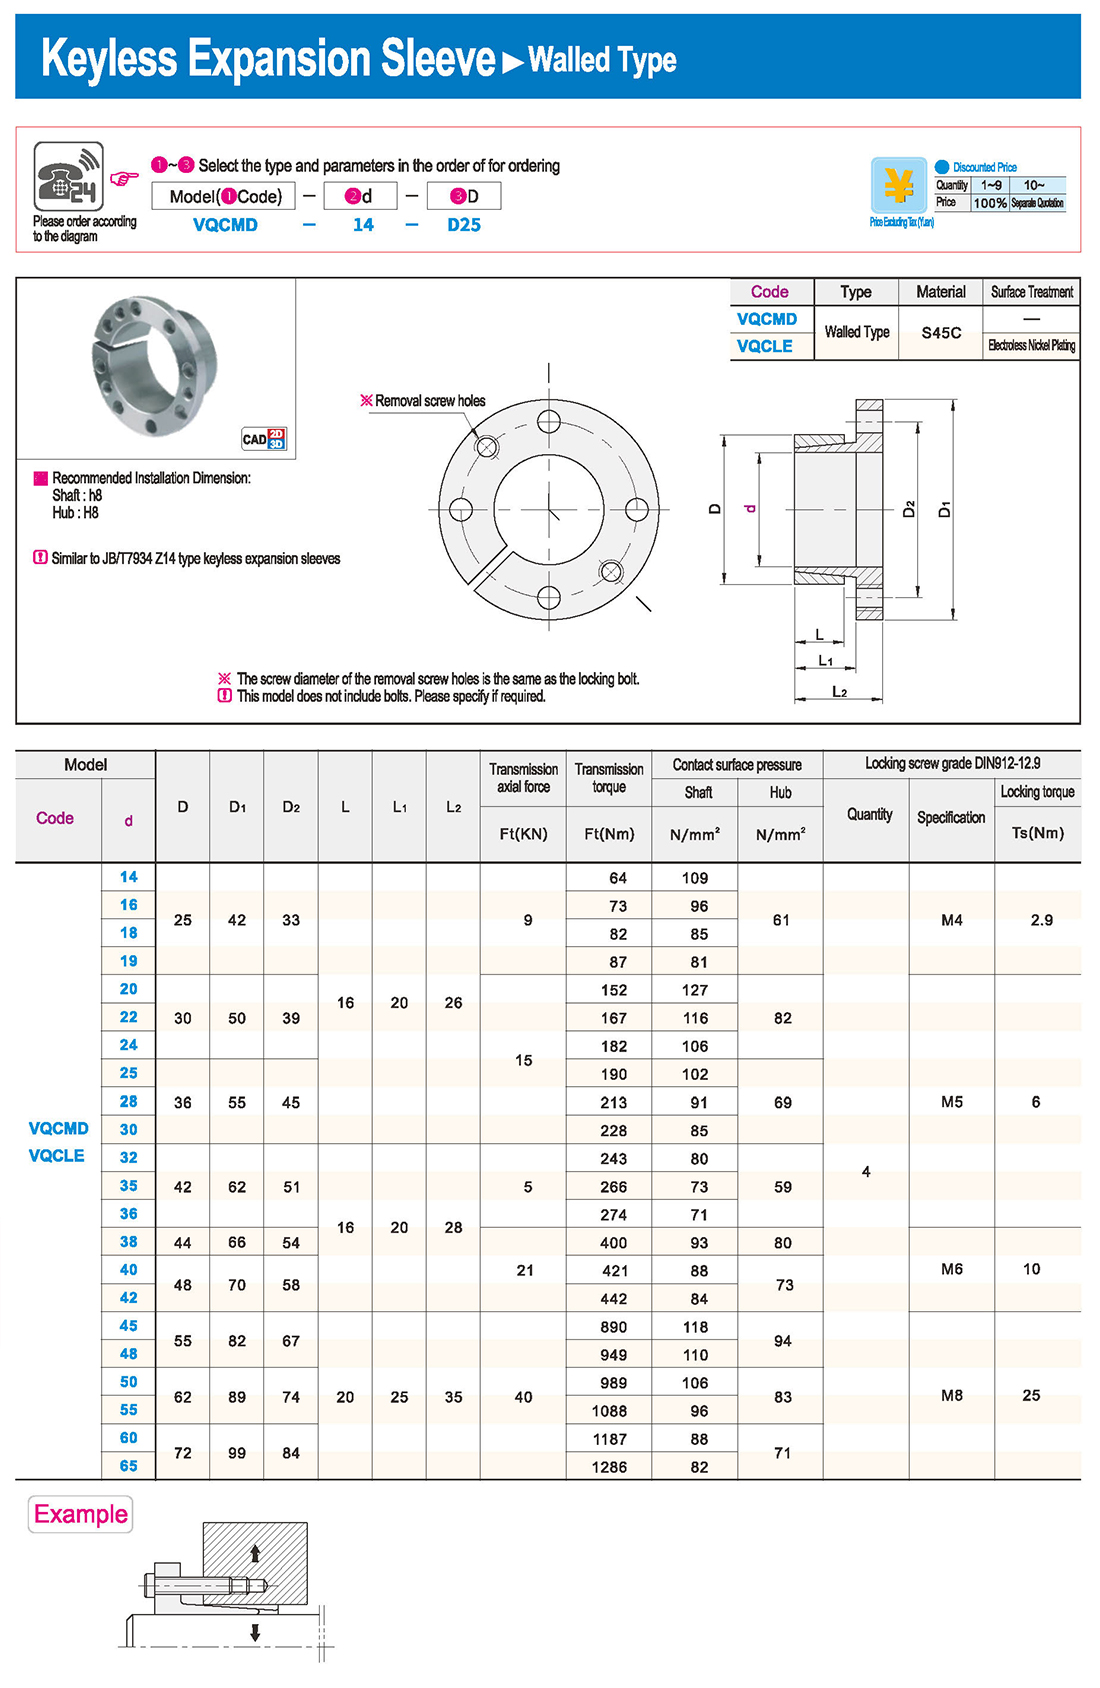
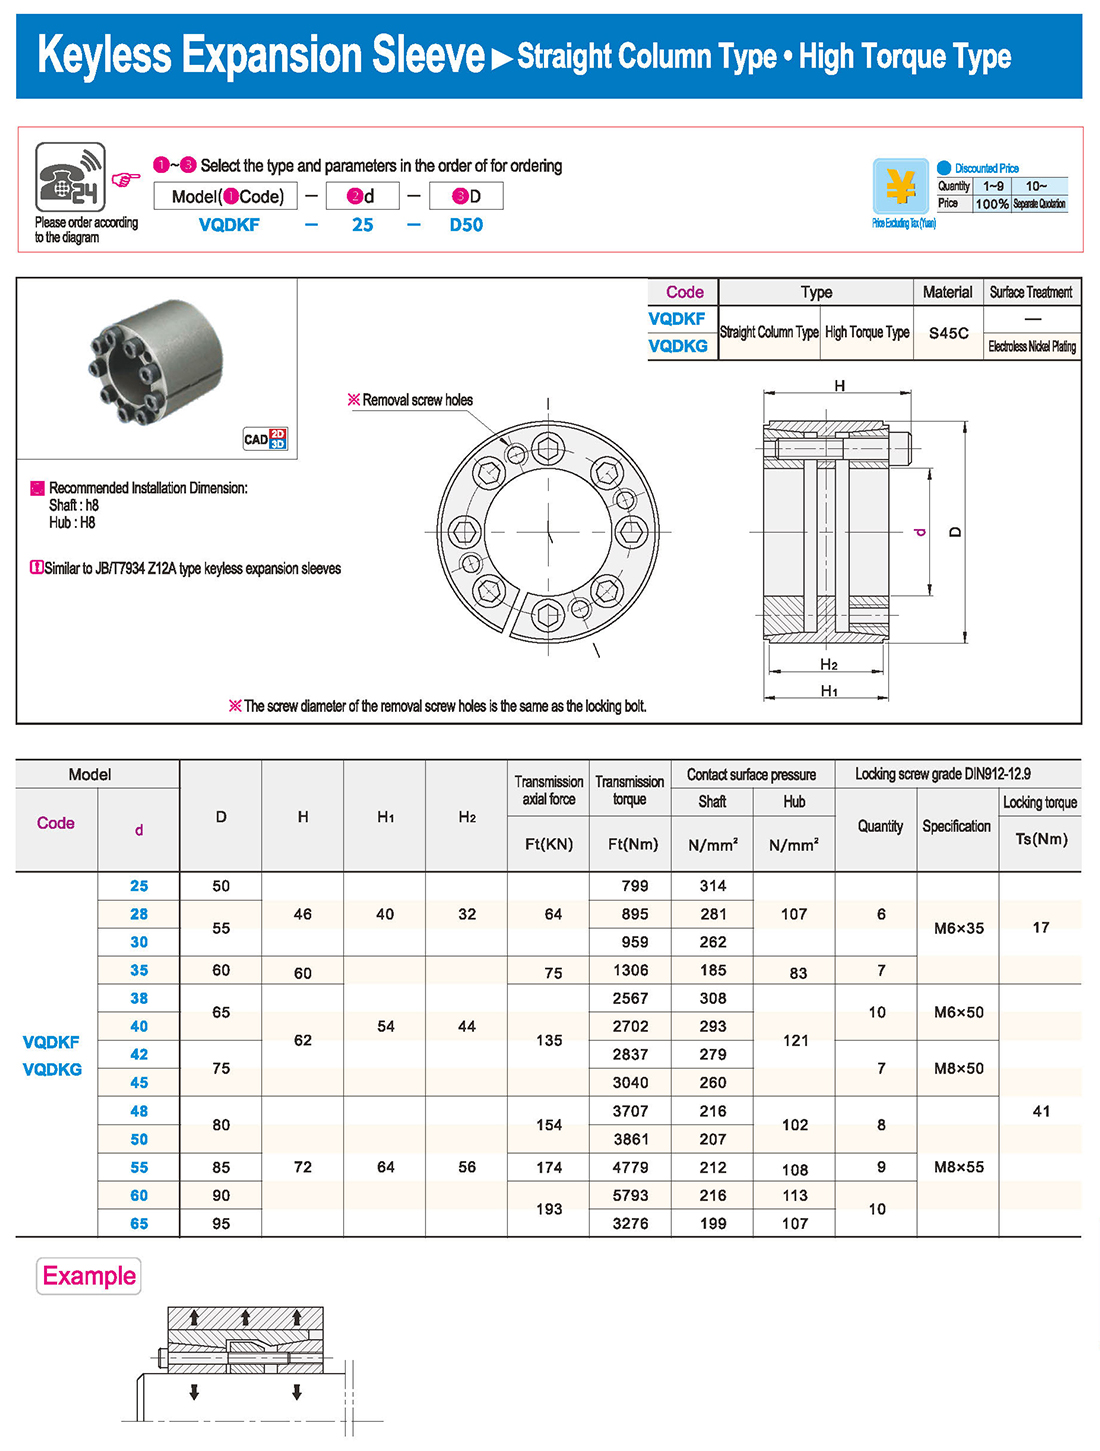
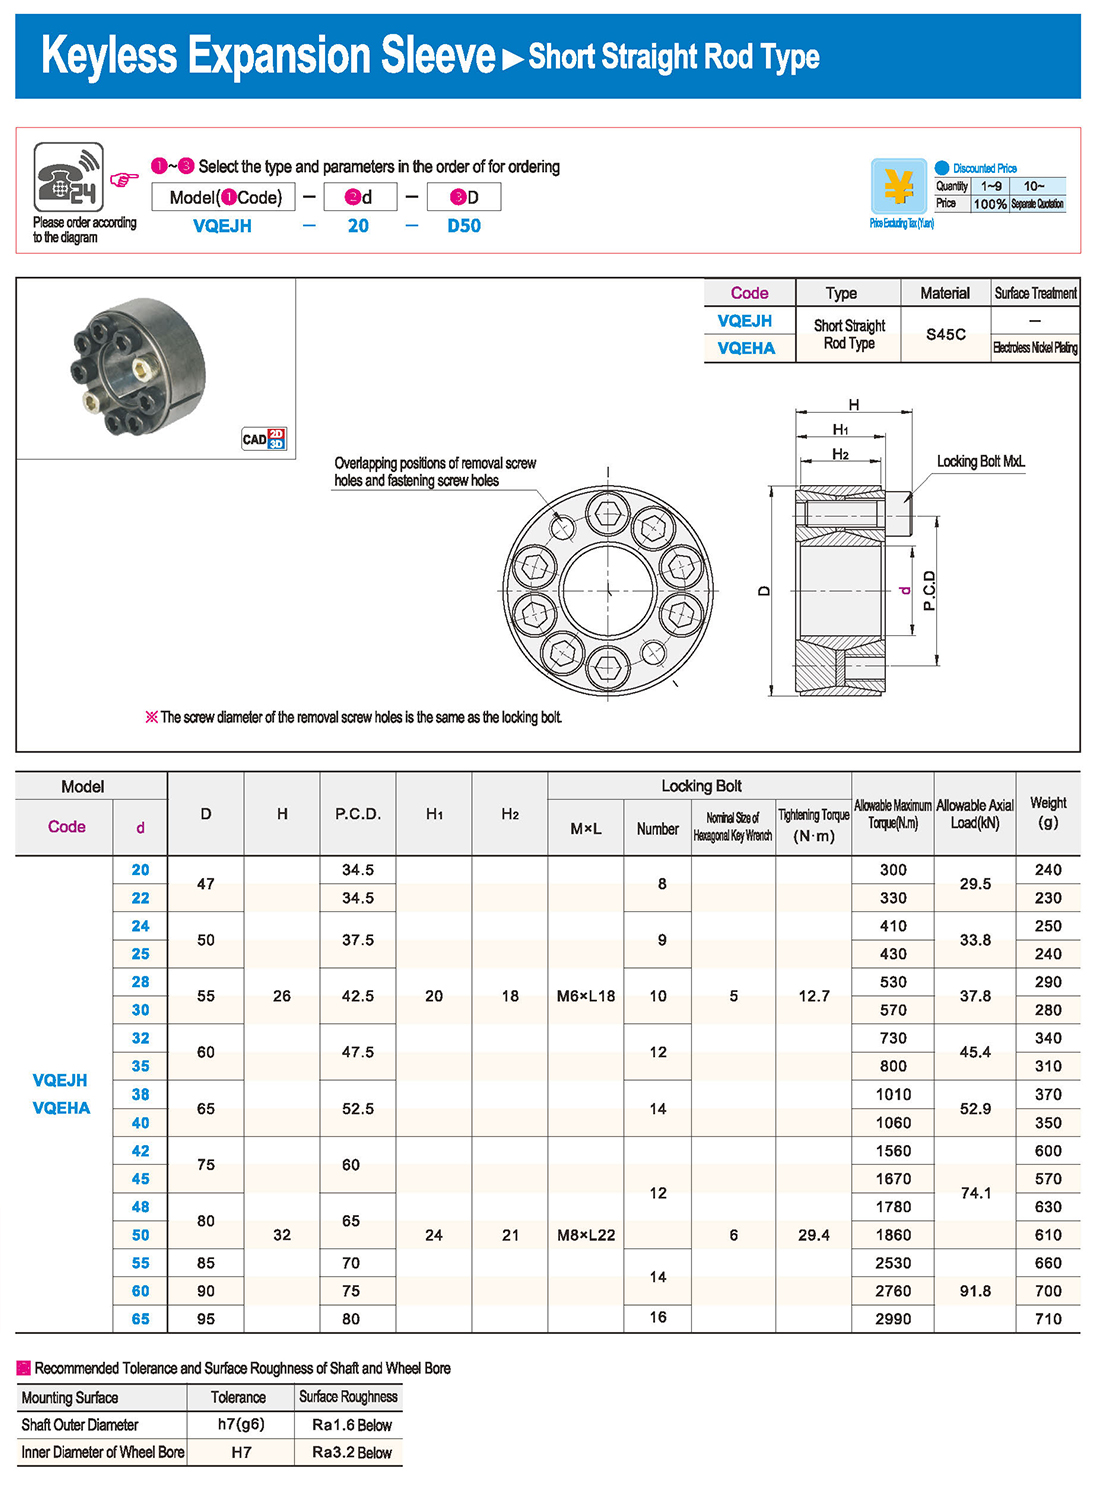
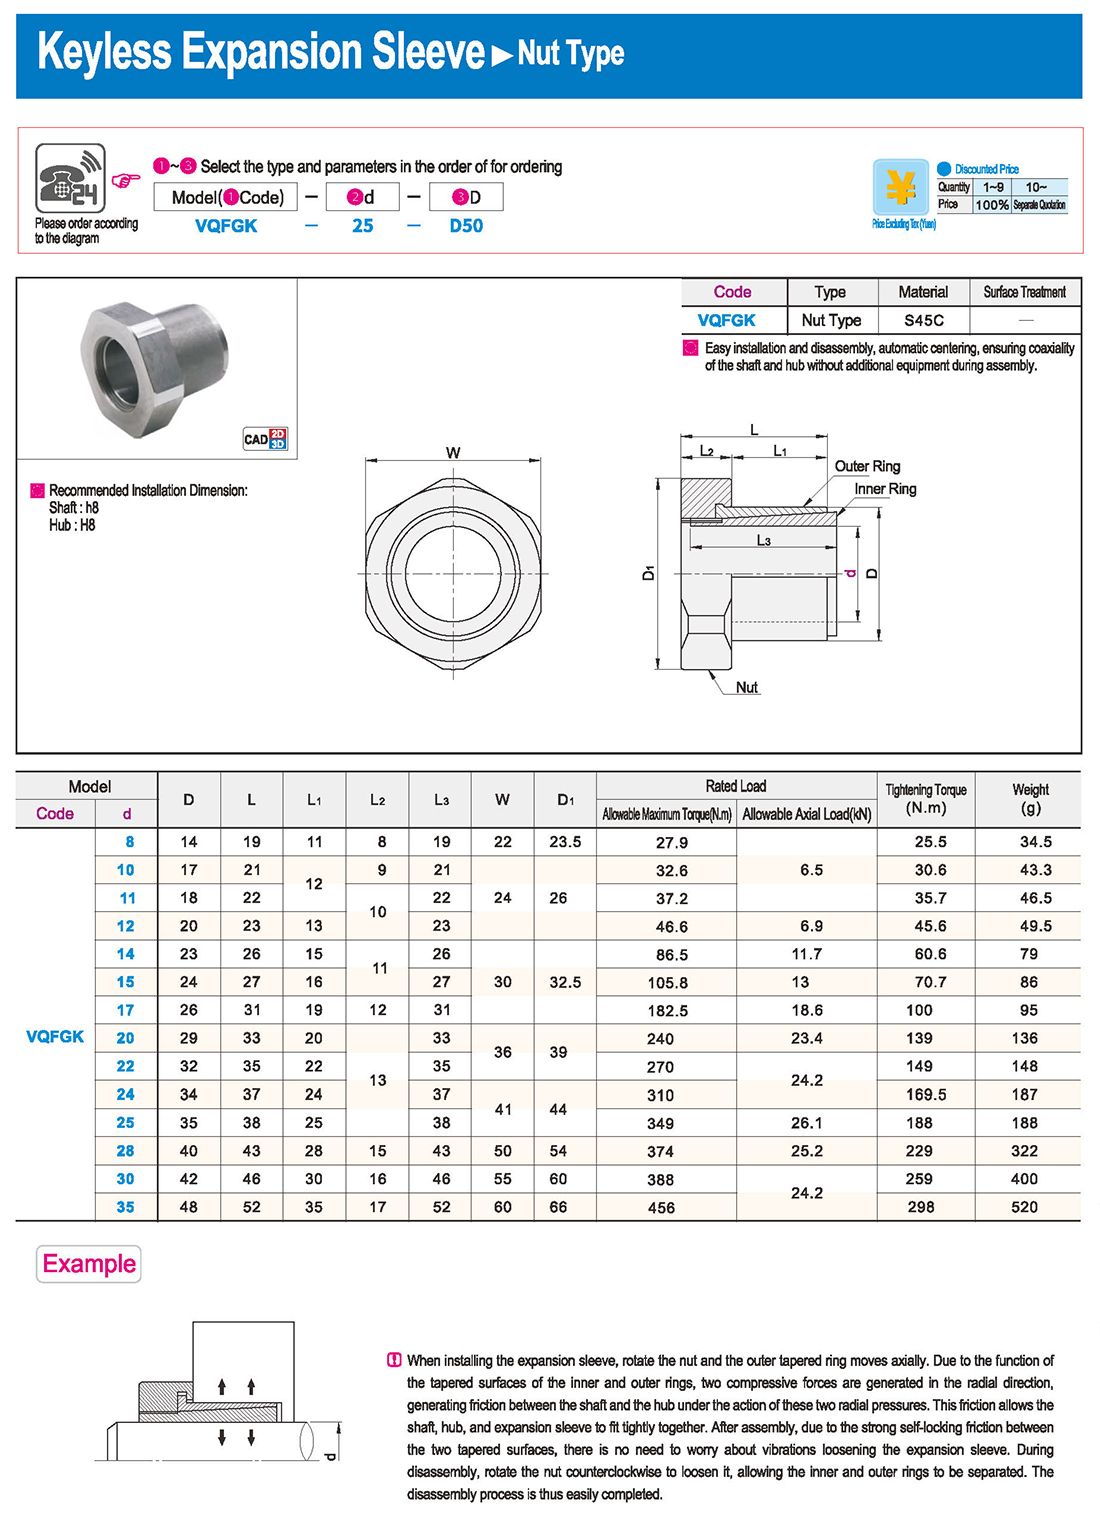
① The expansion sleeve connection involves placing a tensioning sleeve with mating inner and outer conical surfaces between the shaft and the hub. Under the pre-tightening force of high-strength bolts, the inner ring contracts and the outer ring expands, closely fitting the inner ring to the shaft and the outer ring to the hub, generating sufficient friction to transmit torque, axial force, or a combination of both.
② The expansion sleeve connection principle is simple and reliable, with convenient processing, installation, and disassembly operations that are easy to learn. It has been widely used in various machinery, proven to be a reliable and effective connection method.
Installation Steps
① Clean the protruding end of the main shaft and the inner hole of the expansion sleeve using fine gauze and cotton yarn. Check the dimensions of each part, and once confirmed, clean with gasoline or carbon tetrachloride. After cleaning, apply a thin layer of lubricating oil evenly on the surface of the main shaft, the contact surface of the expansion sleeve, the thread surface of the screw, and the support surface. (The lubricating oil must not contain molybdenum disulfide.)
② During assembly, loosen the screws and align the inner side of the expansion sleeve with the main shaft. Install it slowly and securely, ensuring to maintain a gap between the expansion sleeve and the main shaft throughout the installation process.
③ After positioning, tighten the screws manually, then use a torque wrench to tighten them uniformly in different diagonal and cross patterns.
Notes:
① During installation, lubricating oil should be applied evenly to the surface of the main shaft, the contact surface of the expansion sleeve, the thread surface of the screw, and the support surface. Failure to do so will prevent secure tightening and may result in idling of the main shaft.
② Tightening the screws before insertion will cause deformation of the bushing.
③ After inserting the bushing into the shaft, tighten the screws evenly and securely in different diagonal and cross patterns.
Disassembly Steps:
① Disassembly should be performed while the moving parts are in a stationary state.
② Loosen the tightening screws evenly and securely in different diagonal and cross patterns.


 Английский язык
 Русский язык
 На испанском языке
 На итальянском языке
 Арабский язык
 Корейская народно-демократическая республика
 Немецкий язык
 На японском языке
 На вьетнамском языке
 На турецком языке
 1. Введение
 Таблица технических характеристик
 скачать


